Introduction
© 2021-2026 College E-Learning is an online platform that is web and android based application.
The platform is user friendly, effective, efficient, and it enables the college to support its students to register online, enroll for subjects, receive both reading and assignment materials, and sit for exams online.
E-Learning Web Portal
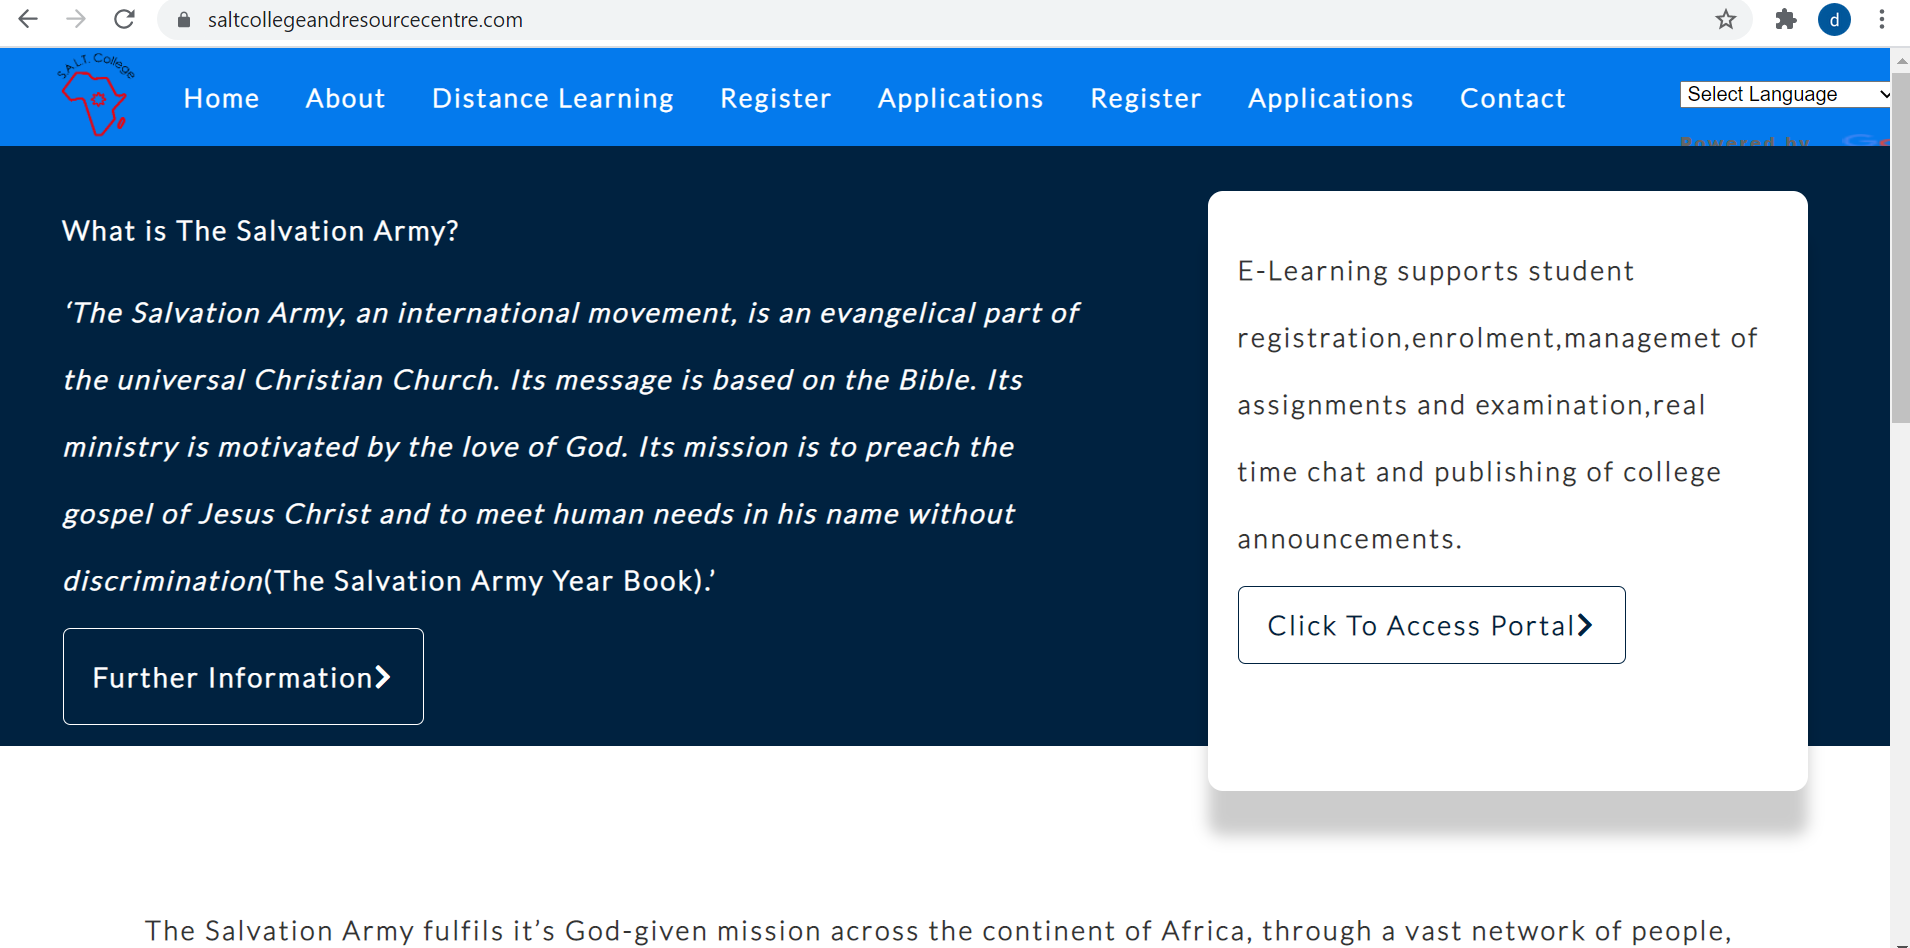
Landing Page for College E-Learning:
- Go to any web browser, copy and paste the URL above.
- Locate the Click To Access Portal button on the website.
The landing page provides information about The Salvation Army and an overview of the E-Learning system features including: student registration, enrollment, management of assignments and examinations, real-time chat, and publishing of college announcements.
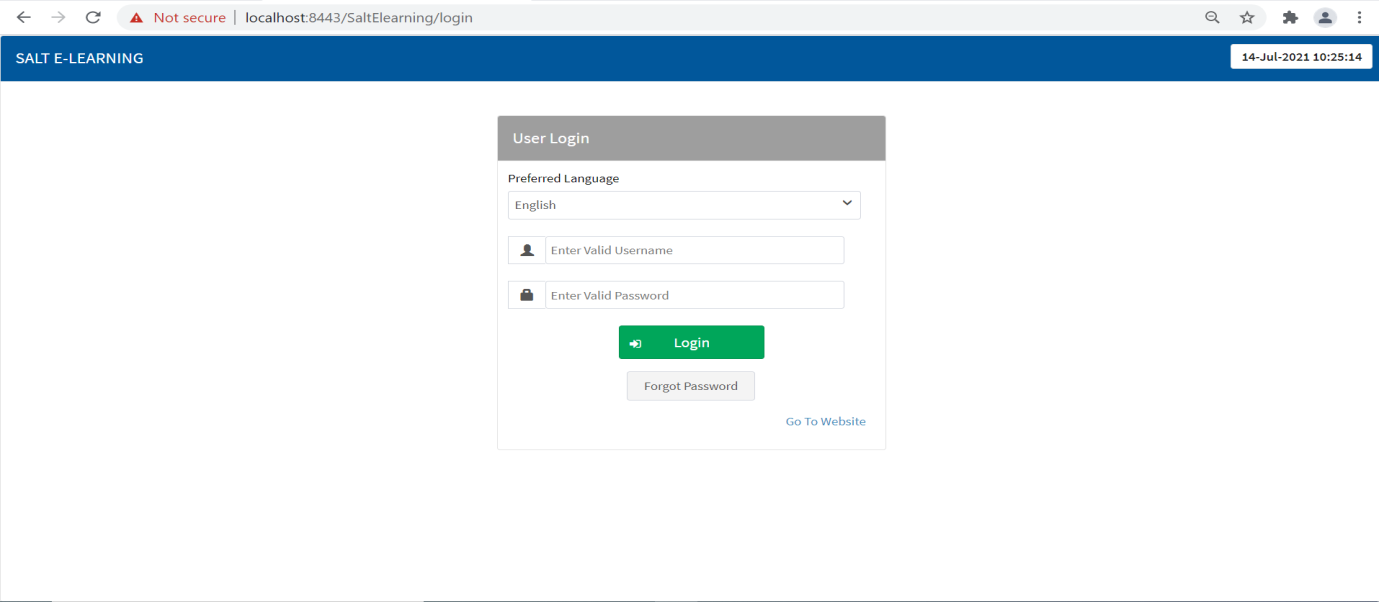
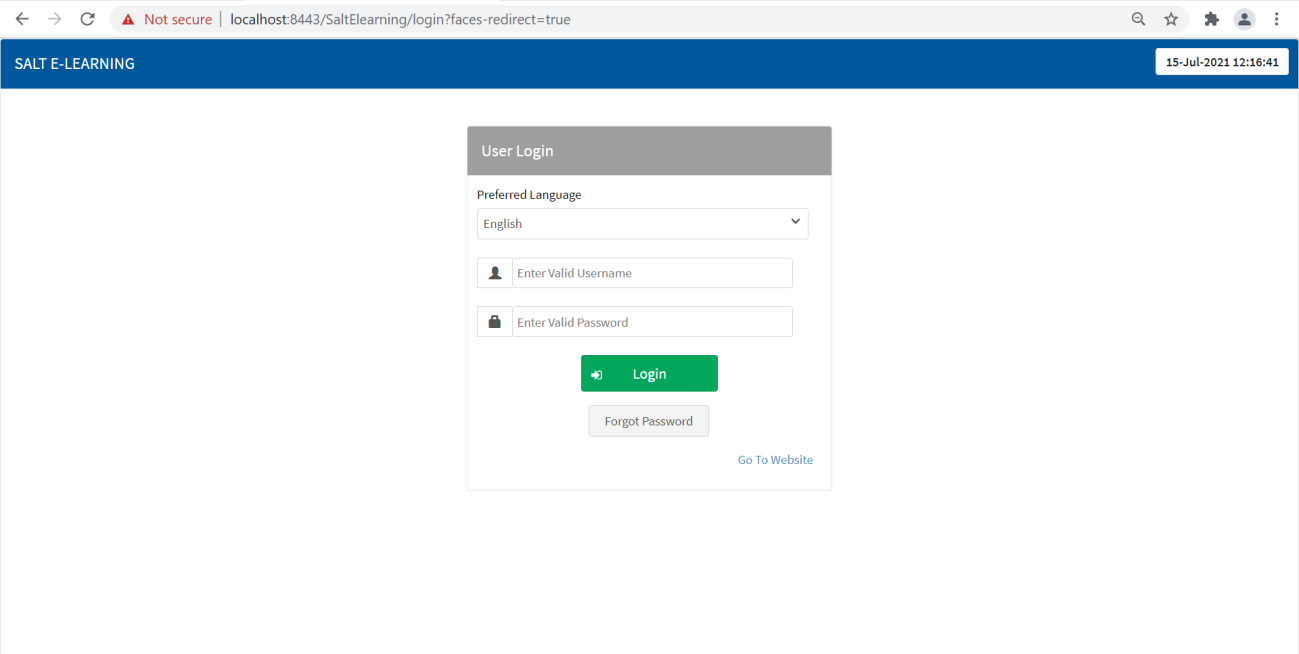
First Attempt Login
- Select your Preferred Language.
- Enter a Valid Username.
- Enter the default password sent via email, then click the Login button.
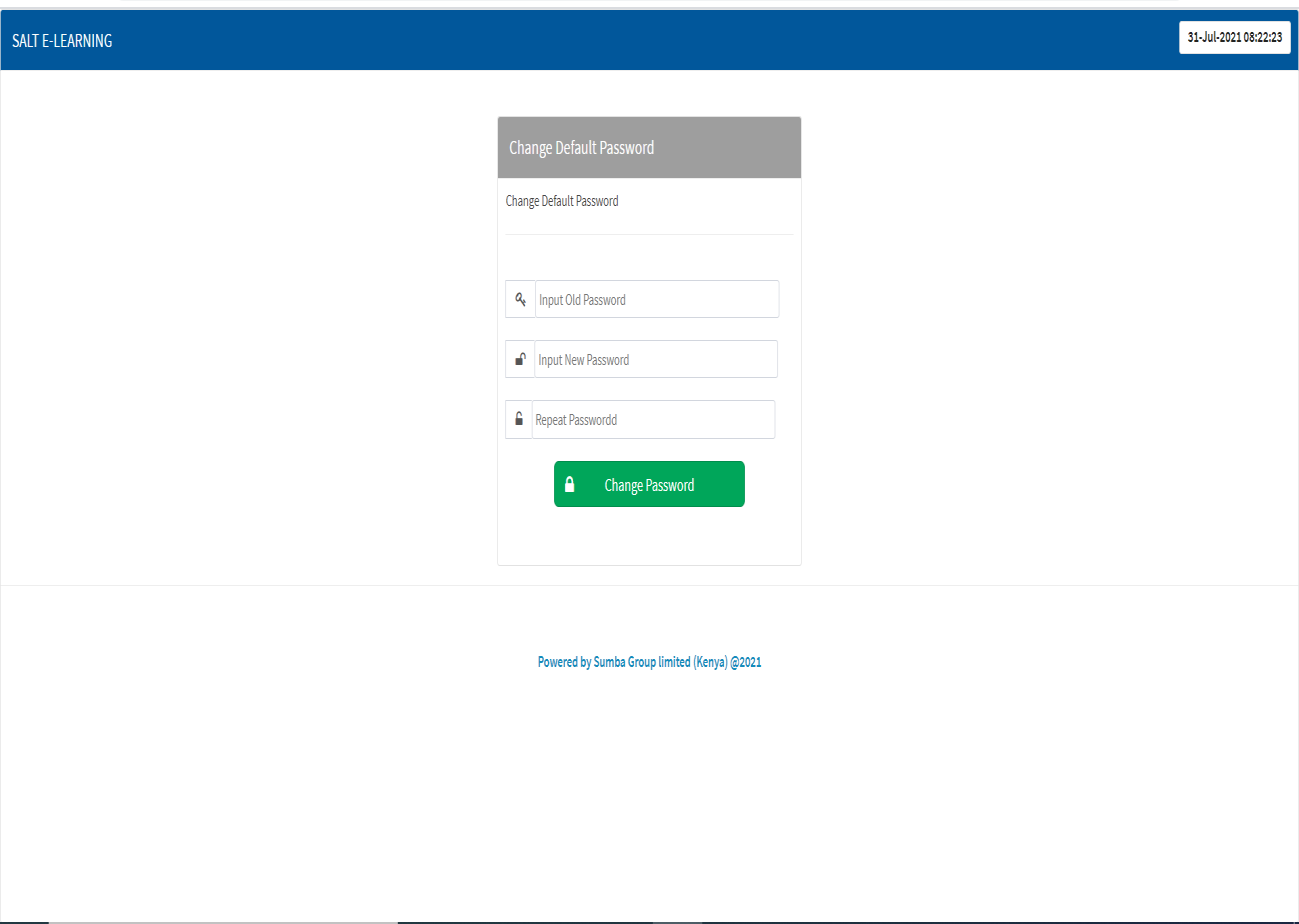
Change Default Password
- You will be redirected to the Change Default Password page.
- Enter your old password (the default password).
- Create a new password.
- Repeat the new password.
- Click Change Password button.
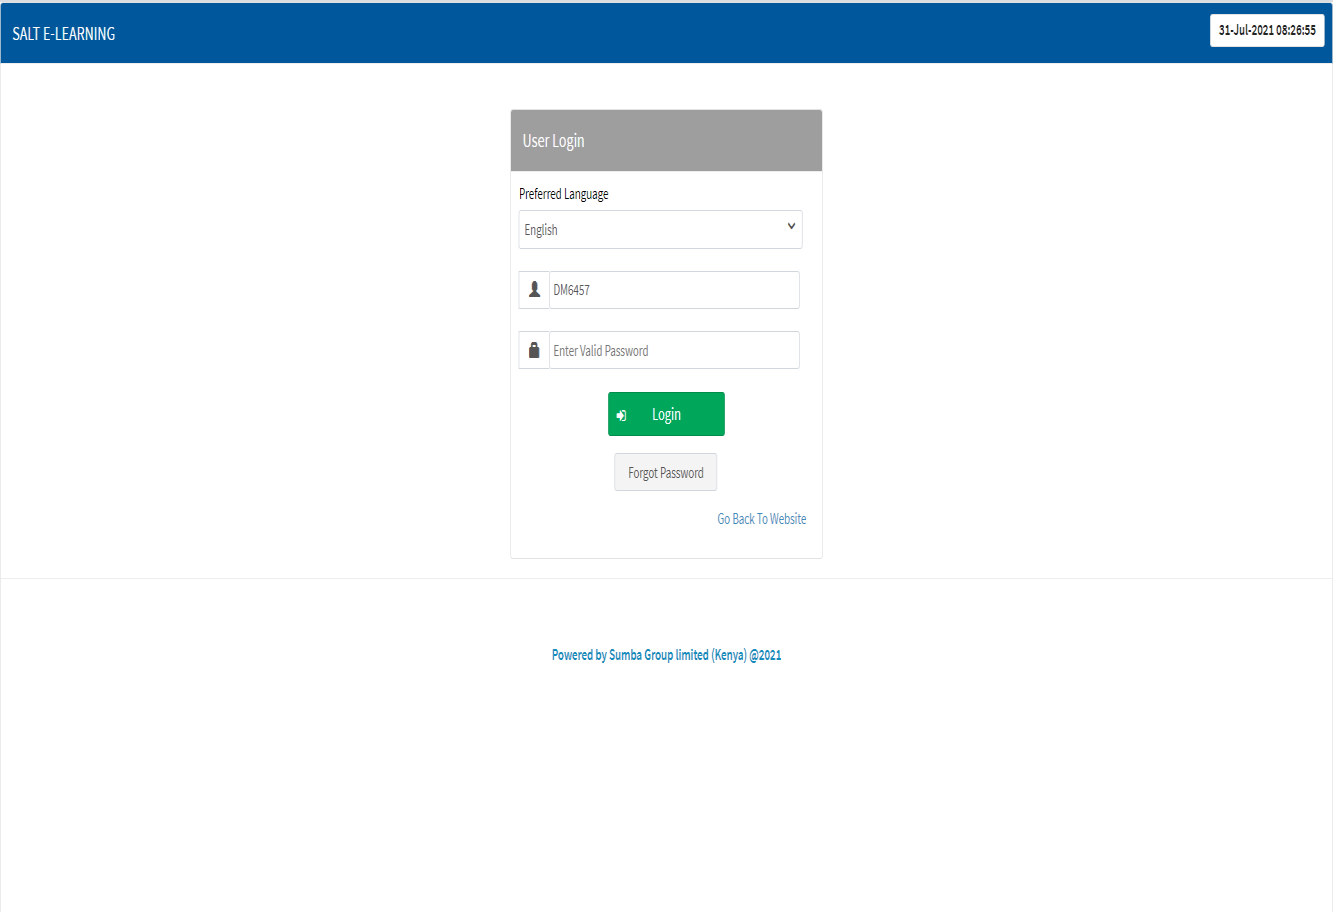
After Successful Password Change
Once the password has been successfully changed, enter the new password and click Login to access the system home page.
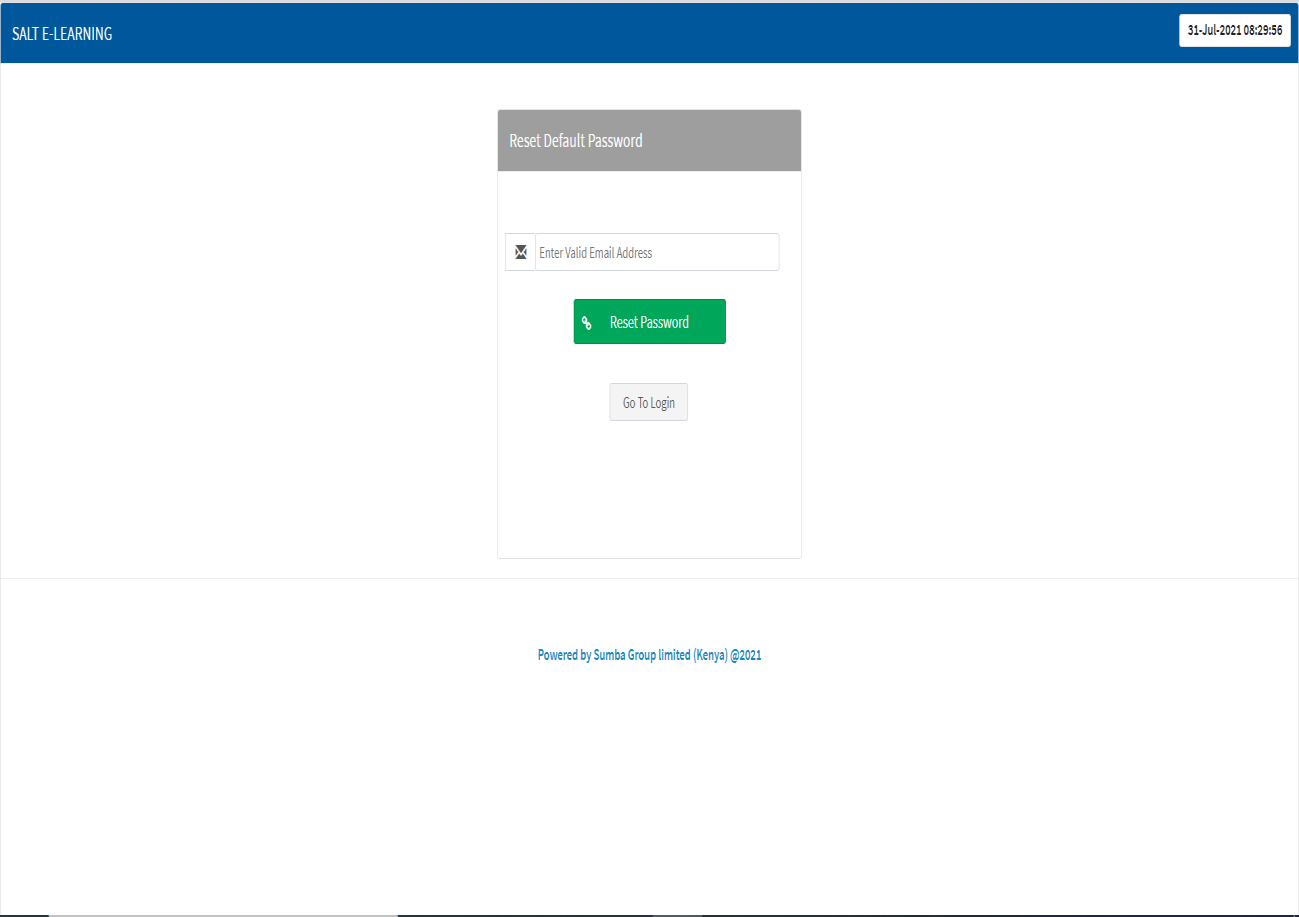
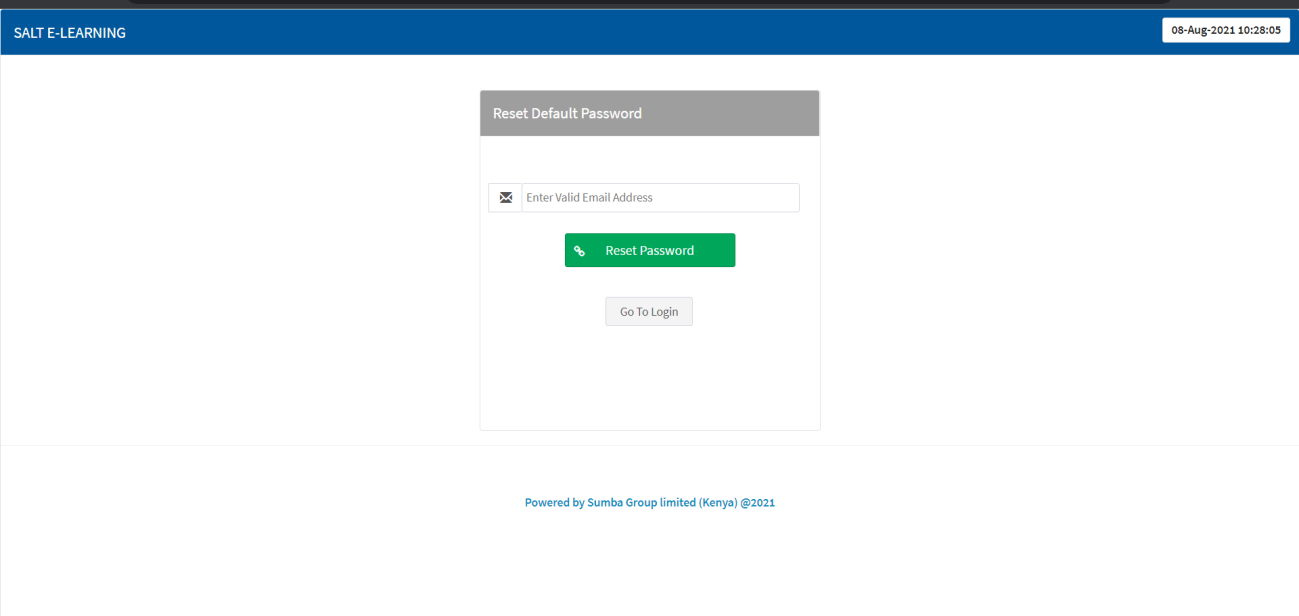
Reset Password
- Click on the Forgot Password button.
- Enter a valid email address.
- The system will generate a new password and send it via email.
- Check your email for the new generated password.
Session Time Out
Admin Functionalities
Admin Login
- Enter a valid username and password, then click the Login button.
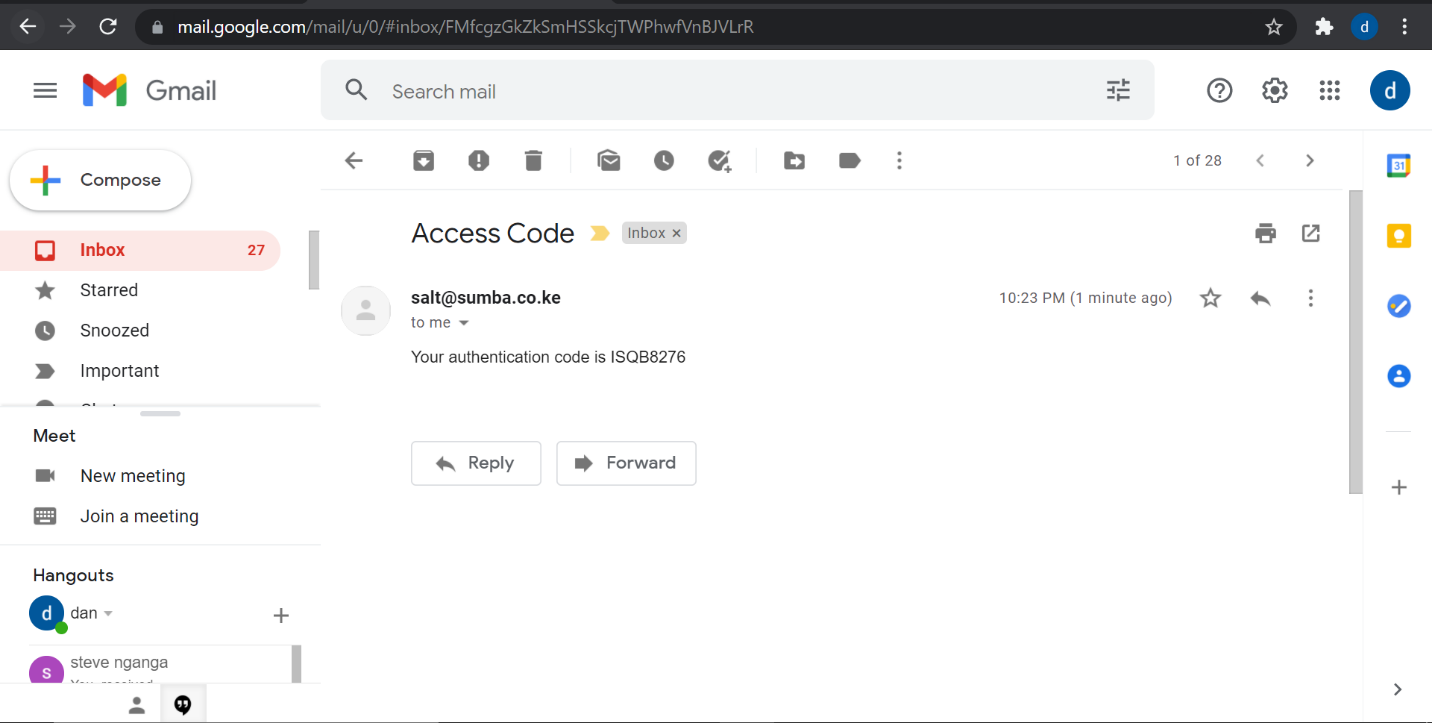
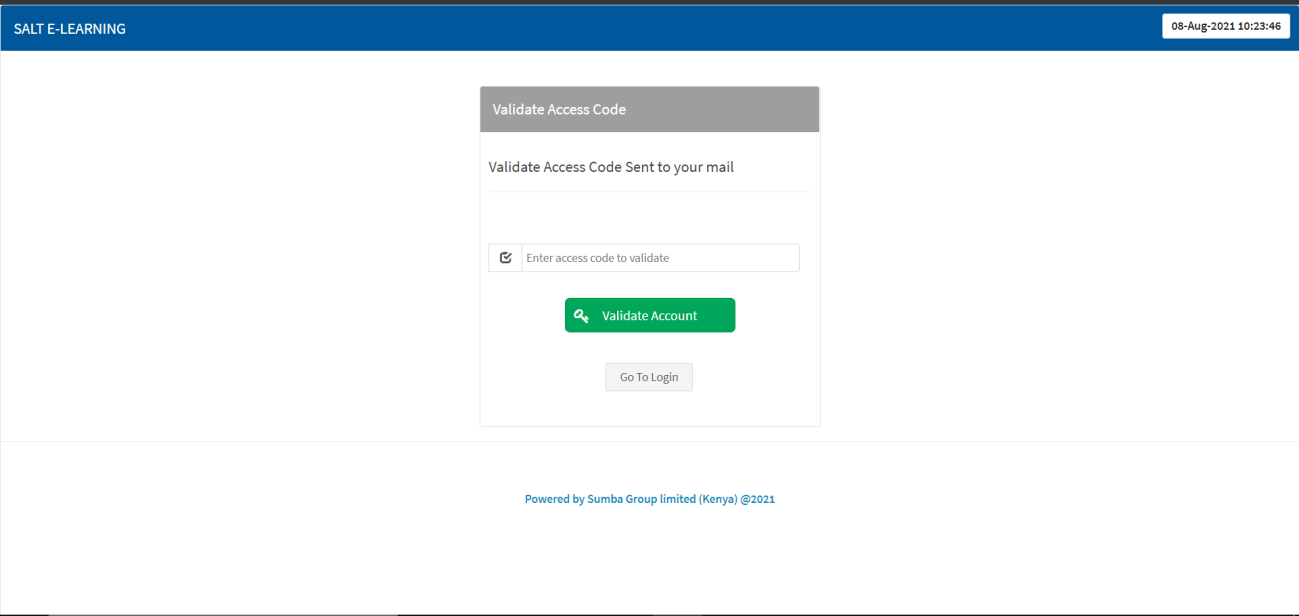
- Check your email address for the Access Code sent to your inbox.
- Retrieve the validation code from your email.
- Enter the code to authenticate your account, then click Validate Account.

Admin Reset Password
- Enter the email address used to create your account.
- Click the Reset Password button.
- Check your email inbox for the new password.
Admin Two Factor Authentication
- Check your email for the two-factor authentication code.
- Copy and paste the access code (auth code).
- Click Validate Account.
System Settings
Hover on System Settings in the navigation menu to show the sub-menu items:
| Menu Item | Description |
|---|---|
| Countries | Manage country records |
| Territories | Manage territory records linked to countries |
| Subjects | Manage academic subjects |
| System Settings | Configure system-wide parameters |
| Event Logs | View system event audit trail |
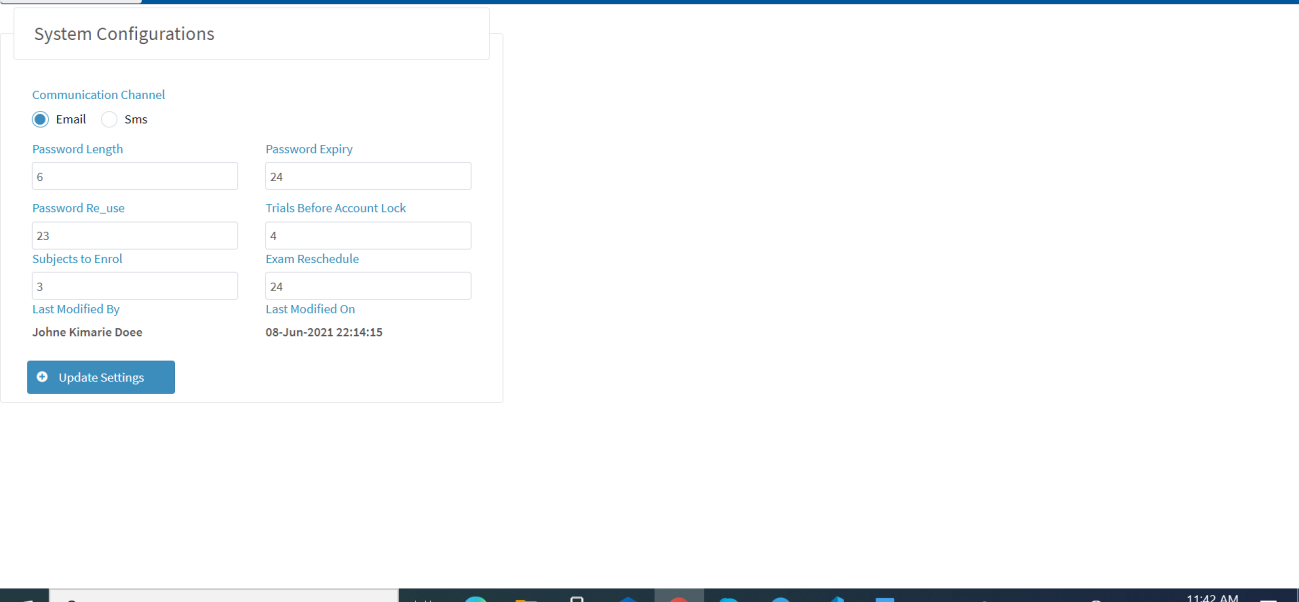
System Configuration
- Navigate to System Settings.
- Click on System Settings.
- Select preferred Communication Channel: either Email or SMS.
- Set preferred Password Length.
- Set preferred Password Expiry.
- Set Password Trials Limit before account lock.
- Set Session Time Out duration.
- Set Password Re-use policy.
- Set Exam Reschedule settings.
- Set the number of Subjects to Enrol (the number of subjects a student should select for enrolment at any given time).
- Click Update Settings to save settings.
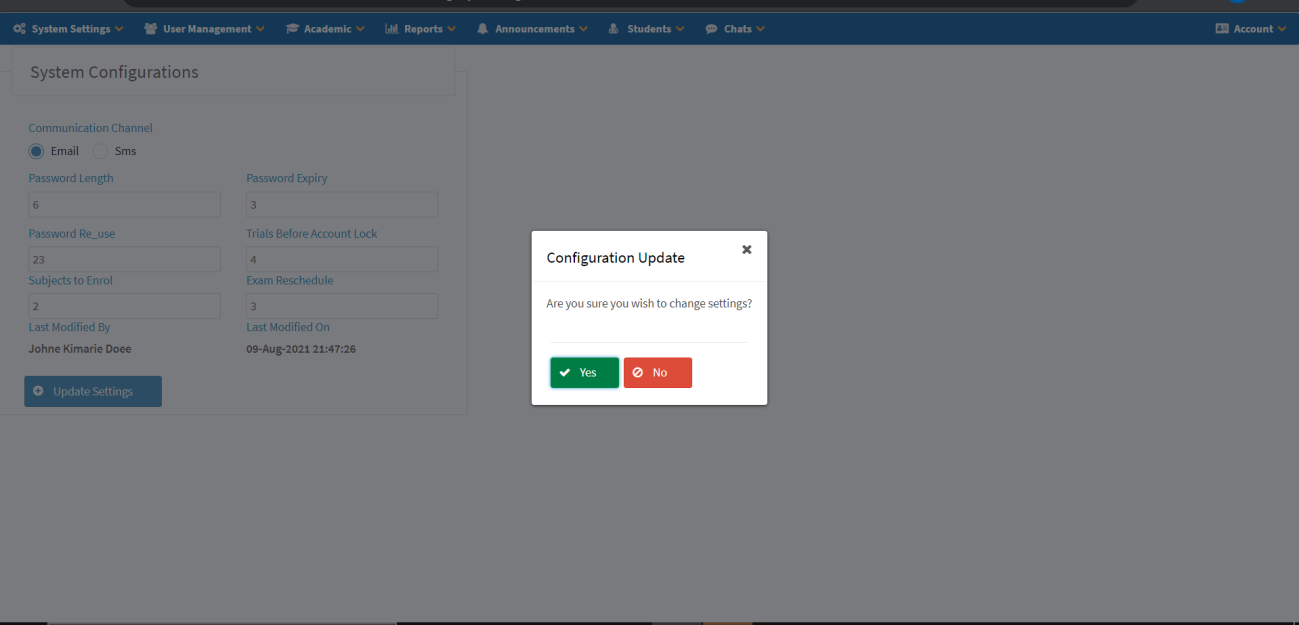
Change Settings
Enter new settings, press Update Settings, and then click Yes to confirm and save changes.
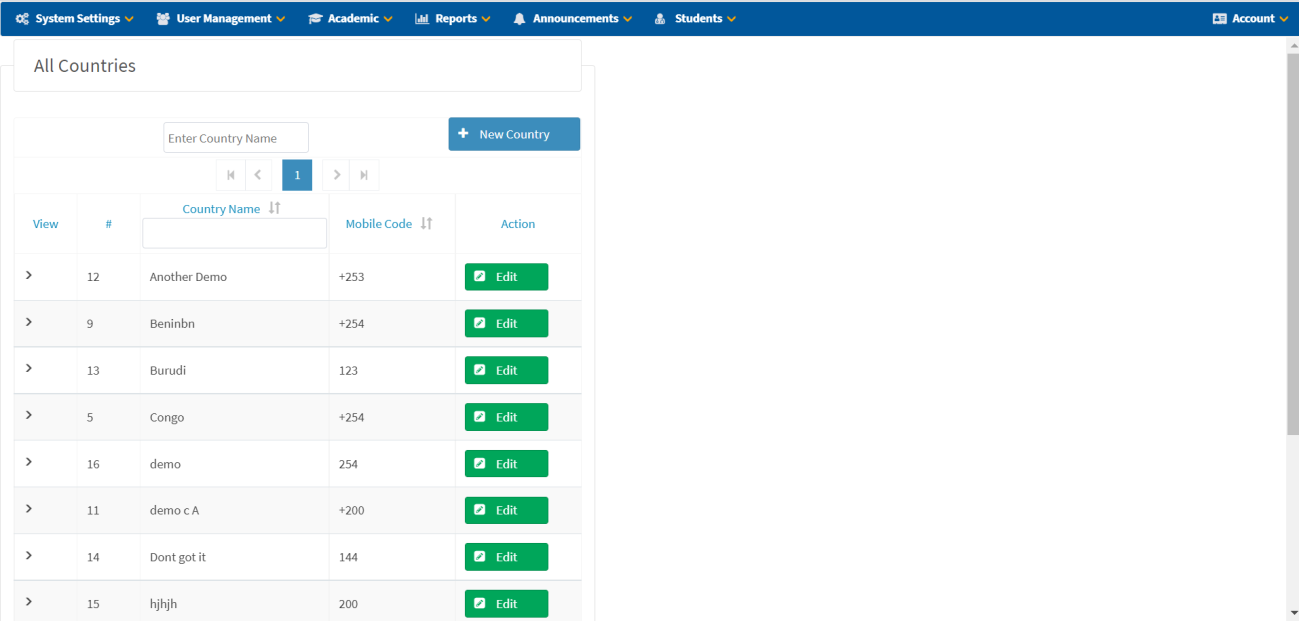
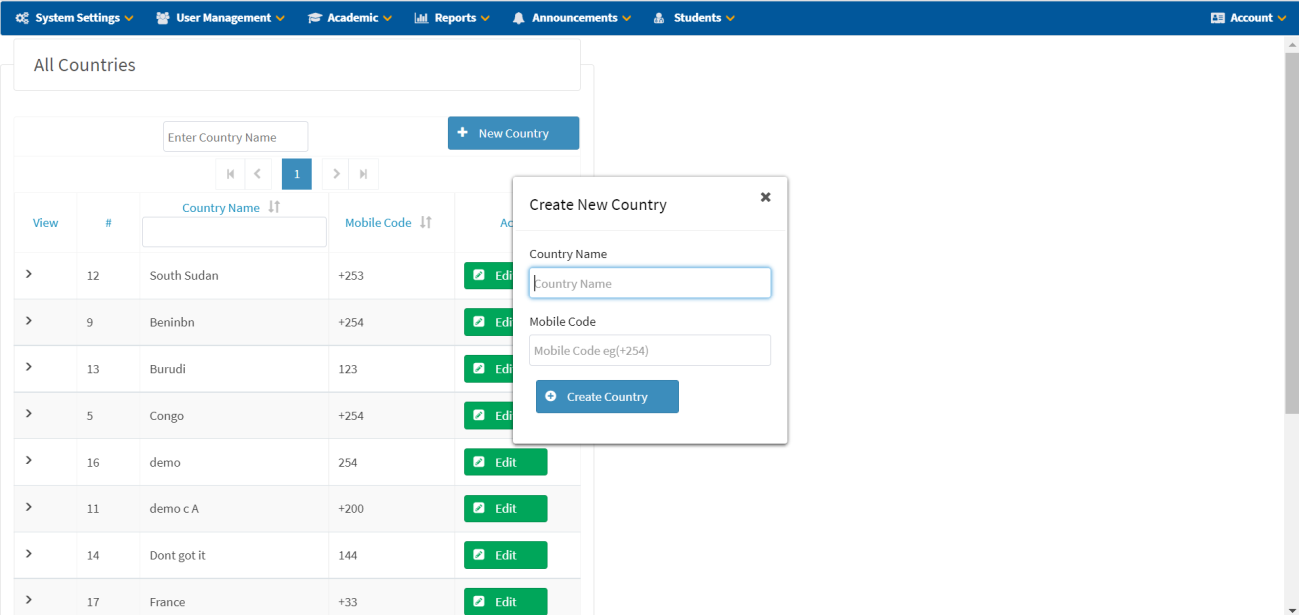
Countries
Create New Country
- Navigate to System Settings → Countries.
- Click + New Country.
- Enter Country Name.
- Enter Country Telephone Code (Mobile Code).
- Click Create Country to save details.
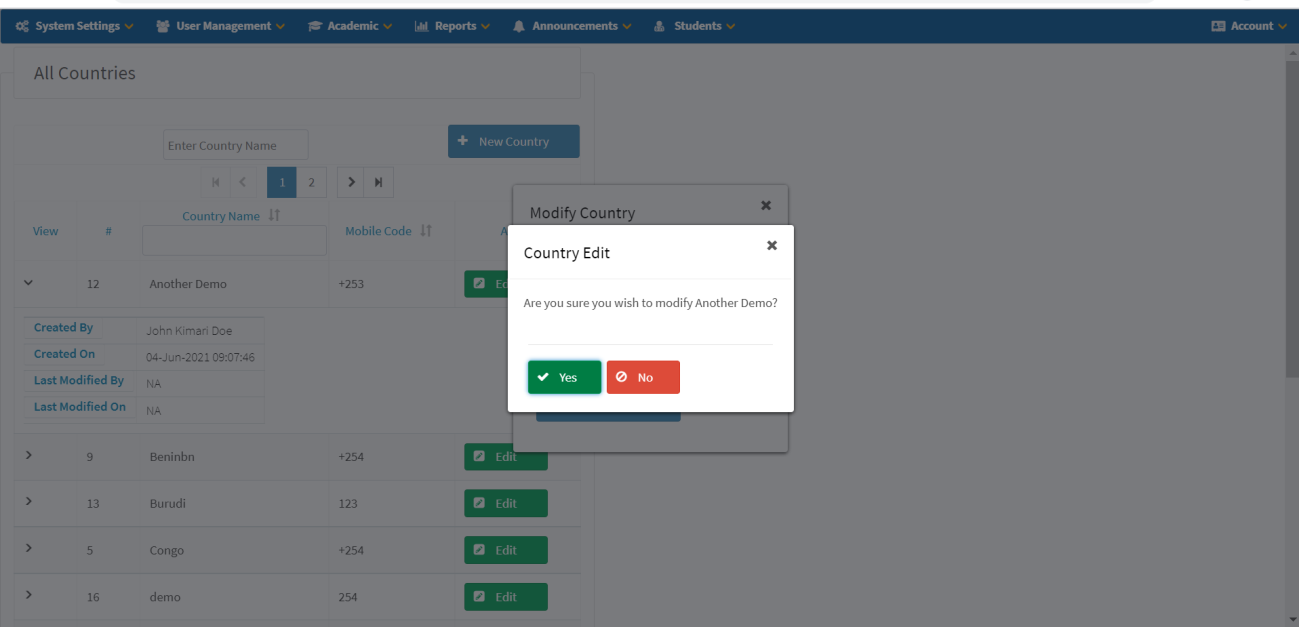
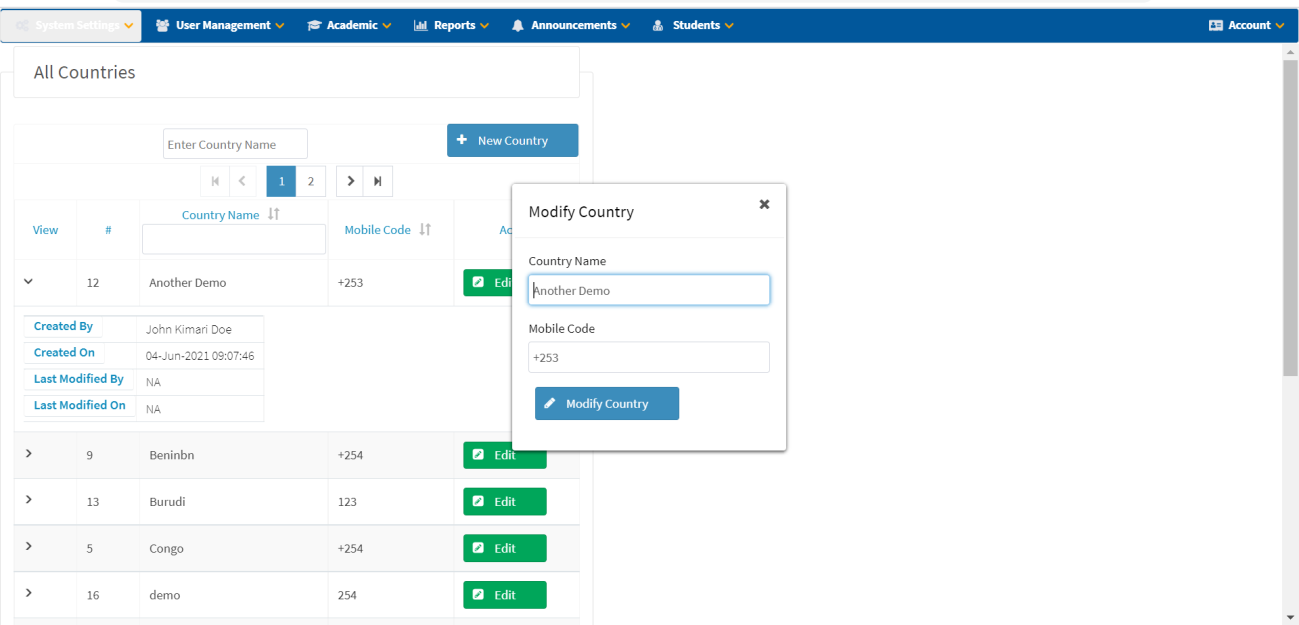
Edit Country Details
- Click the Edit button next to the country you want to modify.
- Update the details in the Modify Country dialog.
- Click Modify Country.
- Confirm the details and click Yes to save changes.
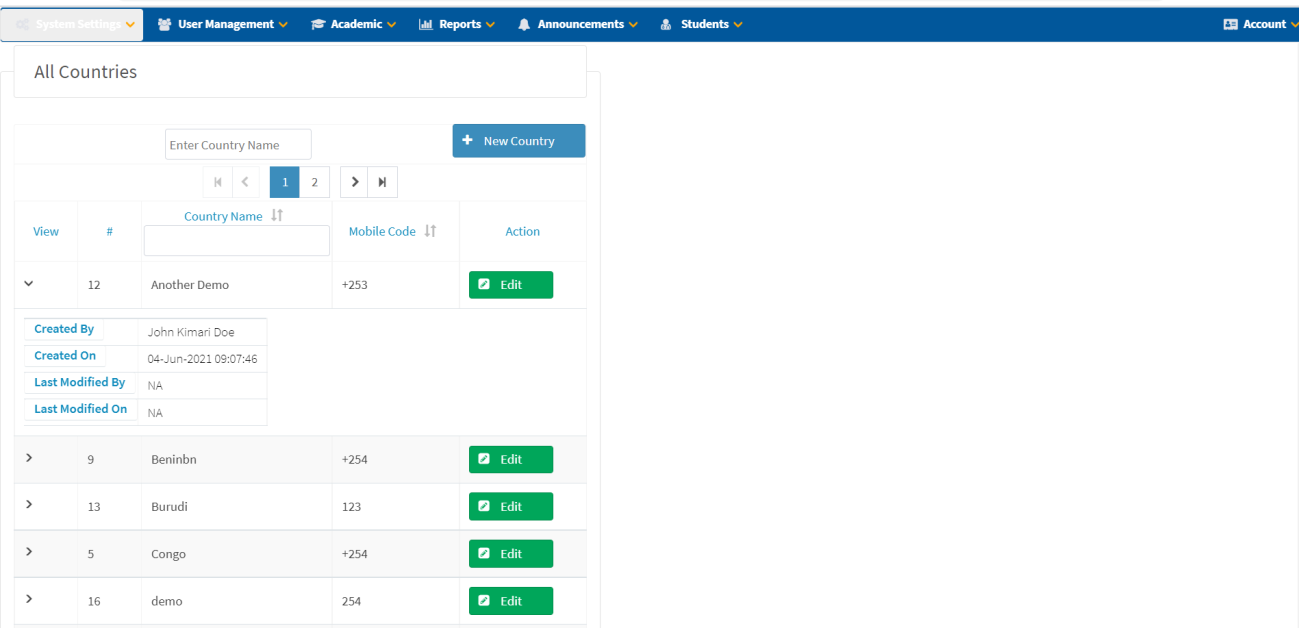
View Country Details
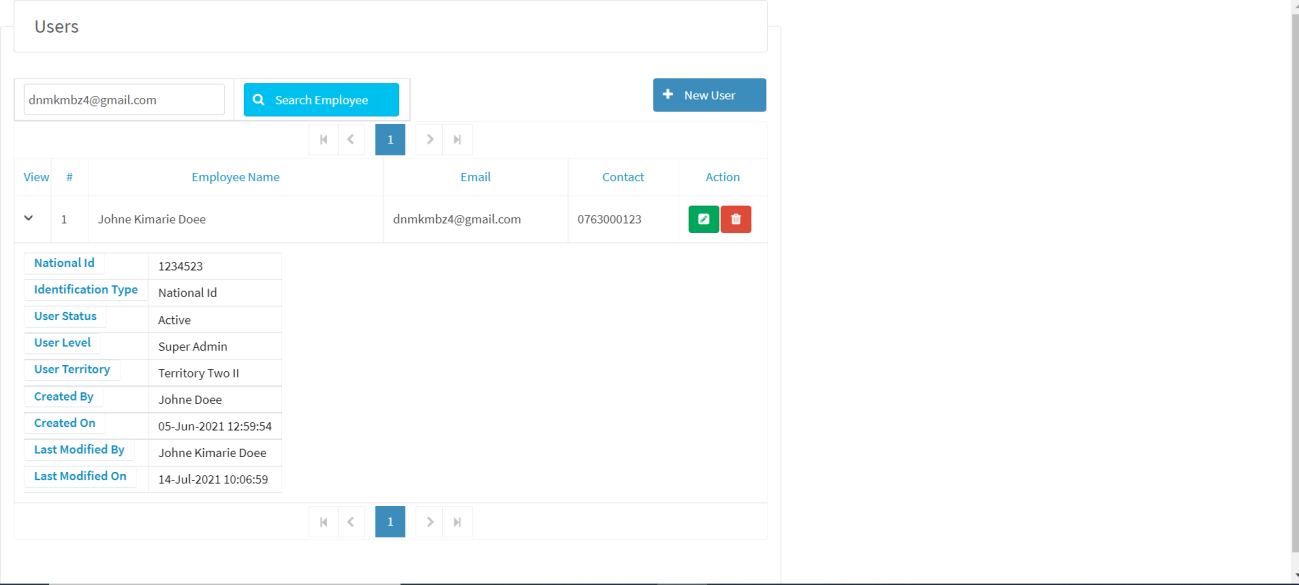
Click on the View icon (arrow) to expand and show the details of a country, including Created By, Created On, Last Modified By, and Last Modified On.
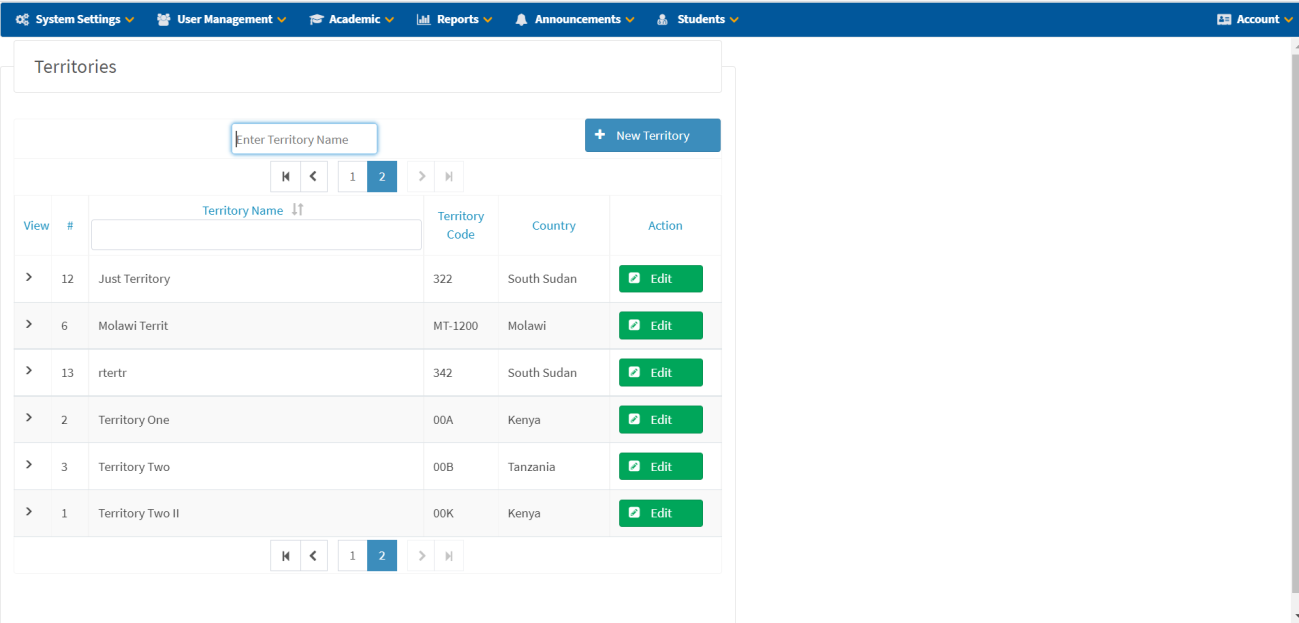
Territories
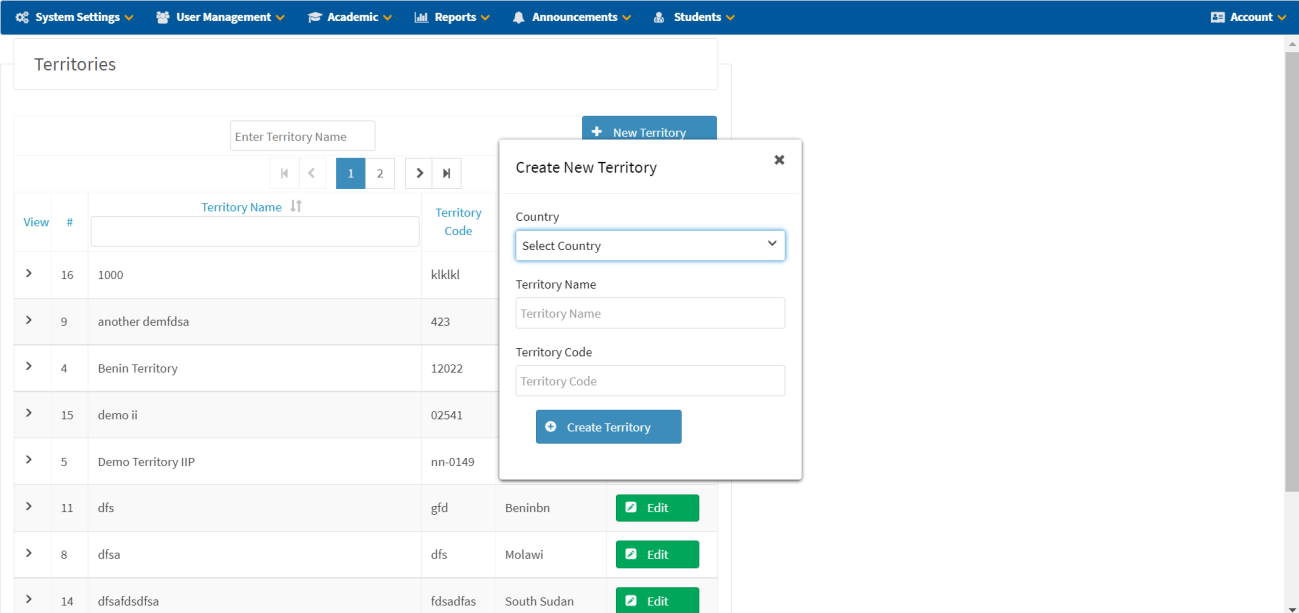
Create New Territory
- Navigate to System Settings → Territories.
- Click + New Territory.
- Select a Country from the list.
- Enter Territory Name.
- Enter Territory Code.
- Click Create Territory to save details.
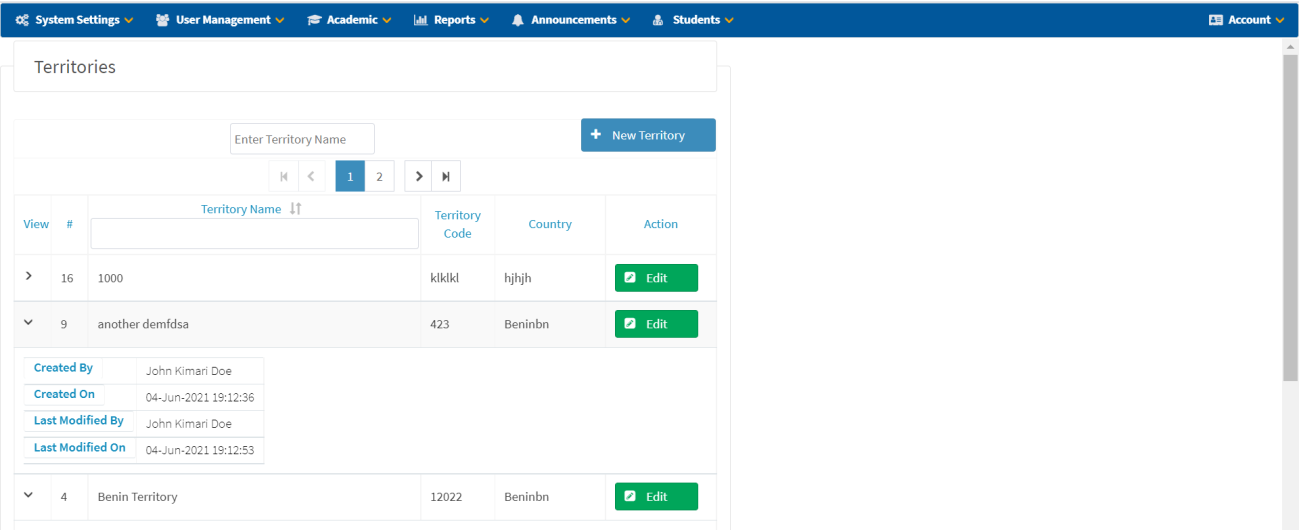
View Territory Details
Click on the view icon to expand and show the territory details.
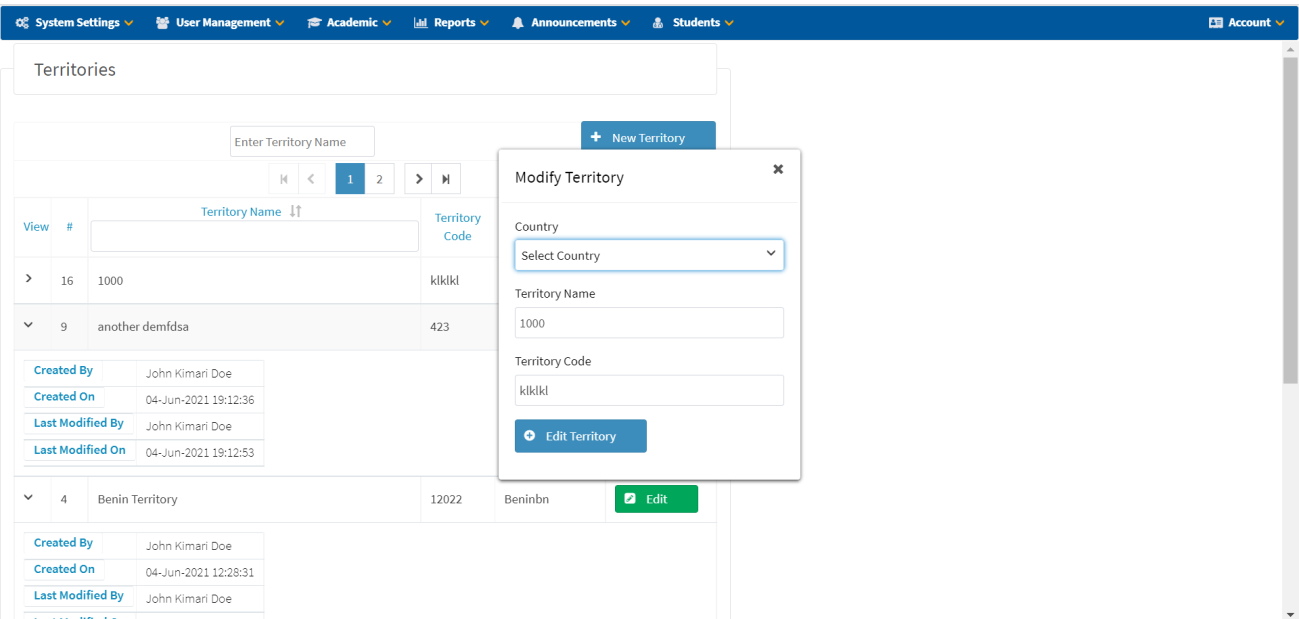
Modify Territory
- Click the Edit button.
- Modify the details as needed.
- Click Edit Territory to save changes.
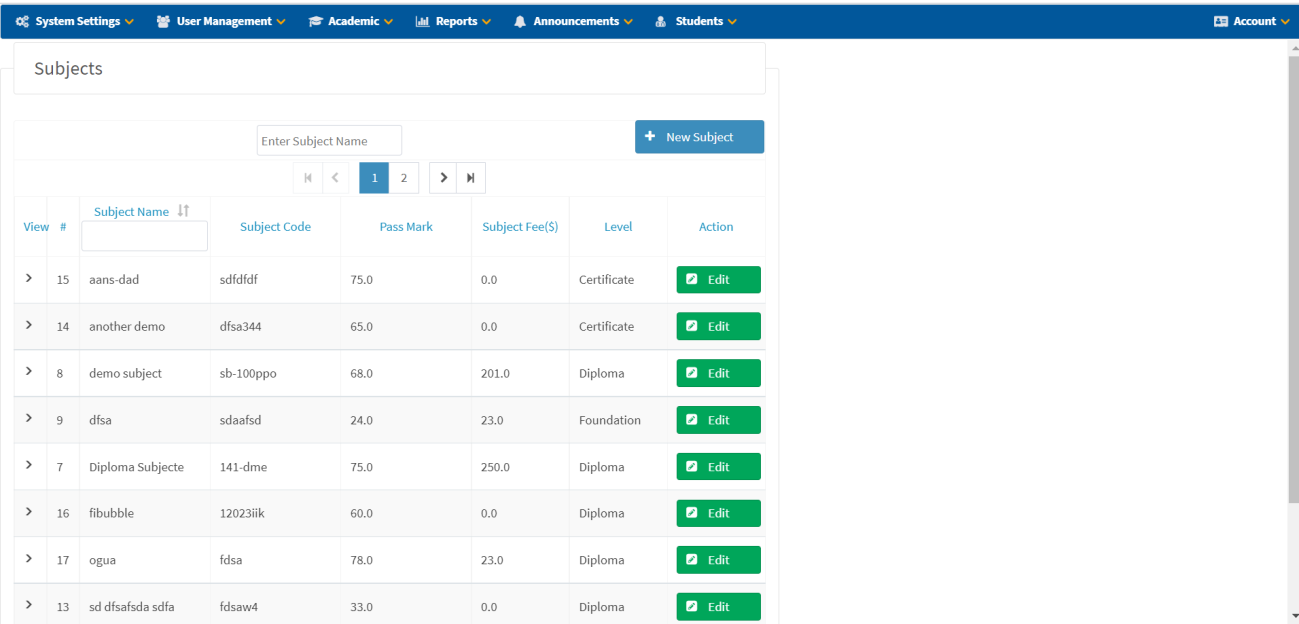
Subjects
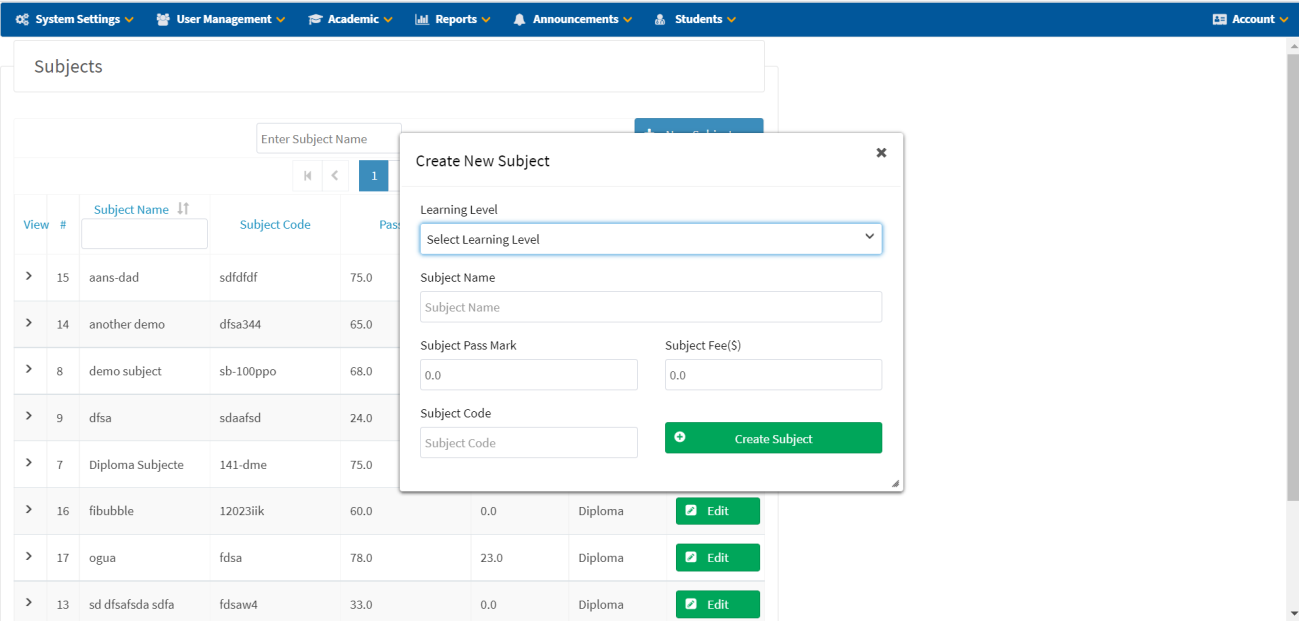
Create New Subject
- Navigate to System Settings → Subjects.
- Click + New Subject.
- Select Learning Level.
- Enter Subject Name.
- Enter Subject Pass Mark.
- Enter Subject Fee.
- Enter Subject Code.
- Click Create Subject to save details.
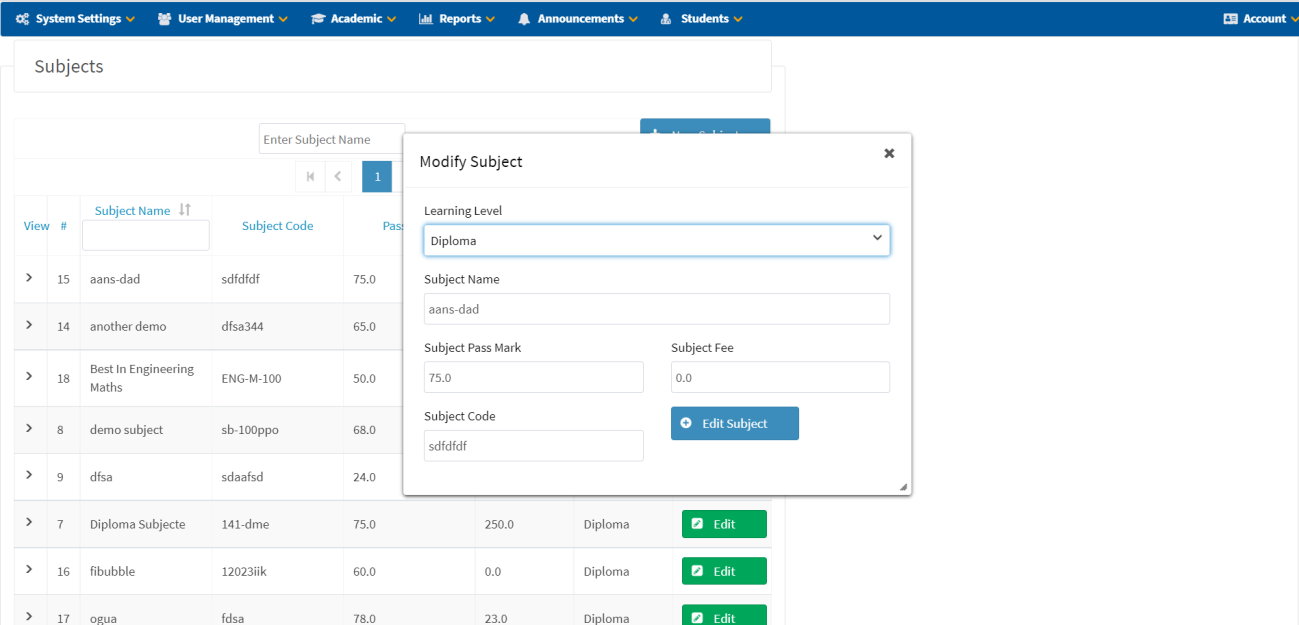
Modify Subject
- Click on the subject you wish to edit (use the Edit button).
- Make the necessary changes.
- Click Edit Subject to save changes.
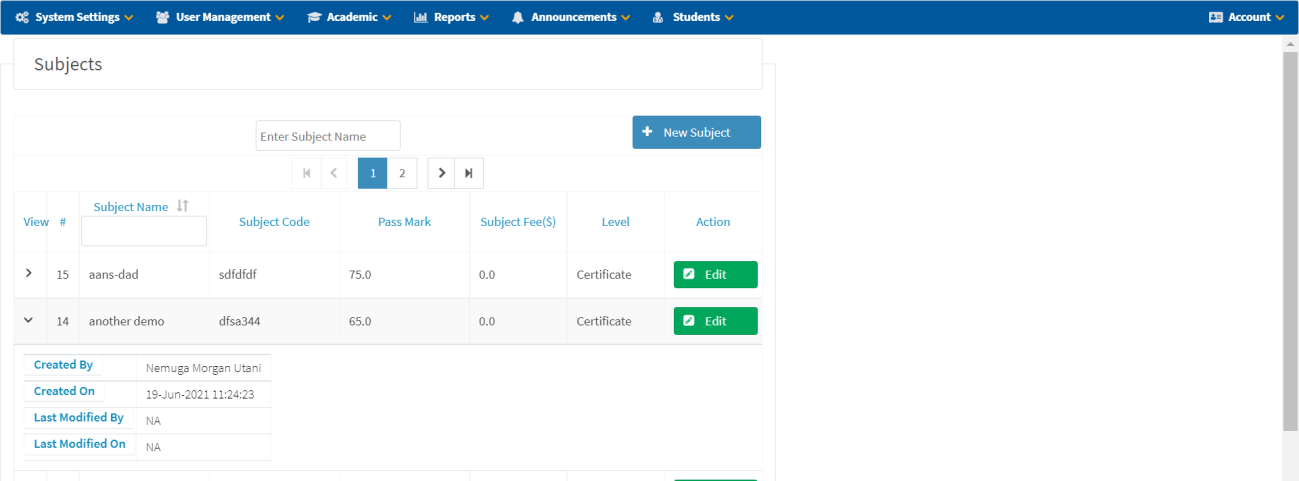
View Subject Details
Click on the view icon to expand and show subject details including Created By, Created On, Last Modified By, and Last Modified On.
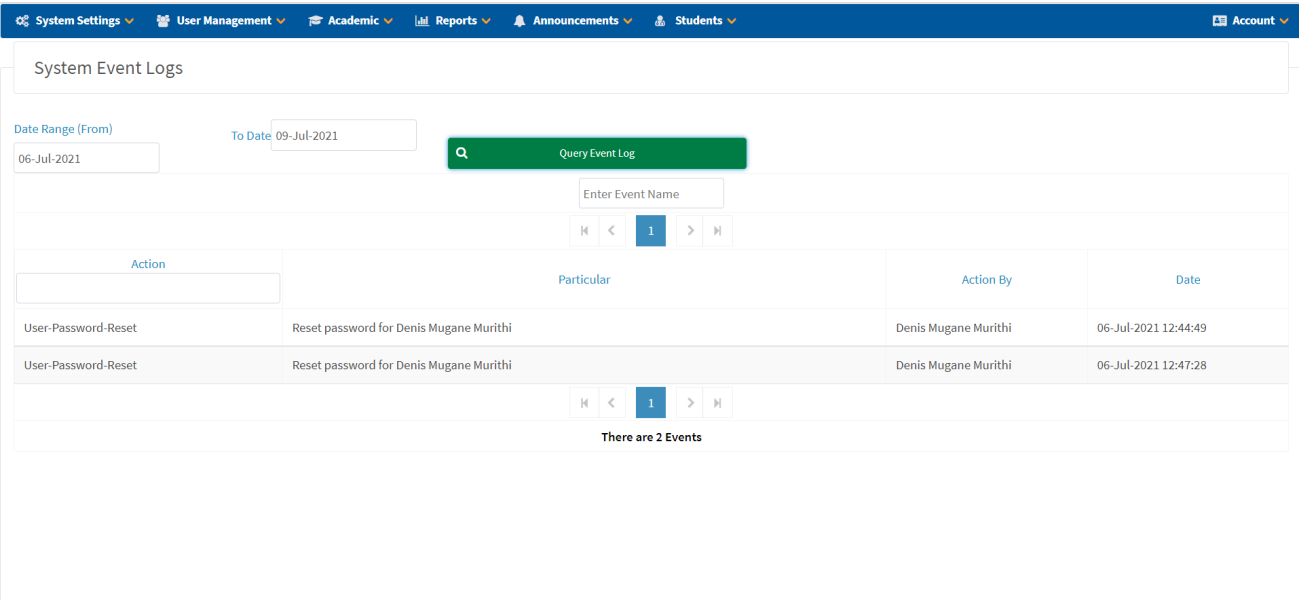
Event Logs
- Select a Date Range (From and To dates).
- Click Query Event Log.
- Optionally, filter by entering the event name or the action, then press Enter on your keyboard.
User Management
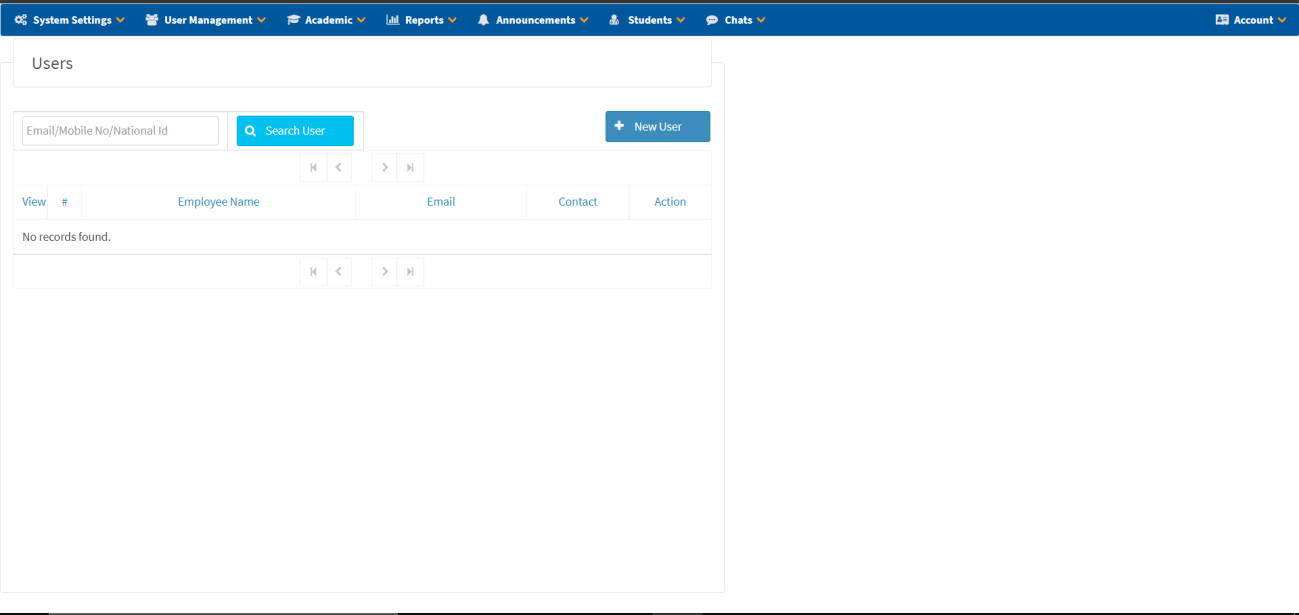
Create Users
- Navigate to User Management, then click on Create User.
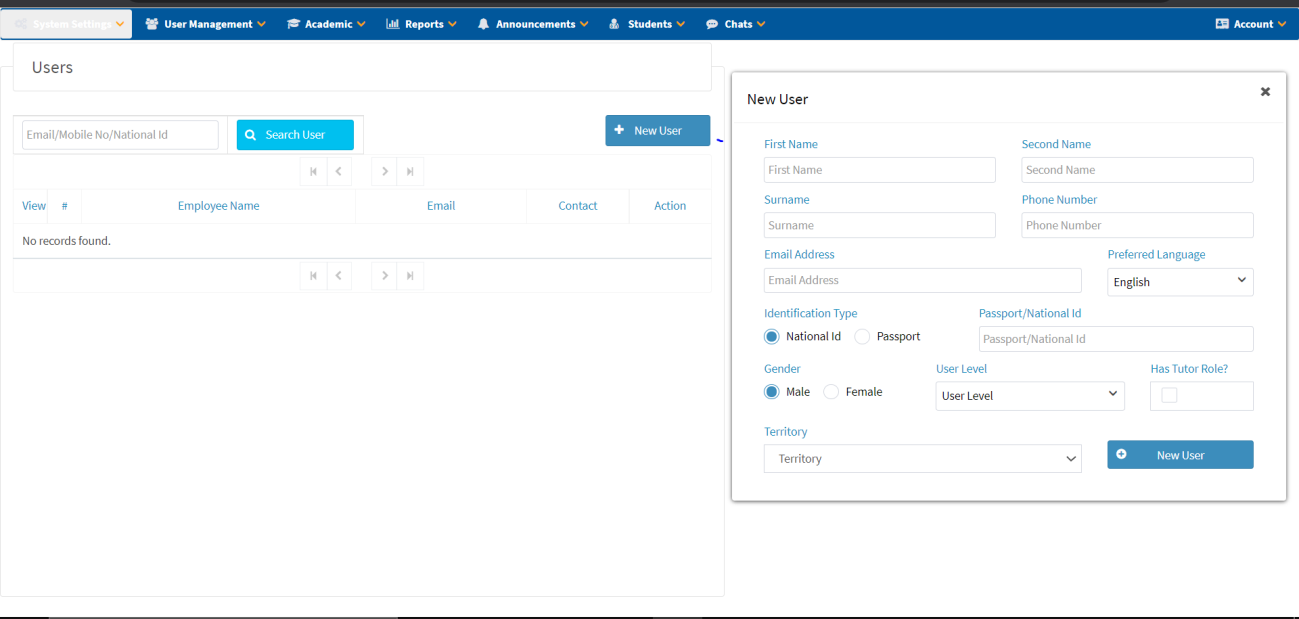
- Click + New User.
- Enter all required user details:
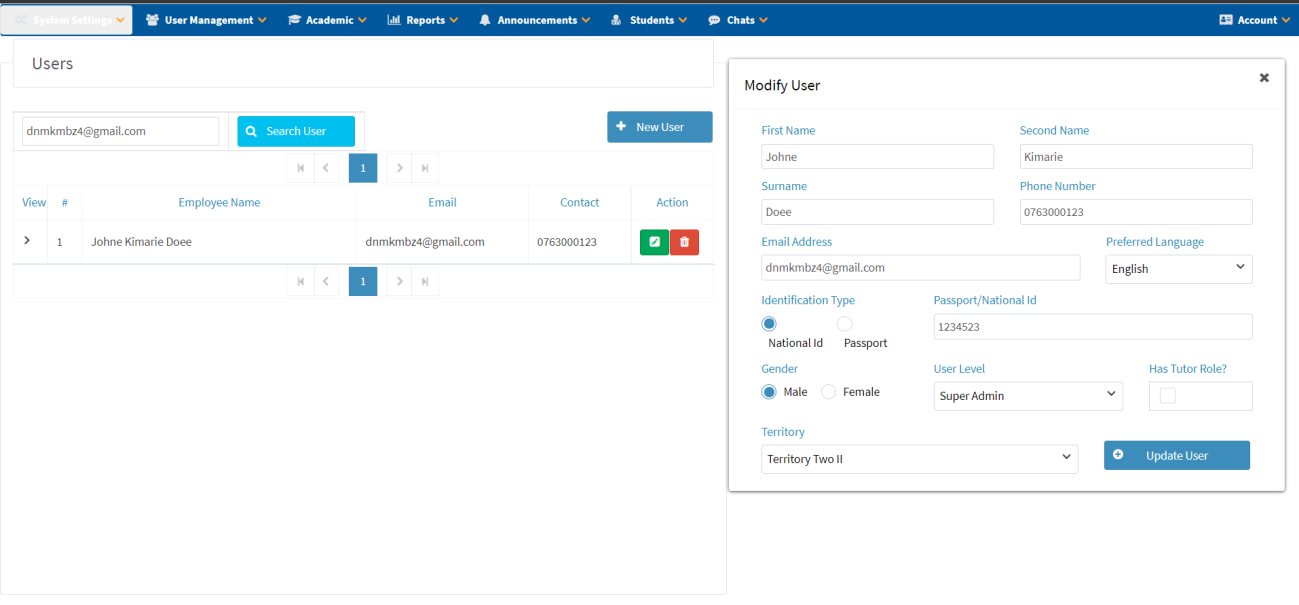
Field Description First Name / Second Name User's first and middle names Surname User's last name Phone Number Contact phone number Email Address Valid email address Preferred Language Select from dropdown Identification Type National ID or Passport Passport/National ID ID number Gender Male or Female User Level Select user level Has Tutor Role? Checkbox if user is a tutor Territory Select from dropdown - Click New User to save details.

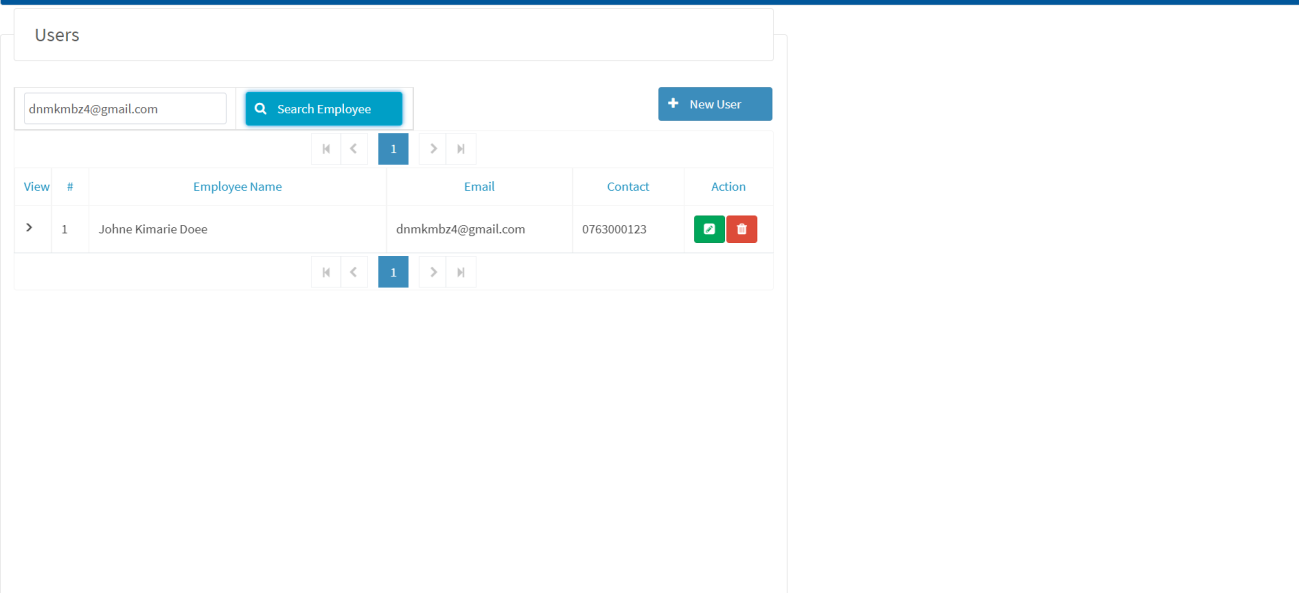
View User Details
- Search for the user using the search field.
- Locate the show icon below the View heading, then click on it to show the details.
Modify Existing User Records
- Locate the green button on the right-hand side, then click on it.
- Modify the record as needed.
- Click Update User to save.
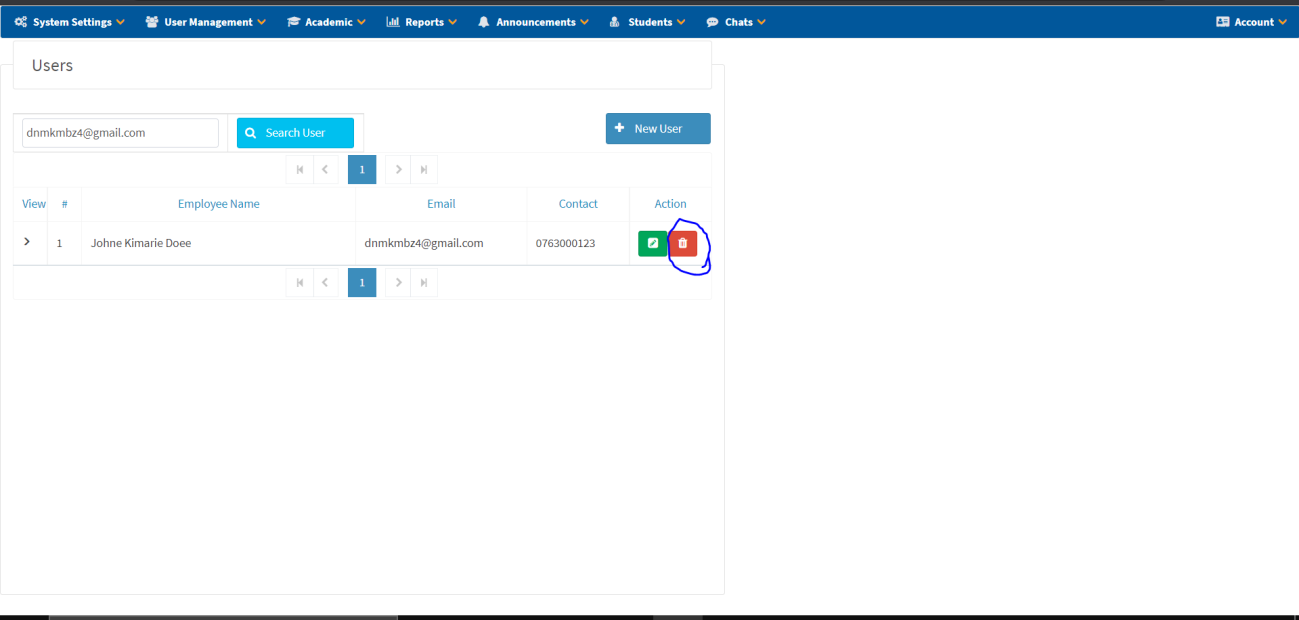
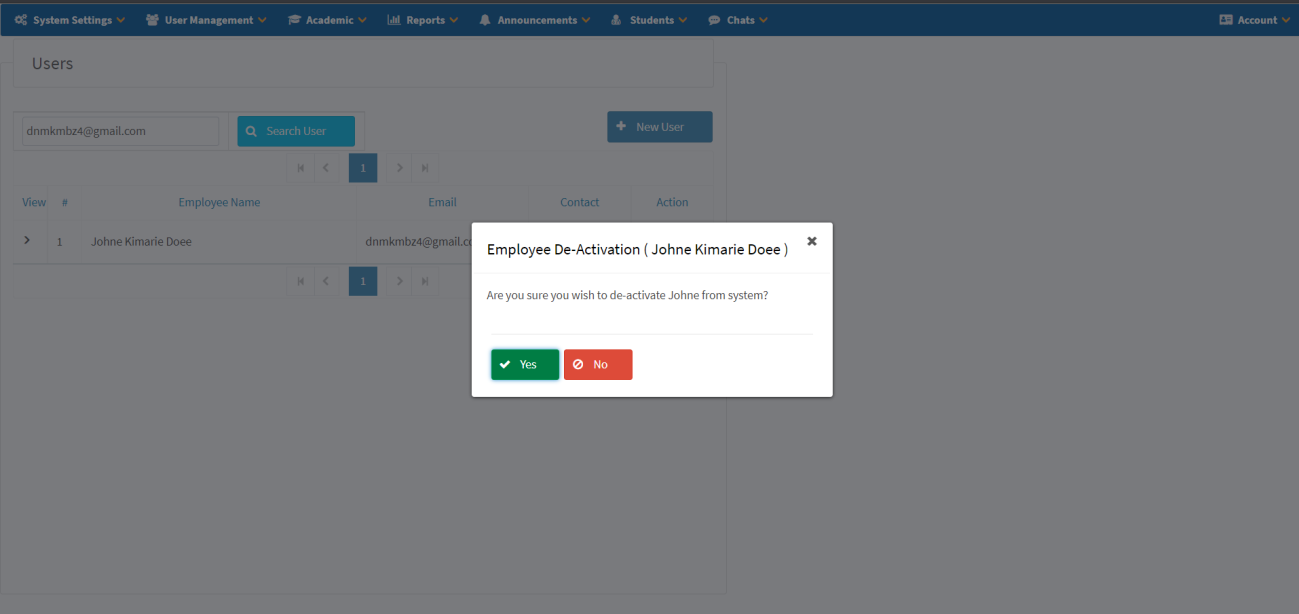
Deactivate and Reactivate User Accounts
- Locate the red button on the right-hand side and click on it to deactivate the account.
- Click Yes to confirm deactivation.
- To reactivate, click on the same button again to reactivate the deactivated account.

Academics
Upload Notes
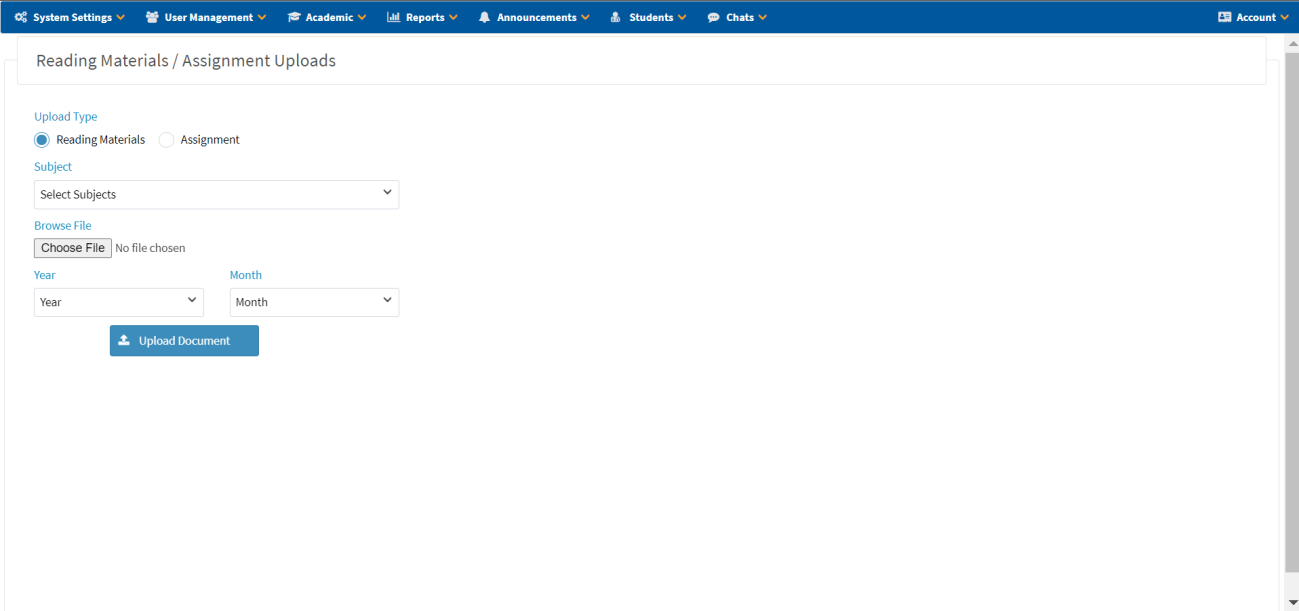
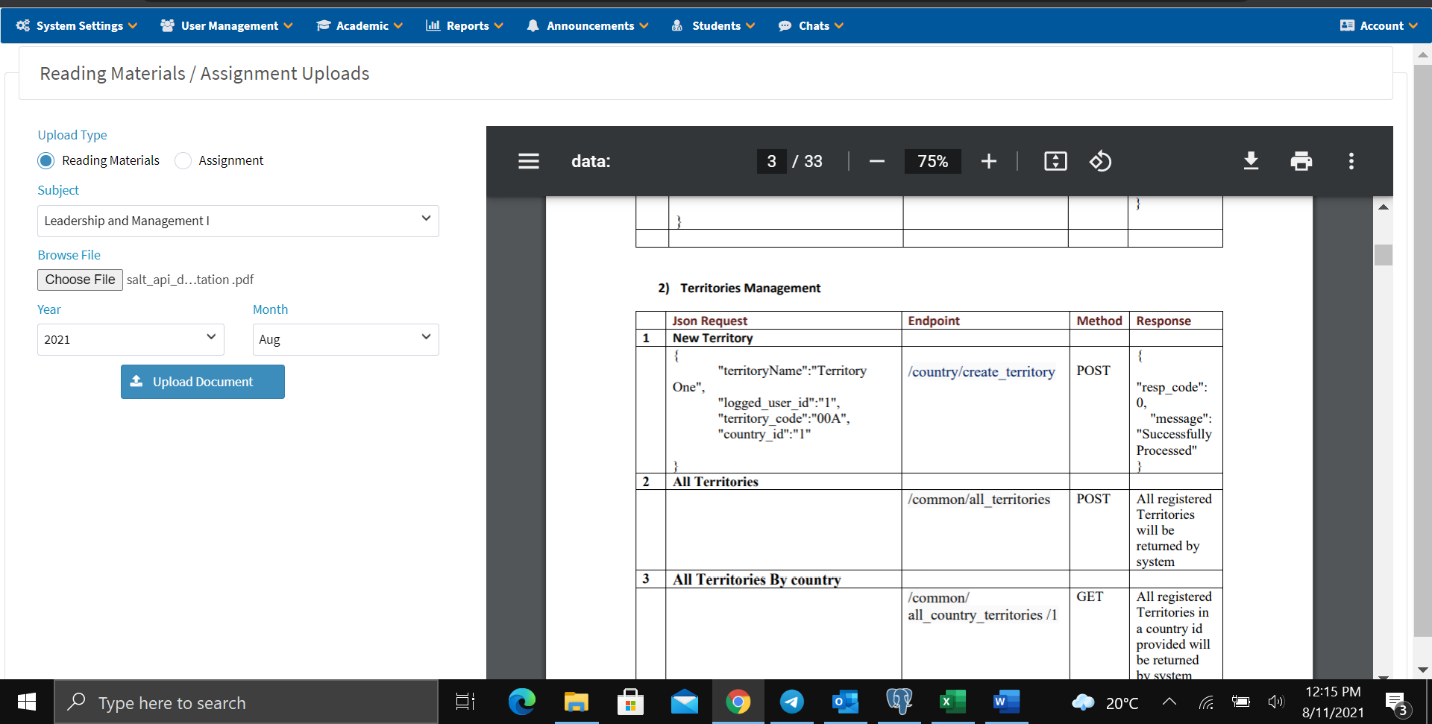
Upload Reading Materials
- Navigate to Academic → Upload Notes.
- Click on Upload Notes.
- Select Upload Type: Reading Material.
- Choose the Subject.
- Browse and select the file from your PC.
- Select the Year in which the student enrolled for the subject.
- Select the Month in which the student enrolled for the subject.
- Preview the file before upload.
- Click Upload Document to upload the file.
Upload Assignments
- Navigate to Academic → Upload Notes.
- Select Upload Type: Assignment.
- Select the Subject.
- Browse and select the file from your PC.
- Select the Year and Month.
- Set the Assignment Due Date.
- Set the Max Score.
- Provide Assignment Instructions.
- Click Upload Document.
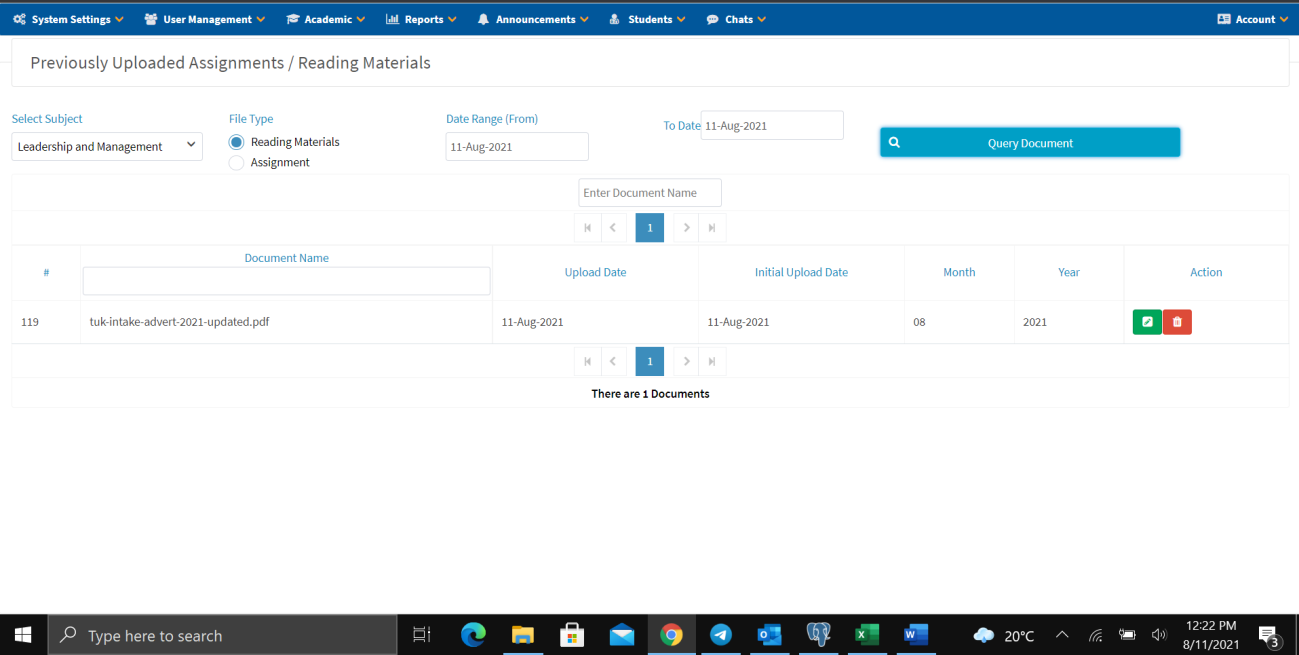
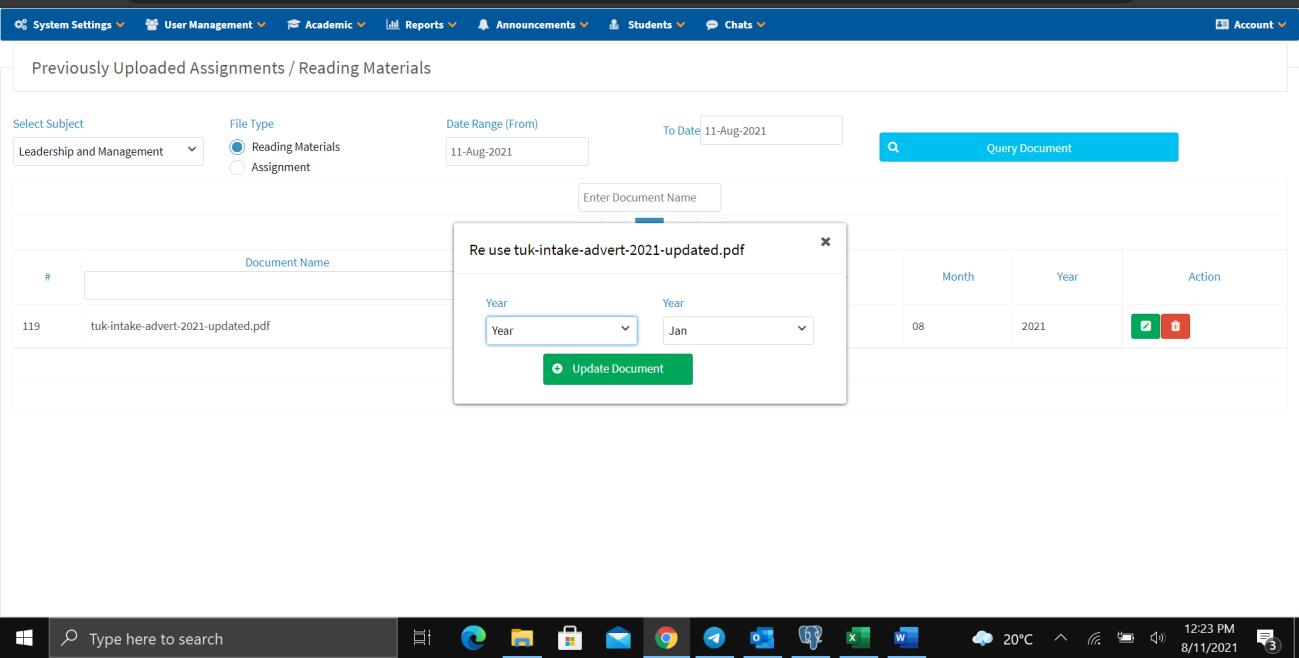
All Notes
- Navigate to Academic → Uploads → All Notes.
- Select the Subject.
- Choose the File Type (Reading Materials or Assignment).
- Select a Date Range.
- Click Query Document.
- From the results, you can:
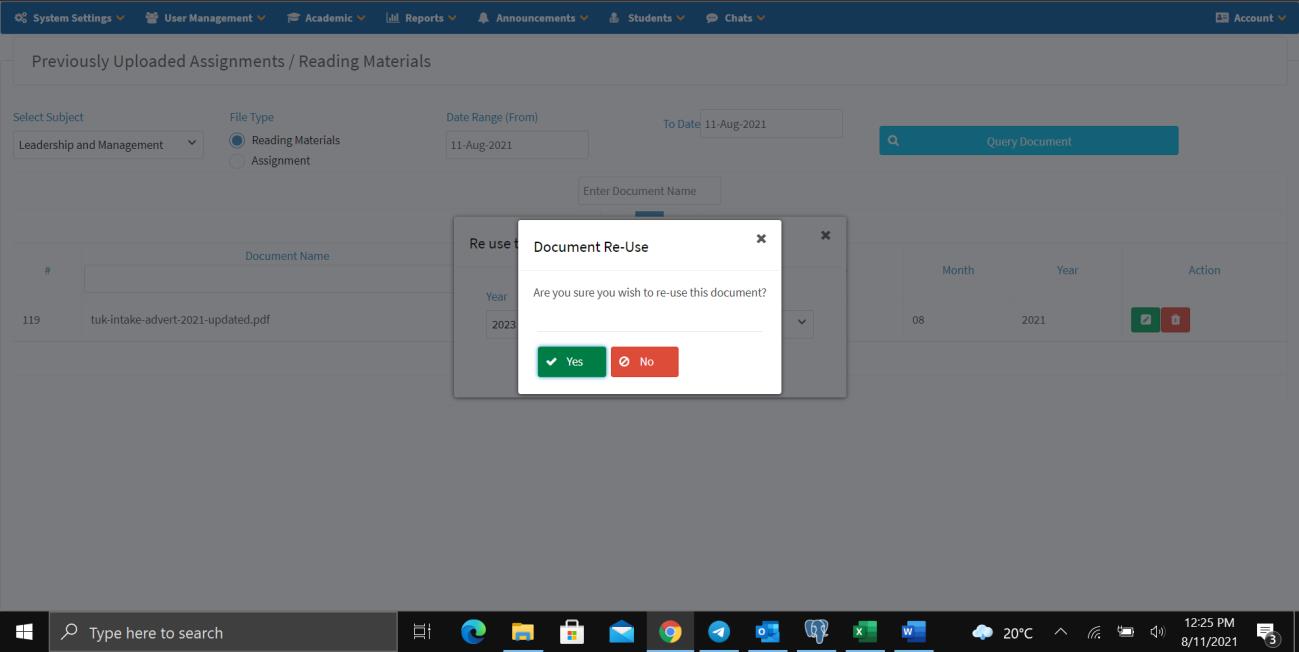
- Click the red button to delete a document.
- Click the green button to re-use the material — configure appropriately and then click Upload Document.
- Click Yes to save or No to cancel.
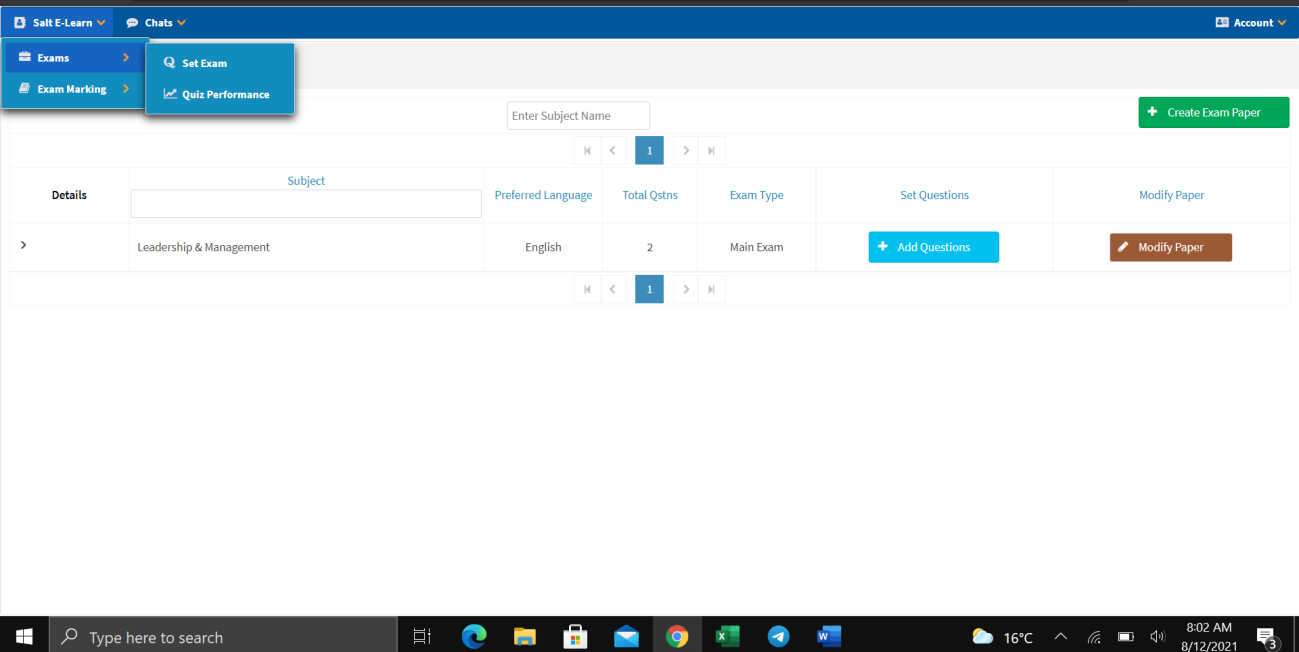
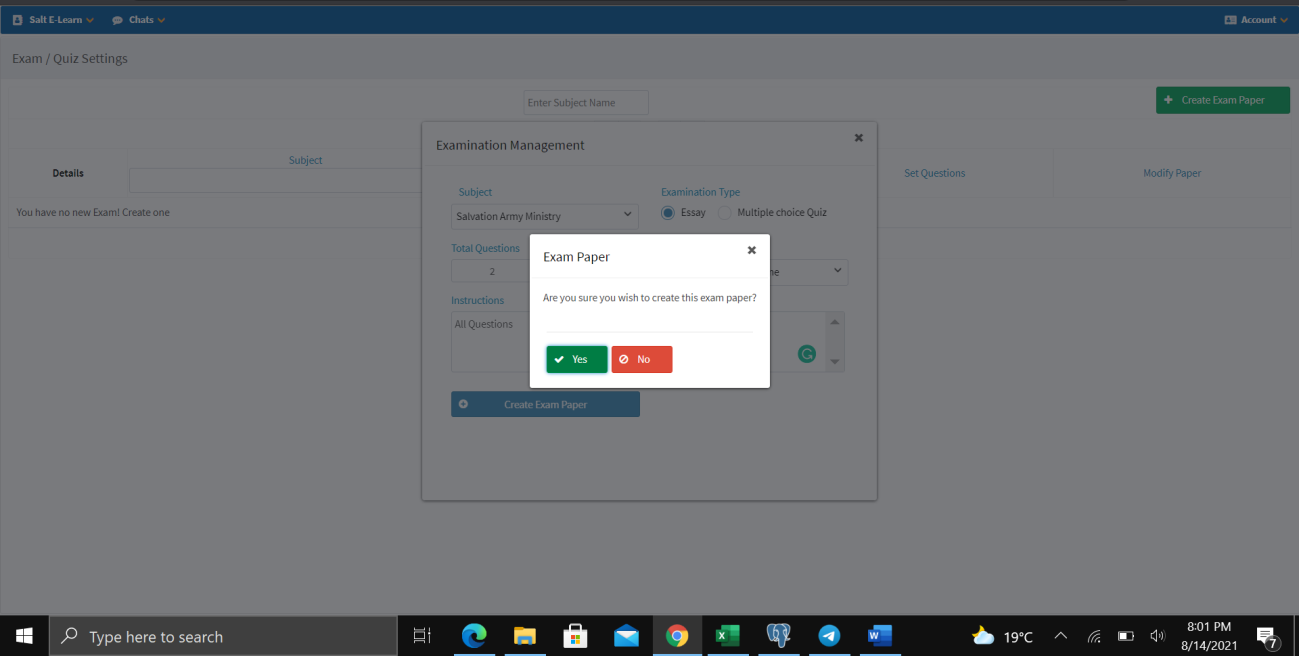
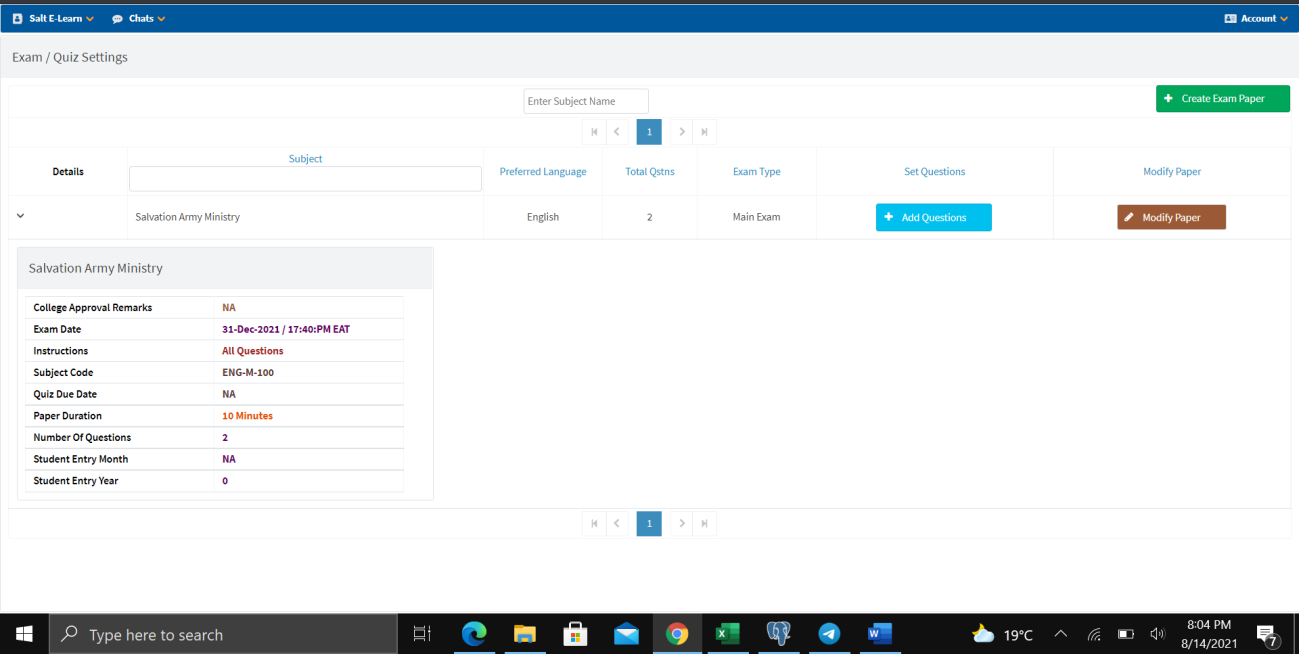
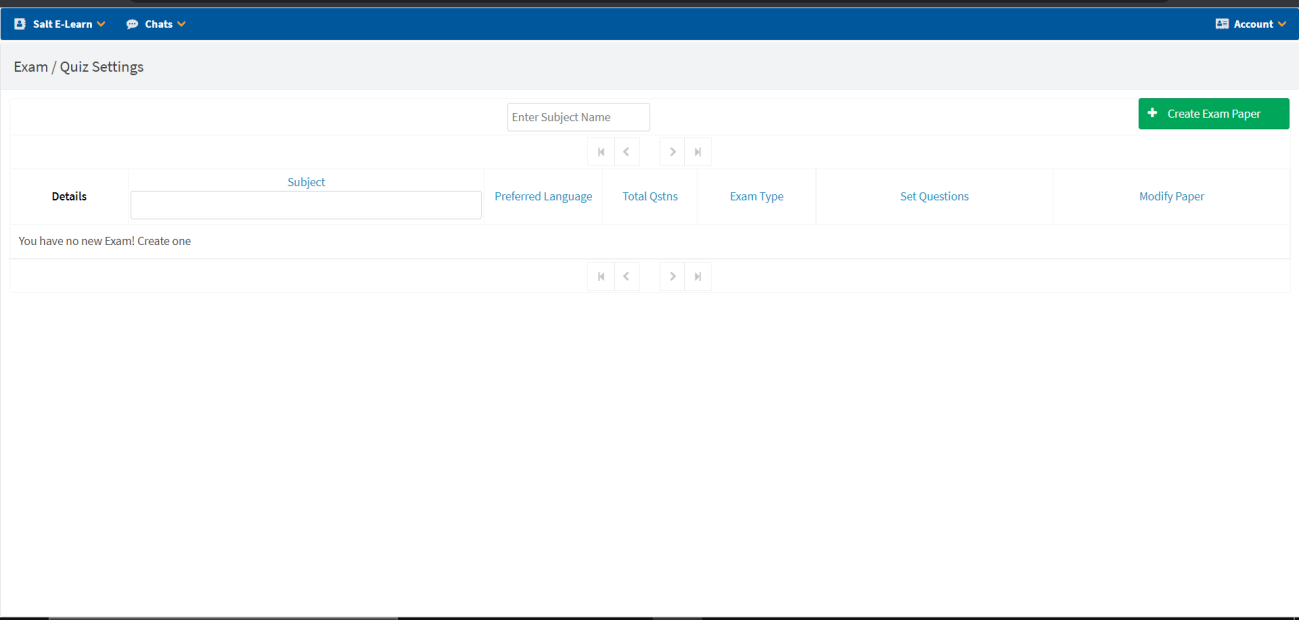
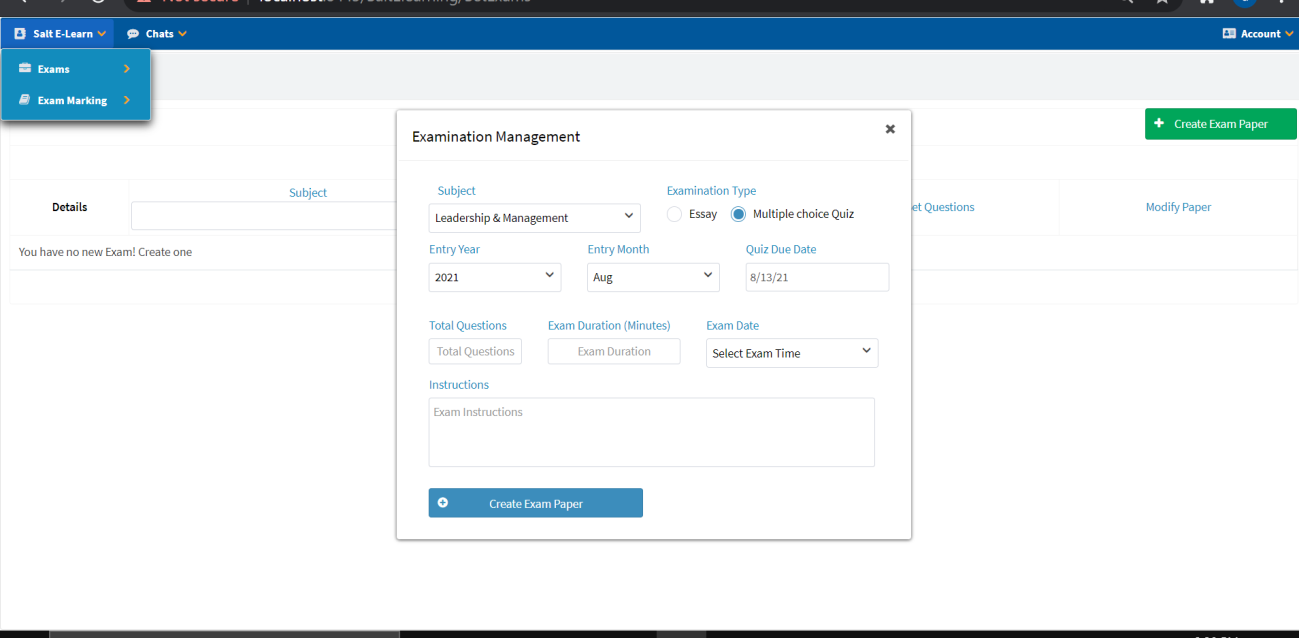
Set Exam
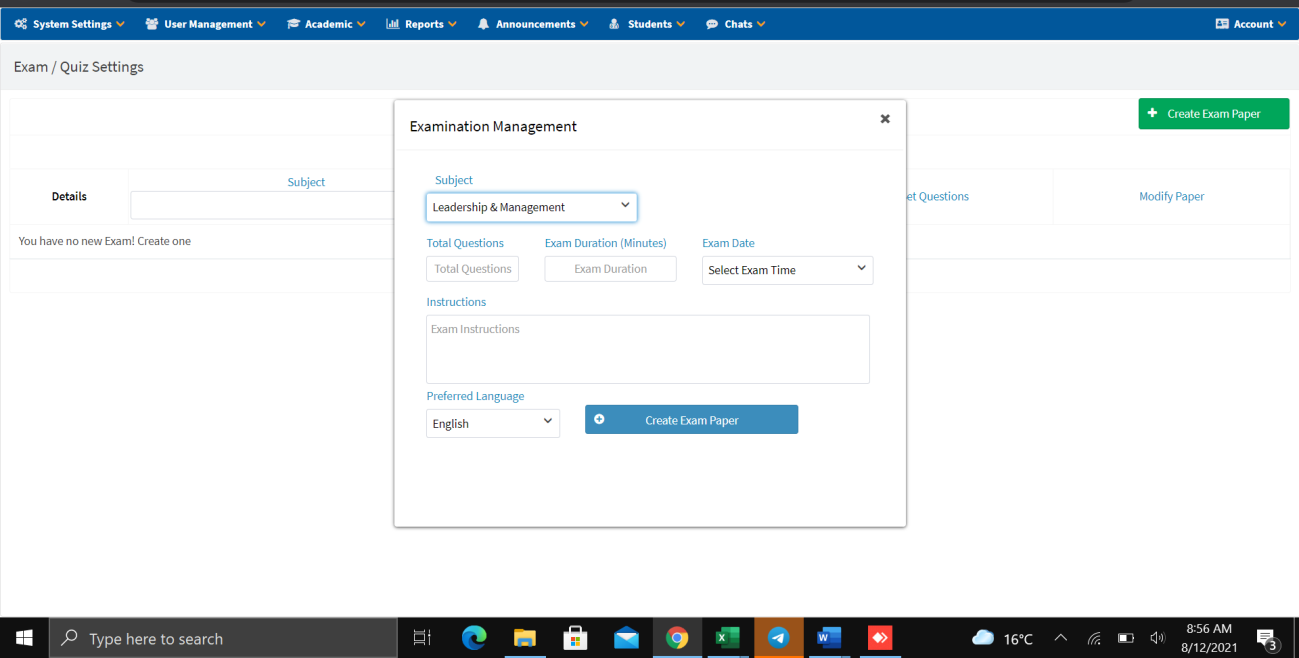
- Navigate to Academic → Set Exam.
- Click + Create Exam Paper.
- Select the Subject.
- Enter the Total Questions.
- Enter the Exam Duration (in minutes).
- Pick the Exam Date.
- Provide Instructions.
- Select the Preferred Language.
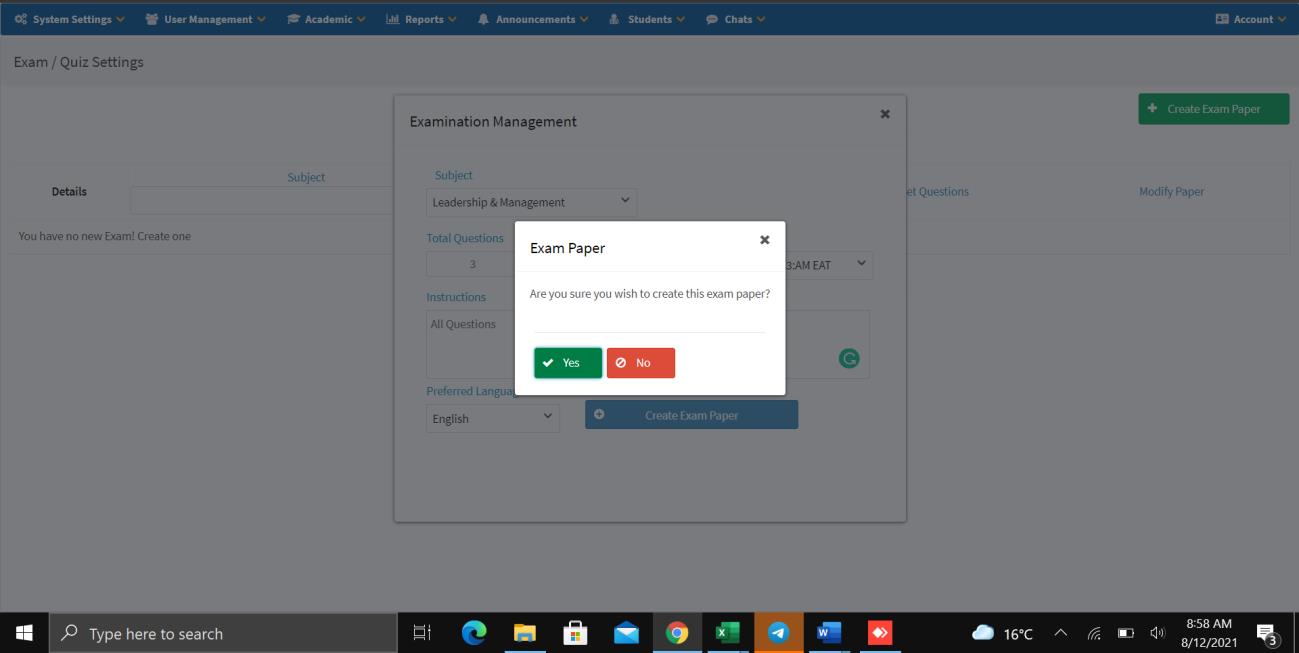
- Click Create Exam Paper.
- Click Yes to save.

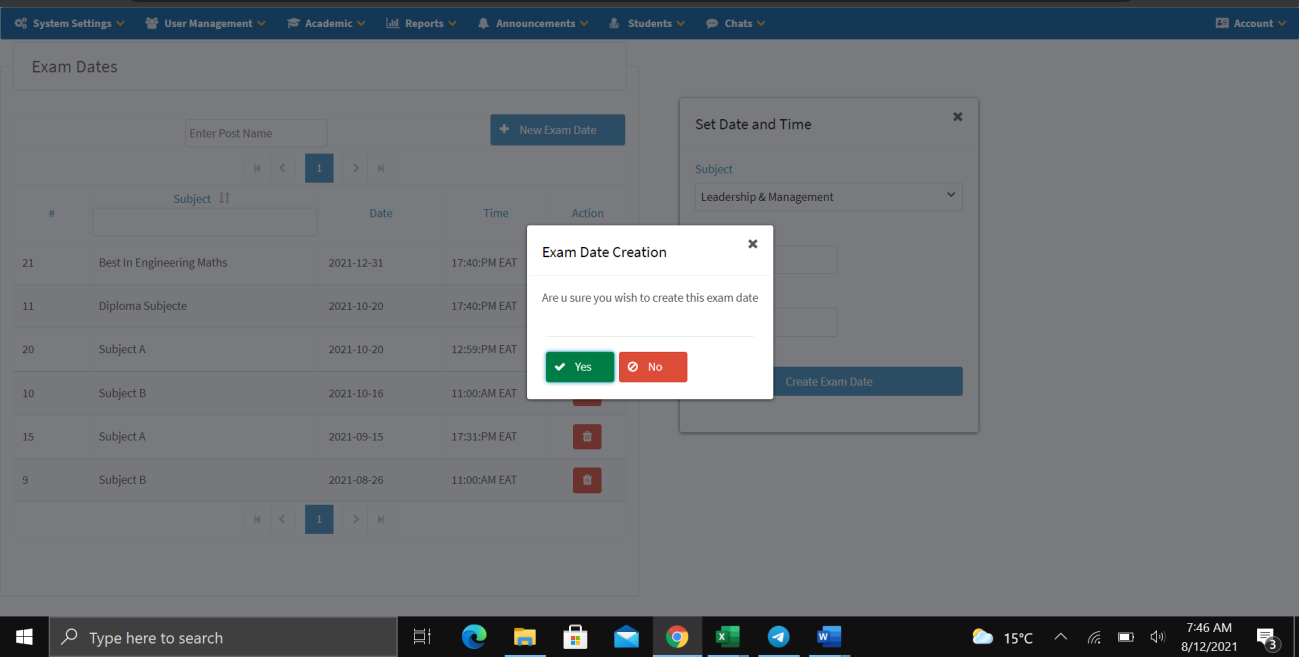
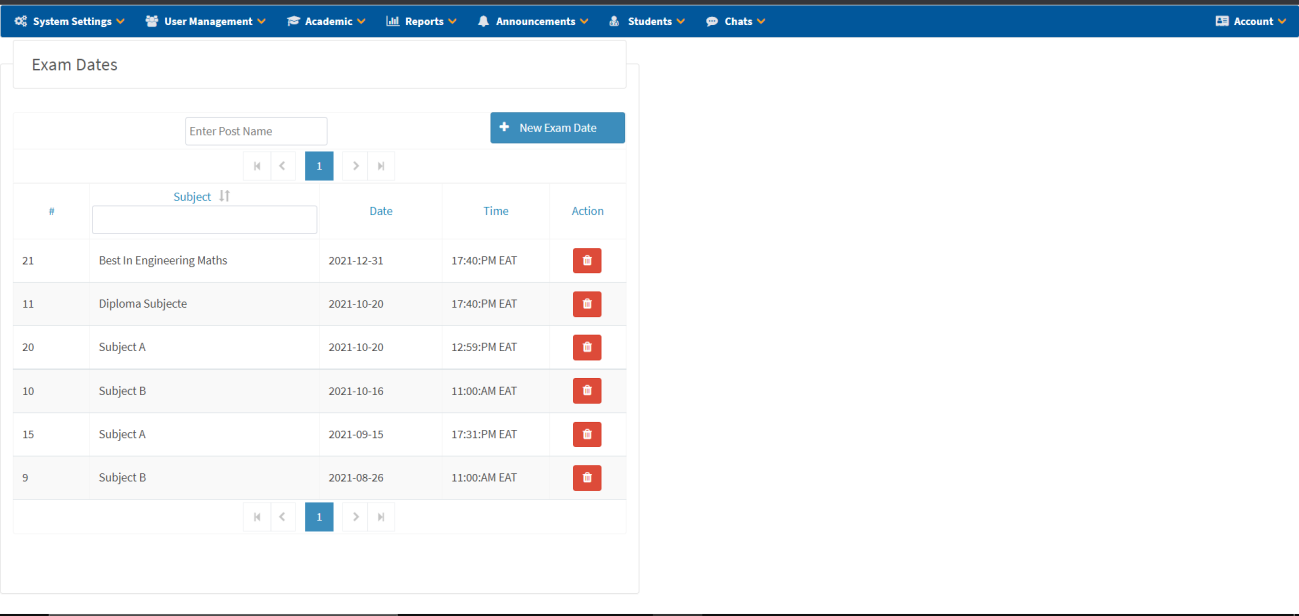
Set Exam Date
Use the Exam Dates page to create new exam dates by clicking + New Exam Date, selecting the subject, setting the date and time, then confirming.
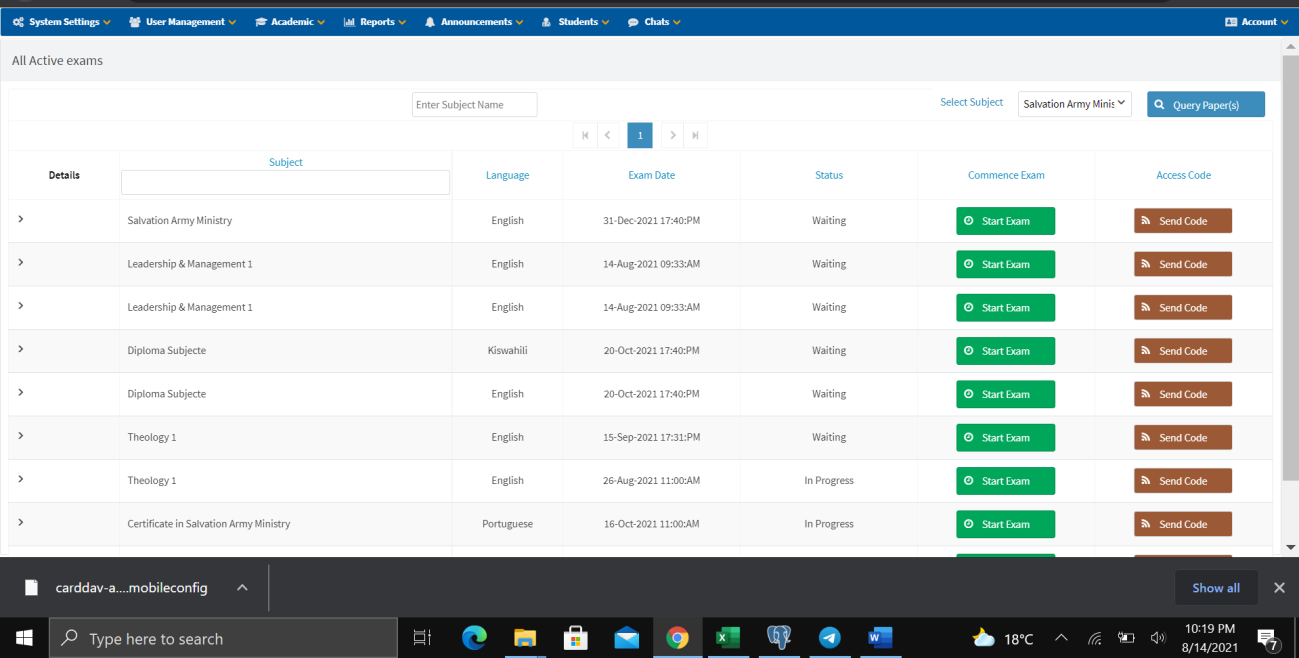
Active Exams
- Click Send Code to send access codes to students.
- Click Start Exam to begin the examination.
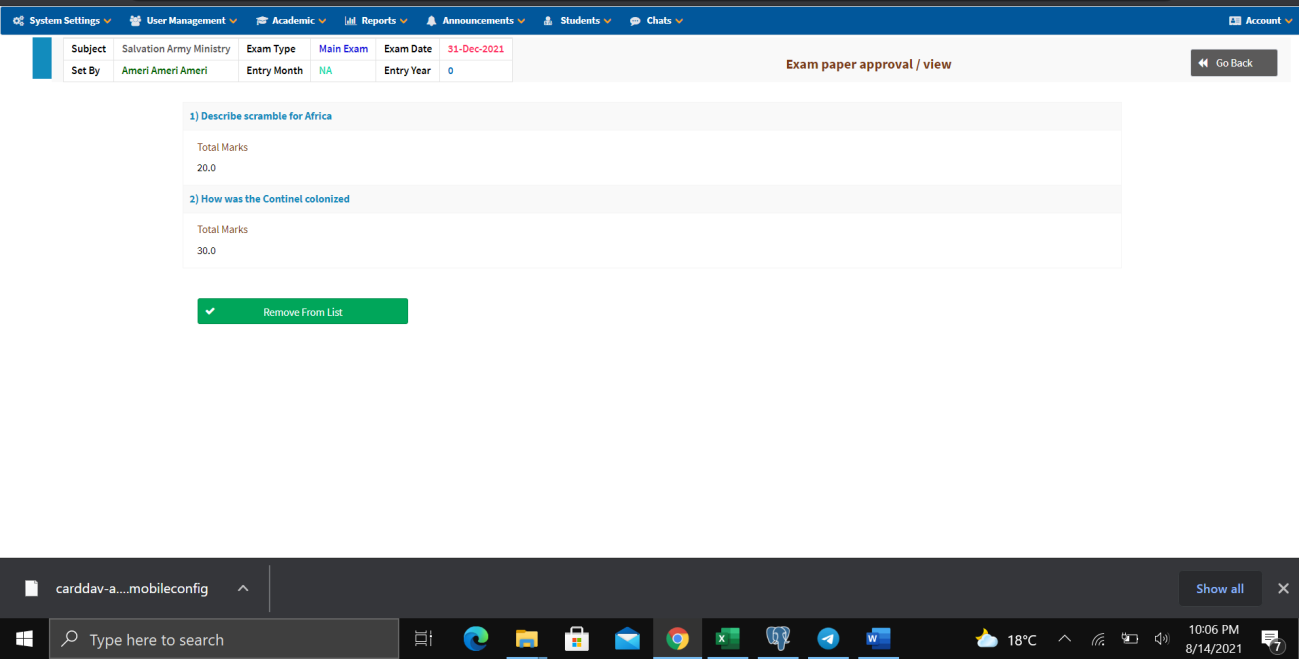
Tutor Paper Approval
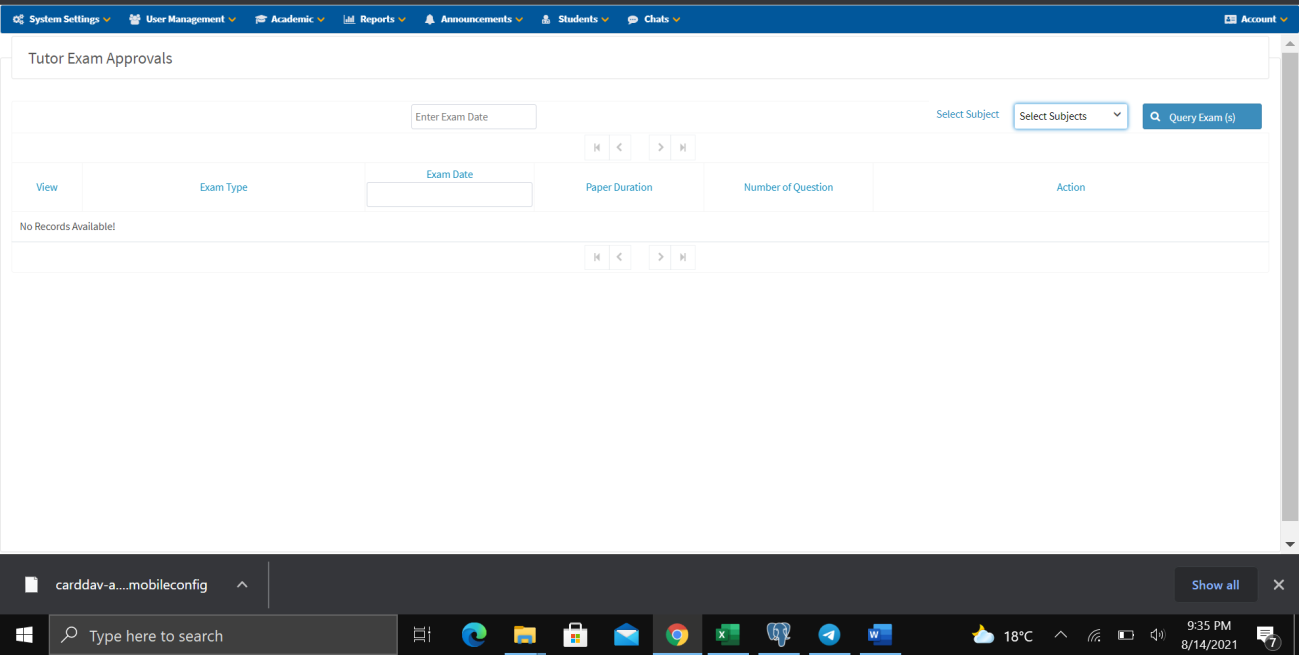
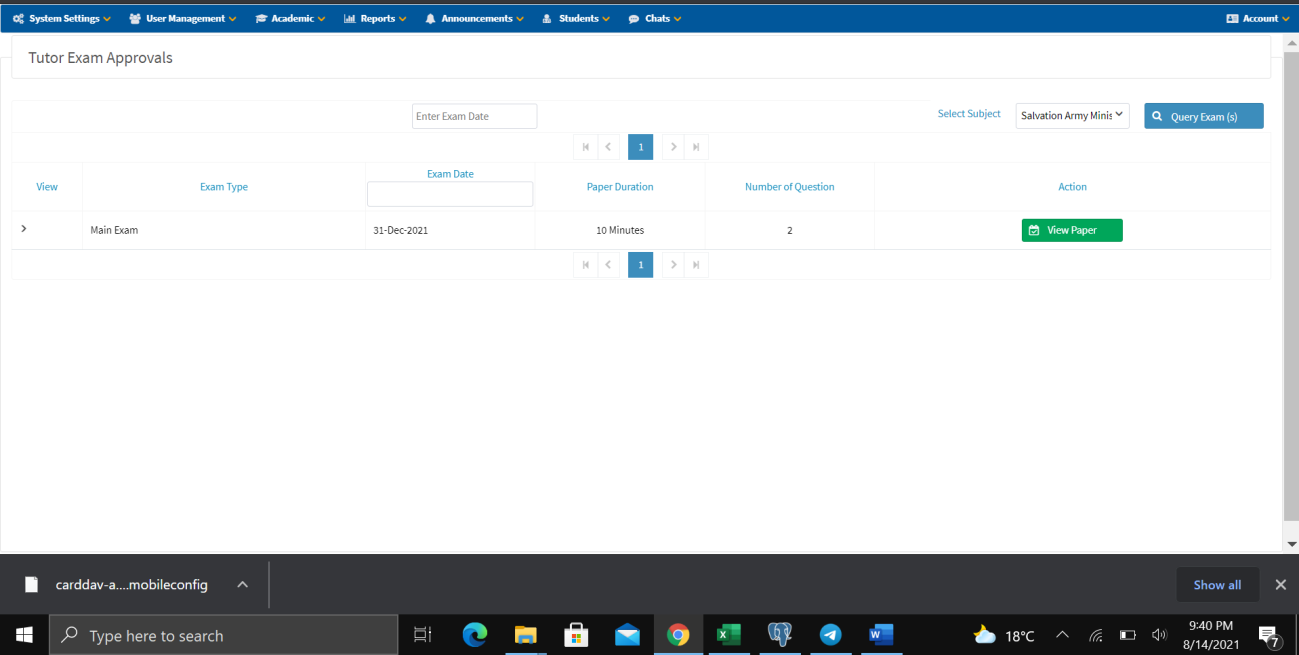
Main Exam Approval
- Navigate to Tutor's Paper.
- Enter the exam due date to search.
- Select the Subject and then click Query Exam.
- Click View Paper to show the questions submitted by a particular tutor.
- Note down the preferred questions from the list provided by the tutor.
- Click Remove From List when done with the questions.
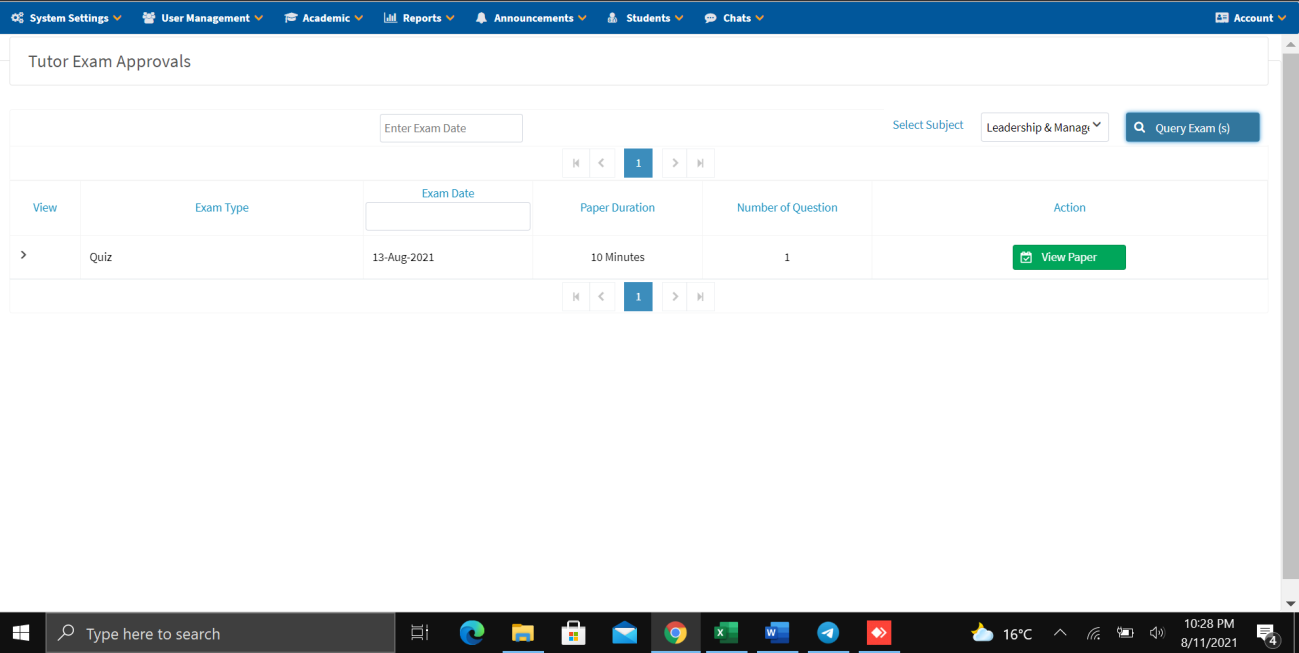
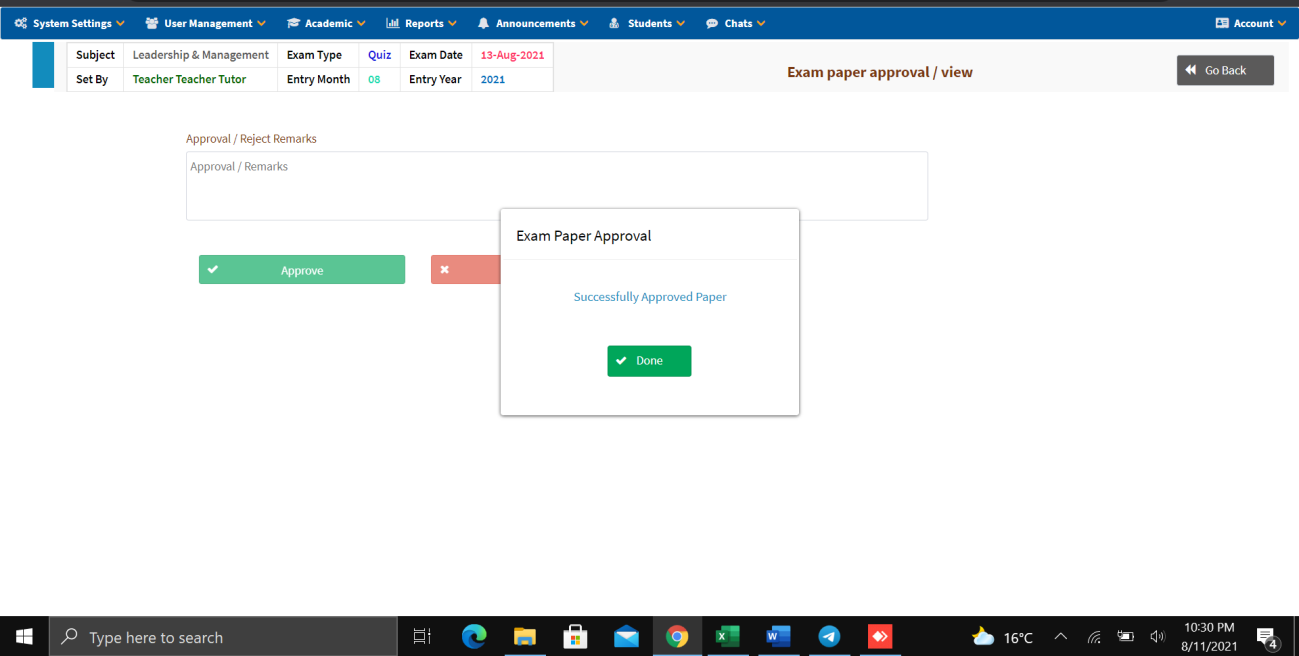
Quiz Approval
- Navigate to Tutor's Paper.
- Select the Subject and click Query Exam.
- Click View Paper.
- Review the quiz carefully.
- Enter your comments/remarks.
- Click Approve to post the exam to students, OR click Reject to send it back to the tutor for correction.
Final Marking
The admin can review marked assignments, view unmarked assignments by tutor, perform final tallying, and manage tutor subject assignments from this section.
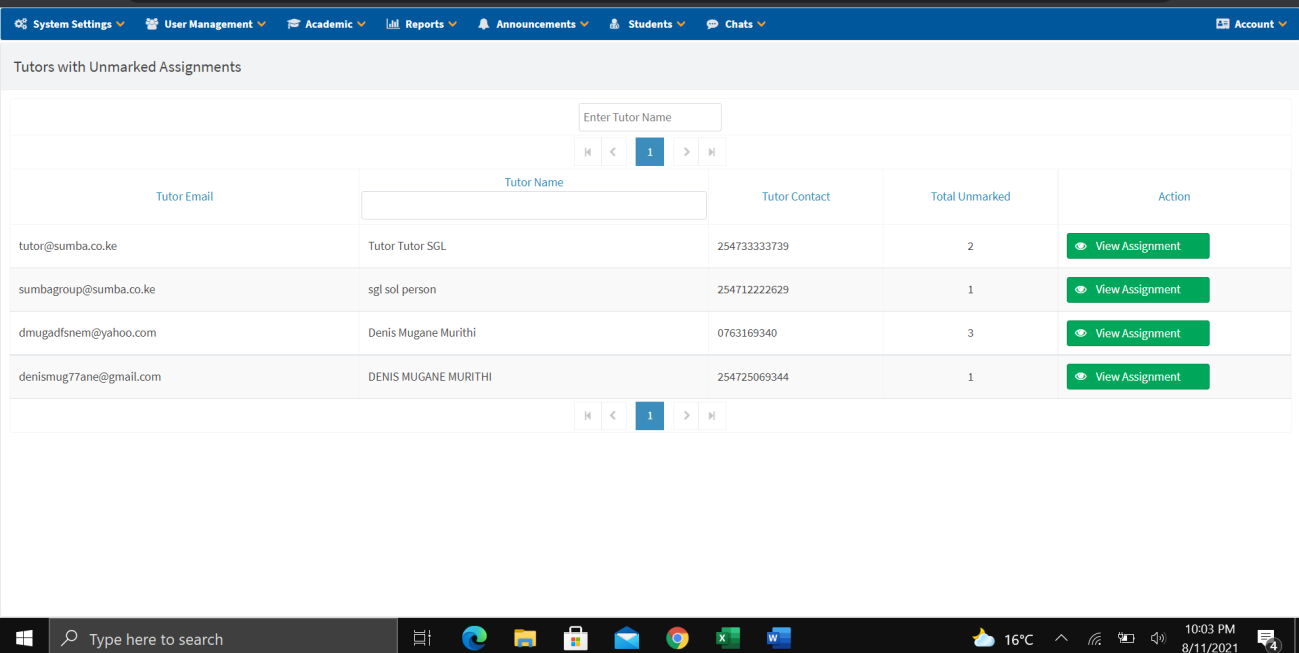
Unmarked Assignments
View the list of tutors with unmarked assignments, including tutor email, name, contact, and total unmarked count. Click View Assignment to see details.
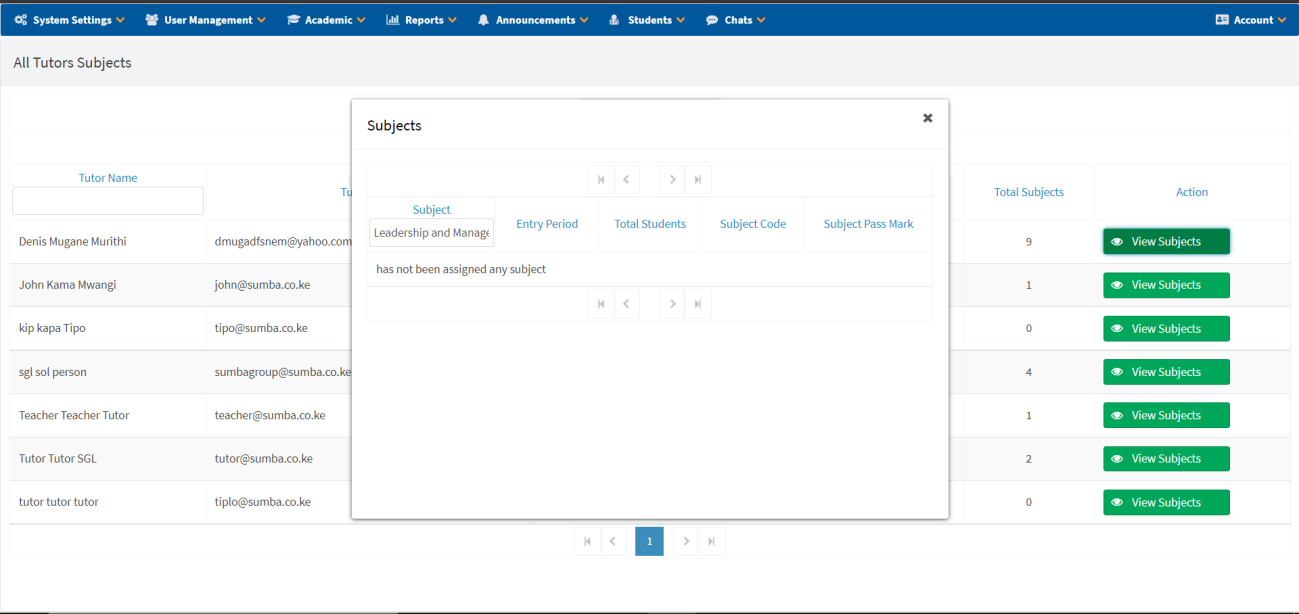
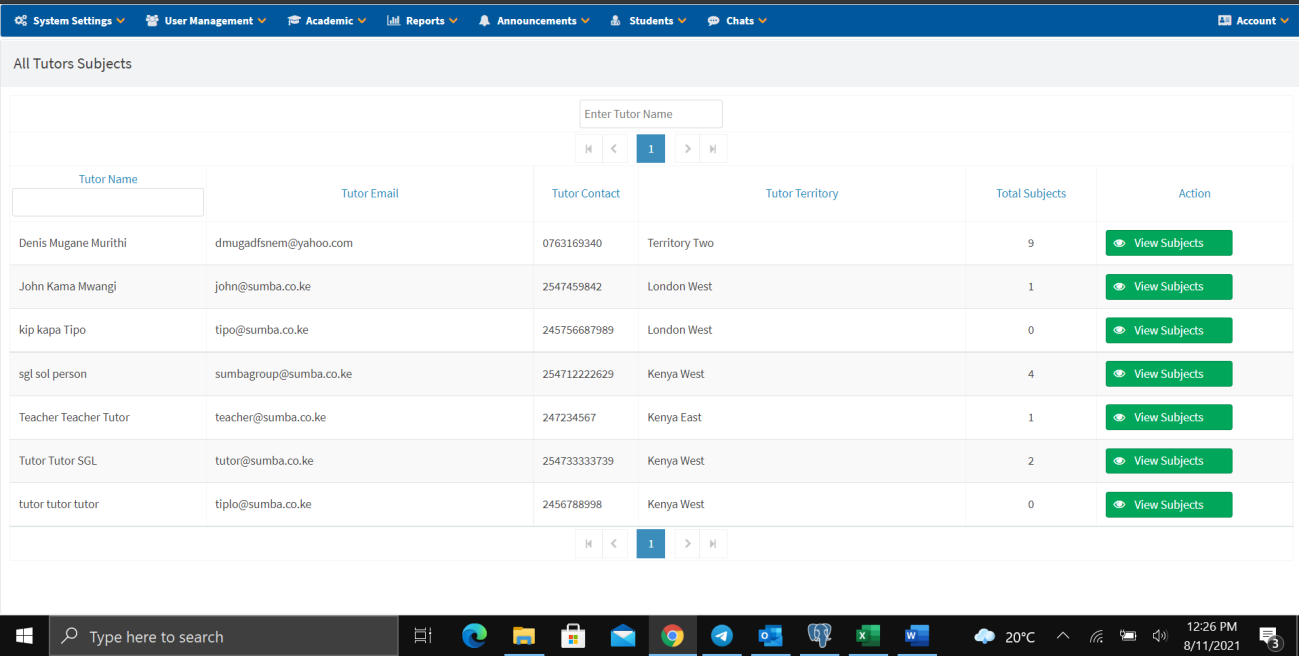
Tutor's Subjects
View all tutors and their assigned subjects, including entry period, total students, subject code, and subject pass mark. Click View Subjects to see subject details.
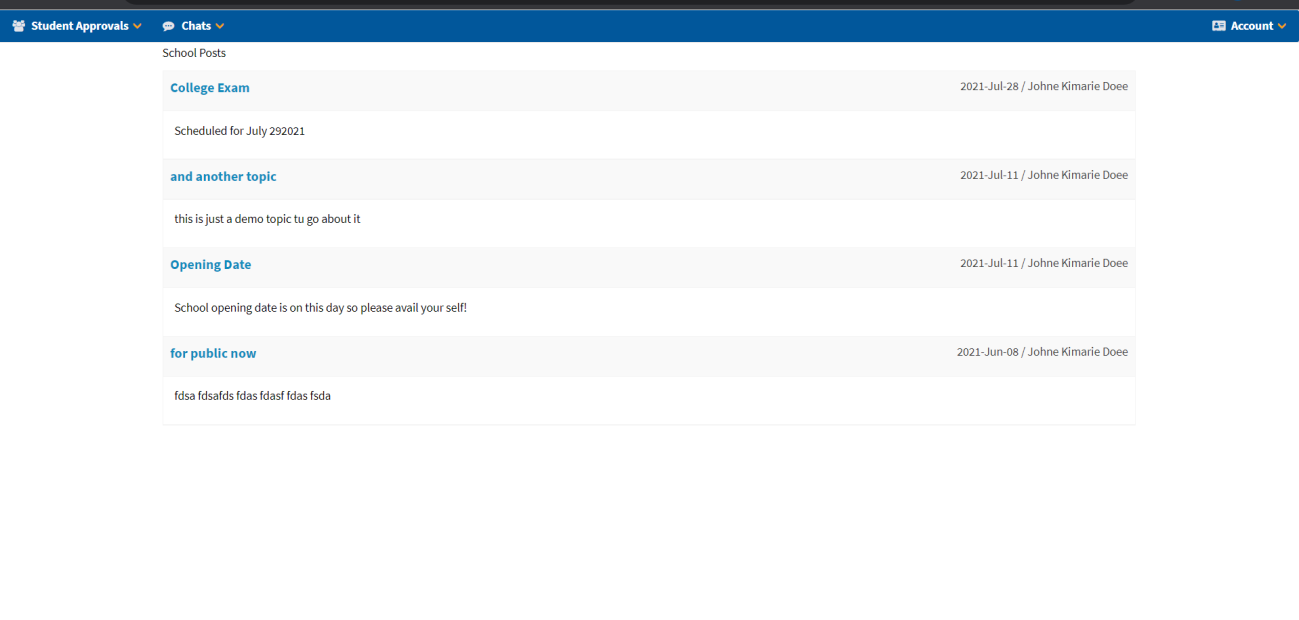
Announcements
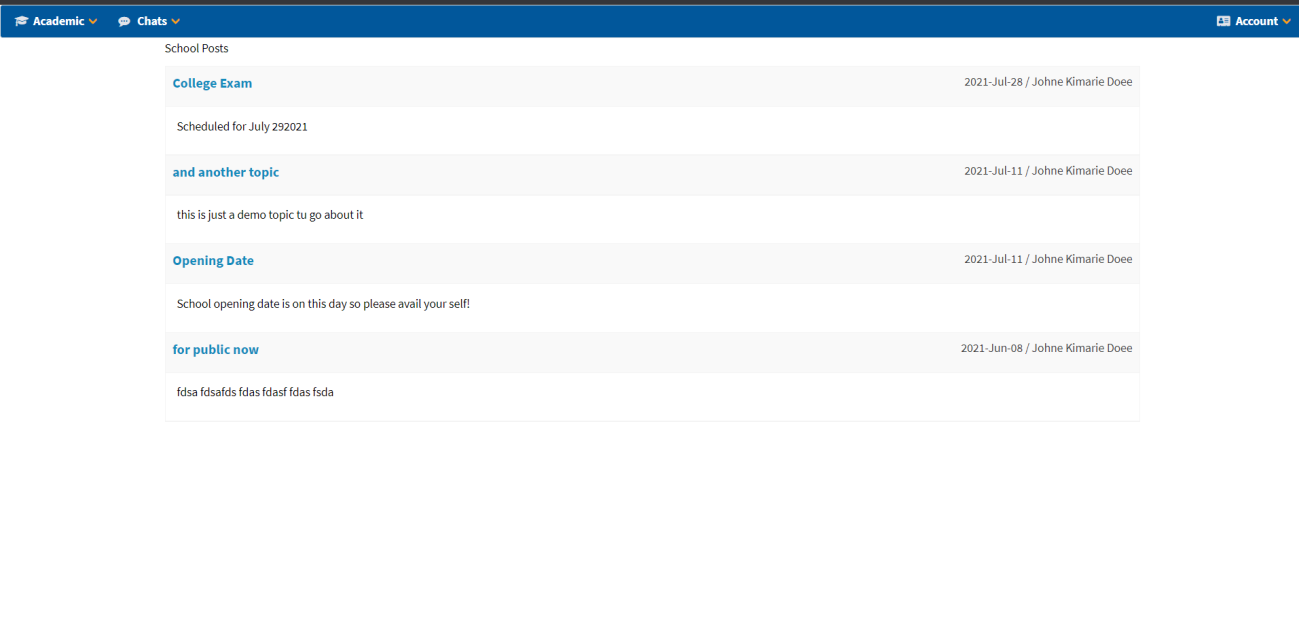
Administrators can create and publish school announcements that will be visible to all users on their dashboard/home page.

Student Management
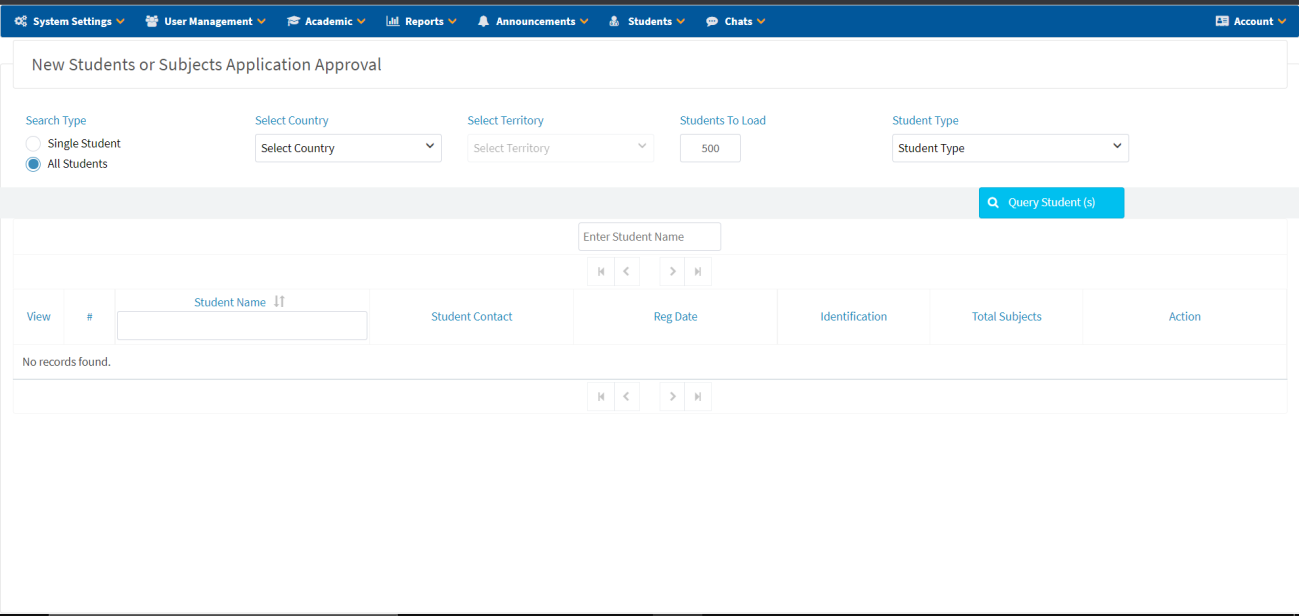
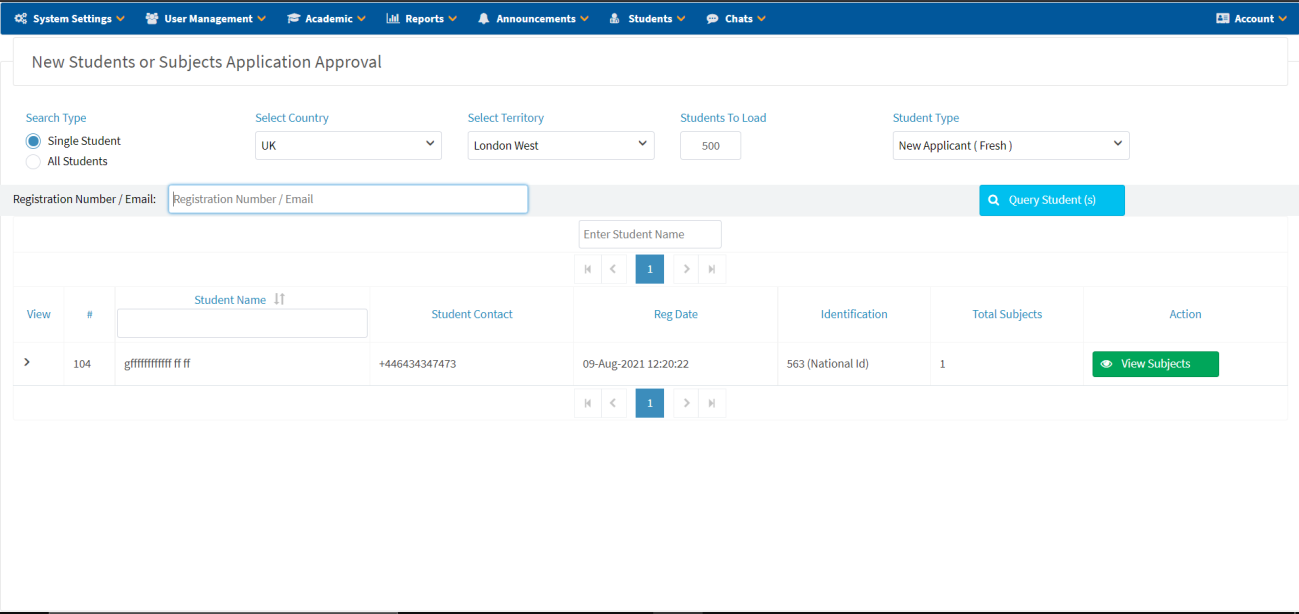
Students/Subjects Approval
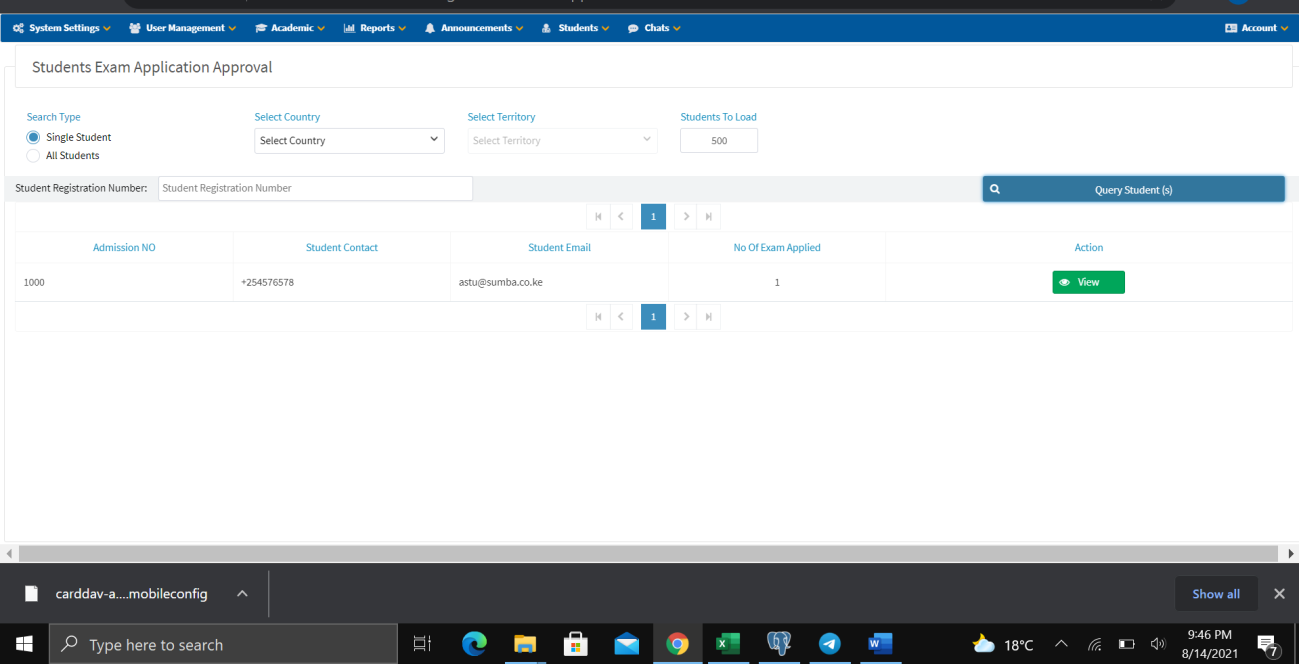
- Select Search Type:
- Single Search — enter student registration number or email address.
- All Students — load all students based on filters.
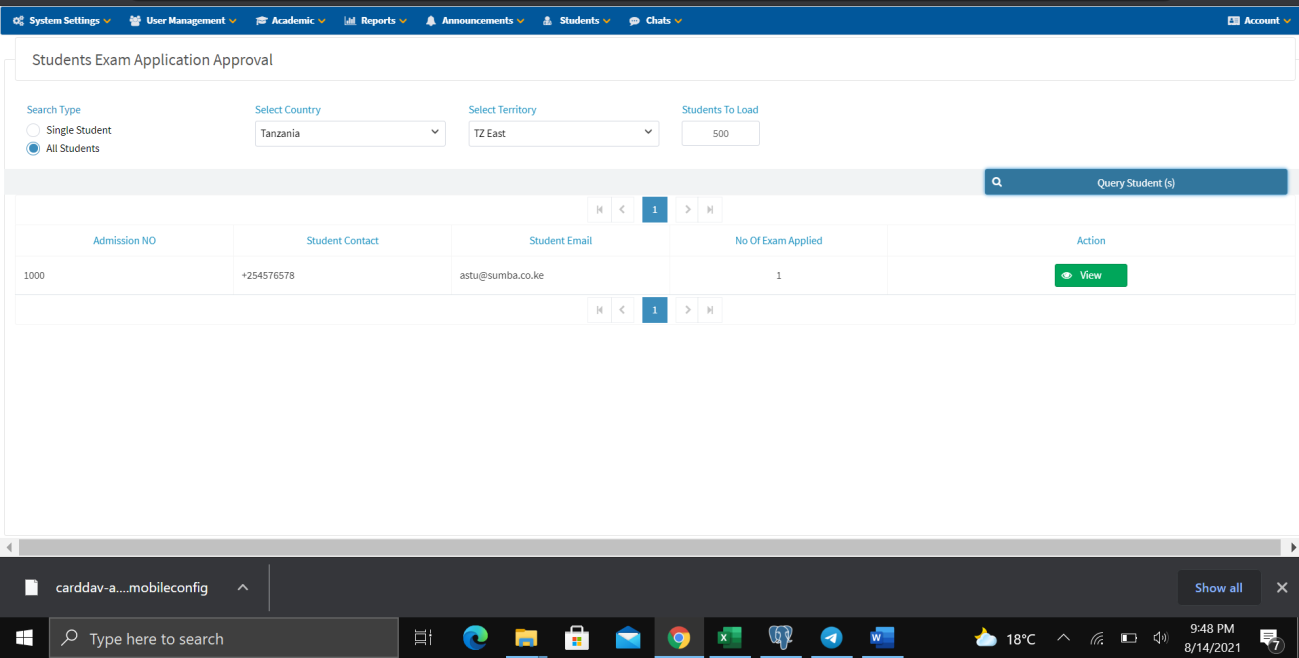
- Select Country from the list.
- Select Territory from the list.
- Select Total Records to Load.
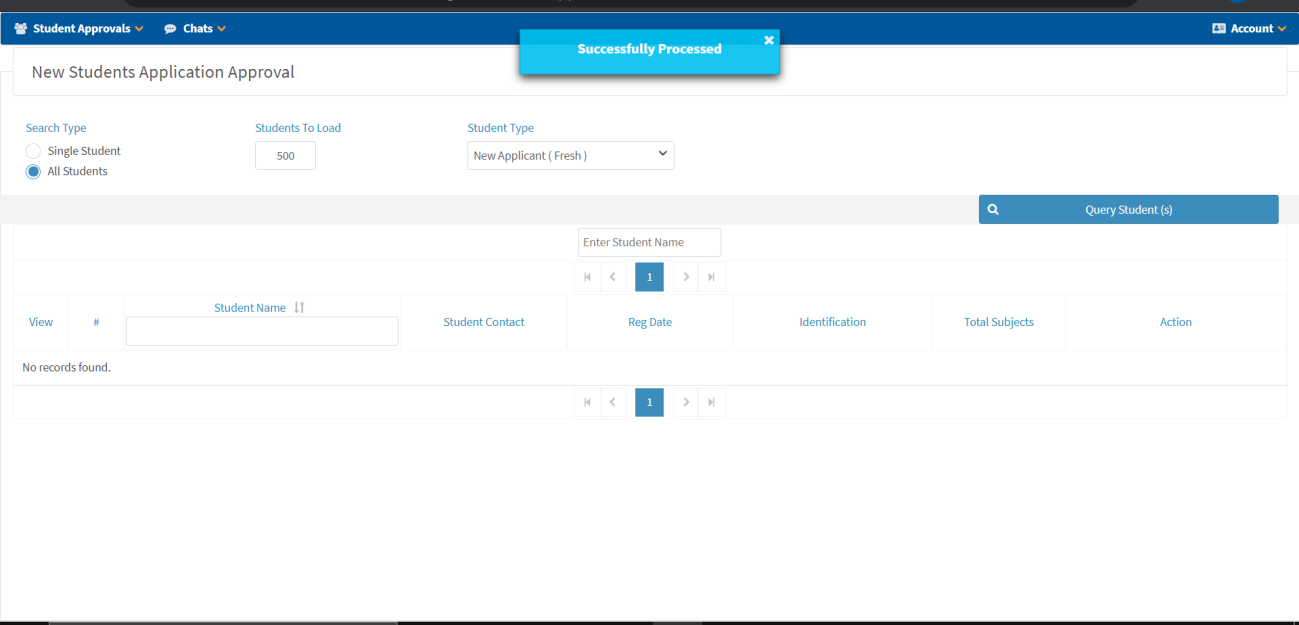
- Select Student Type: New Applicant, Continuing Student, or Continuing Applicants.
- Click Query Student(s).
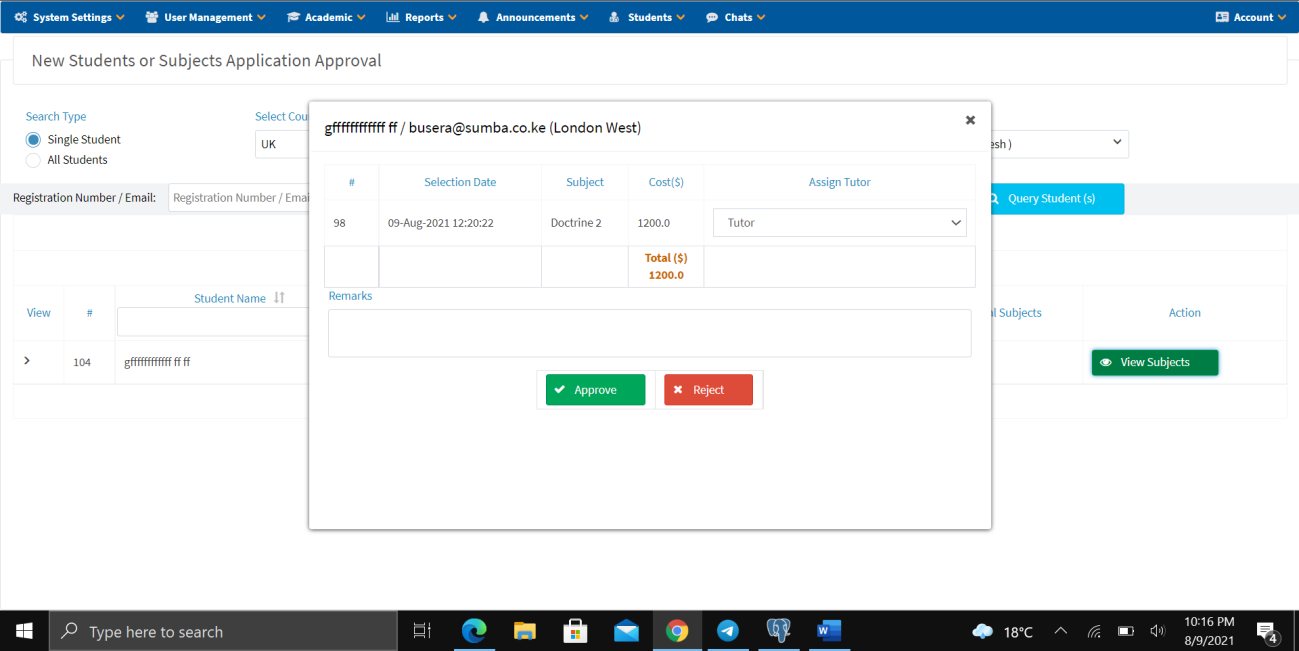
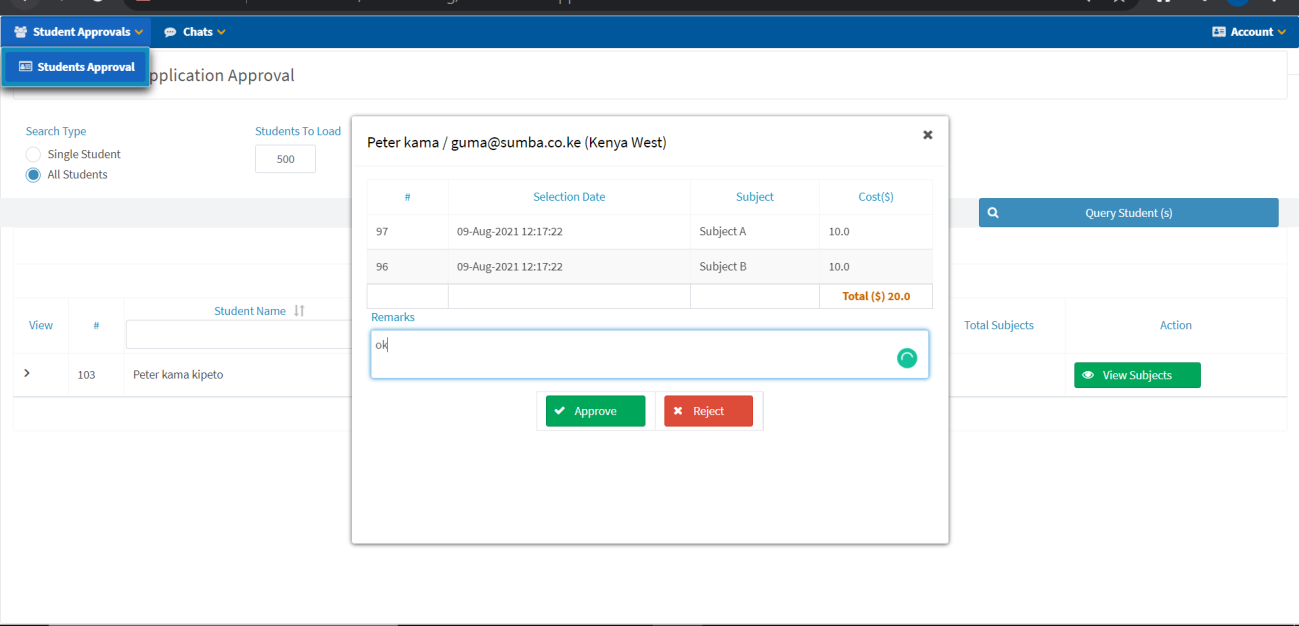
Approve Subject
- Click View Subjects.
- Assign a Tutor.
- Enter your Remarks.
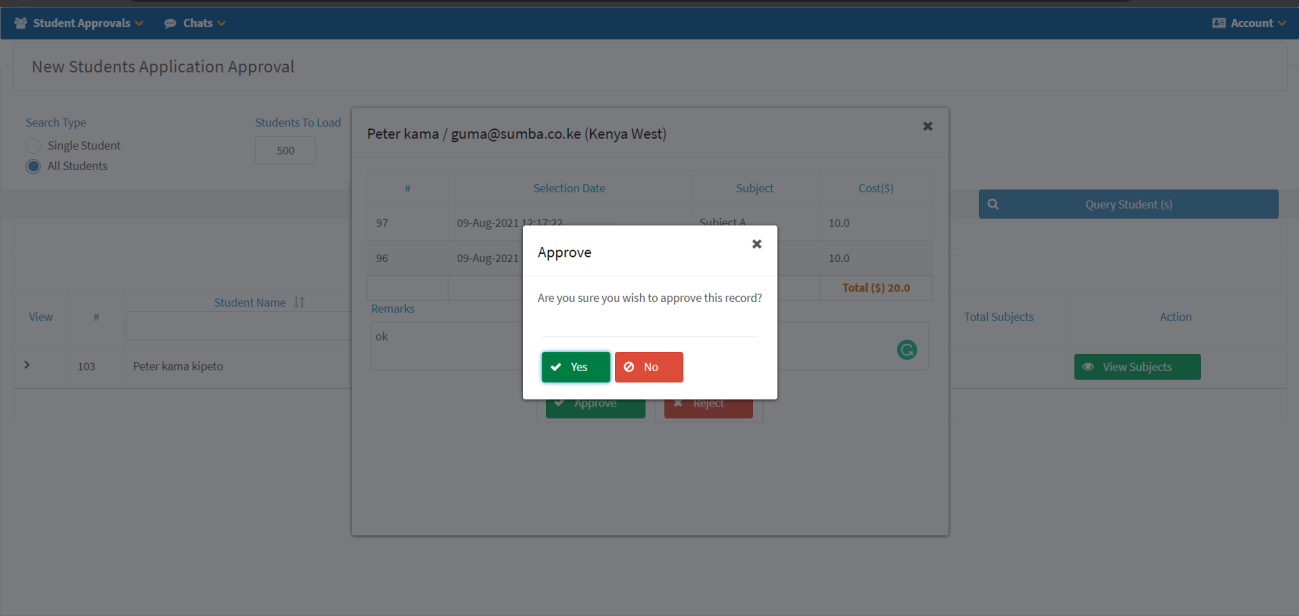
- Click Approve or Reject.
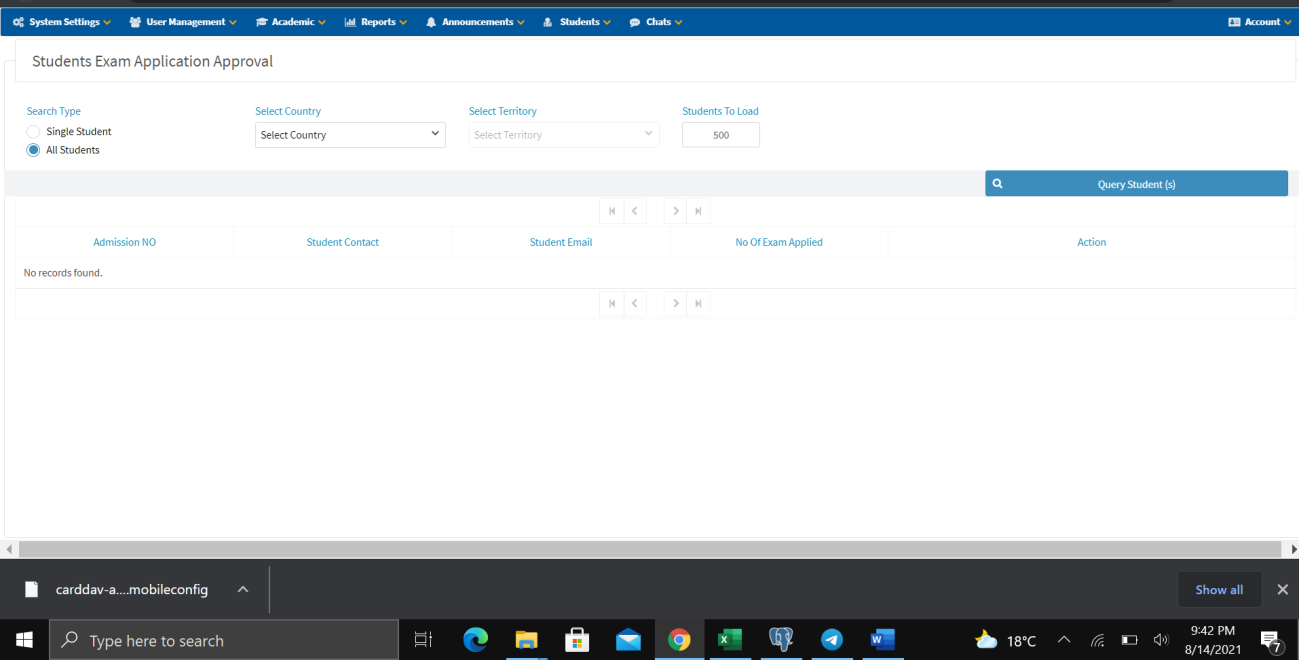
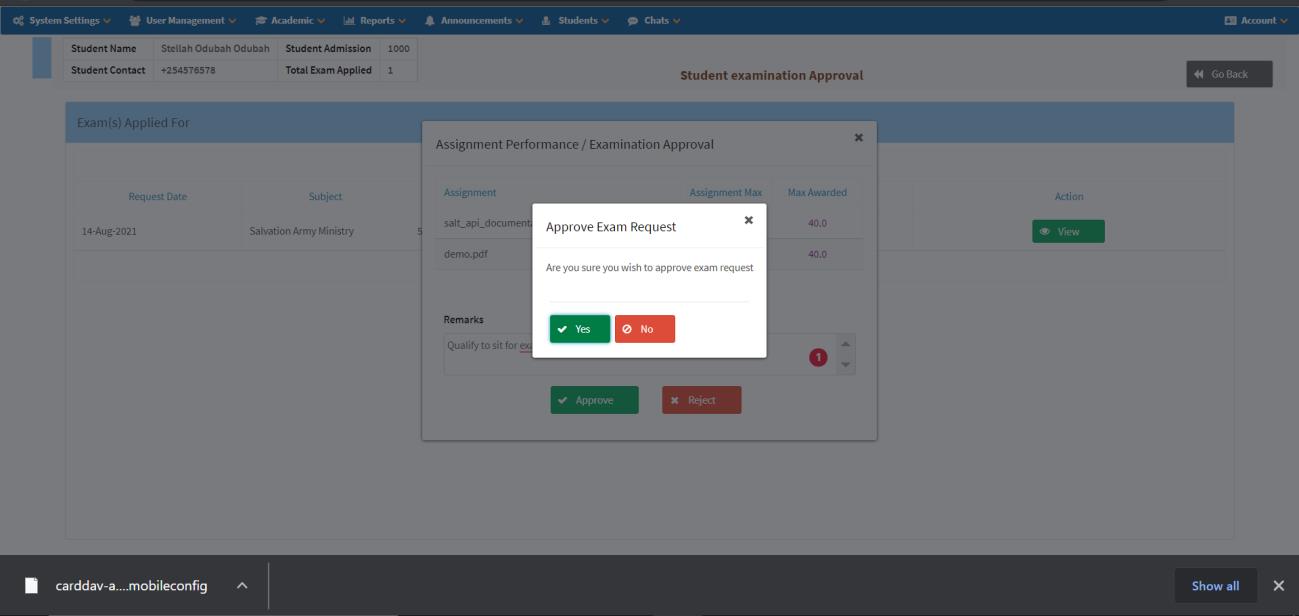
Exam Application Approval
- Navigate to Student → Approval → Exam Application.
- Search for the student (single or all students).
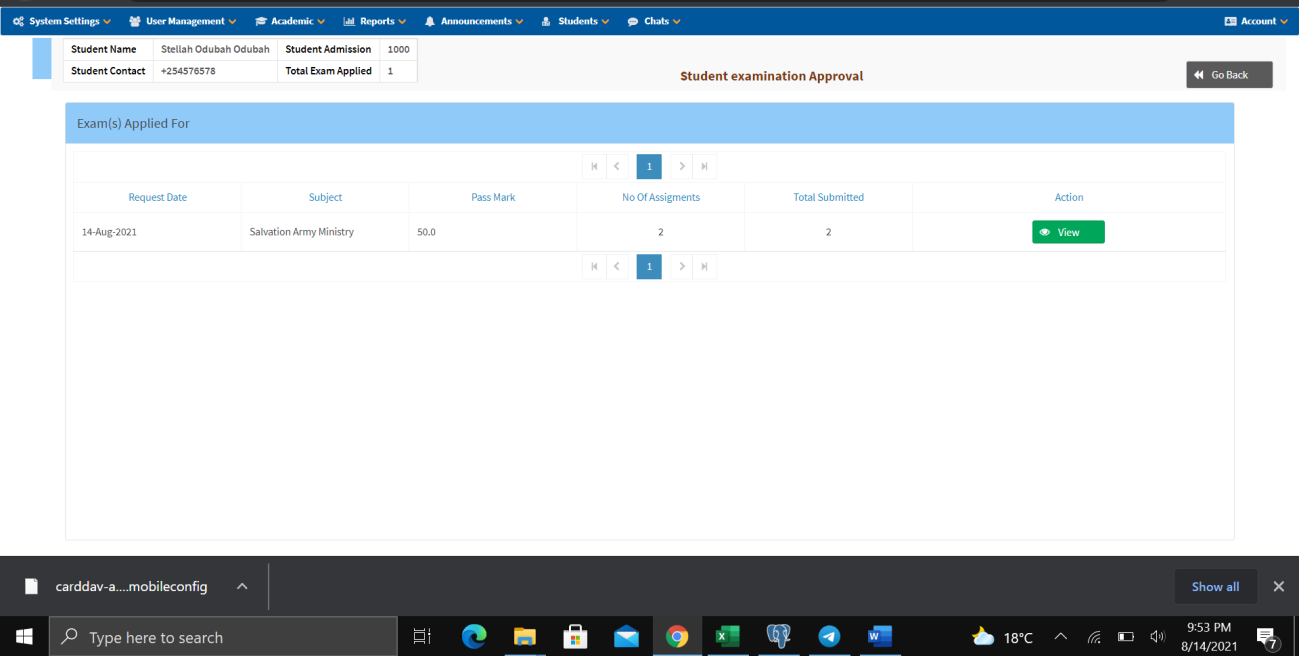
- Click View to see the student's exam applications.
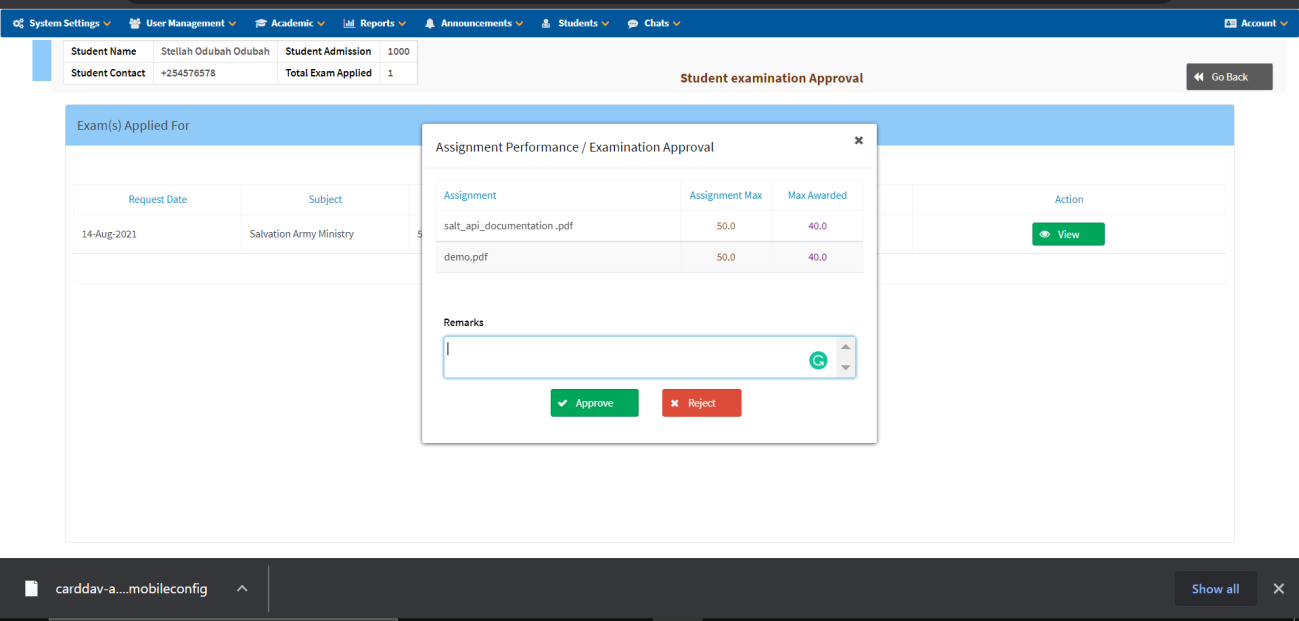
- Review the assignment performance and examination details.
- Enter Remarks.
- Click Approve or Reject.
- Click Yes or No to confirm.
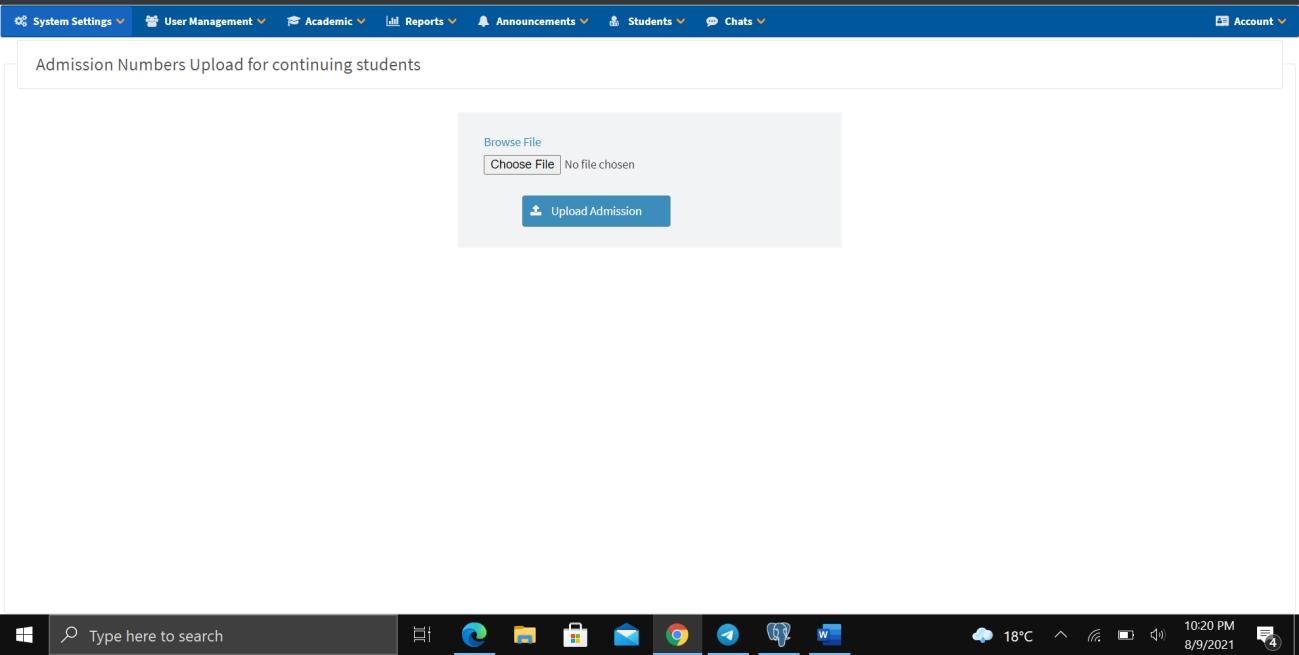
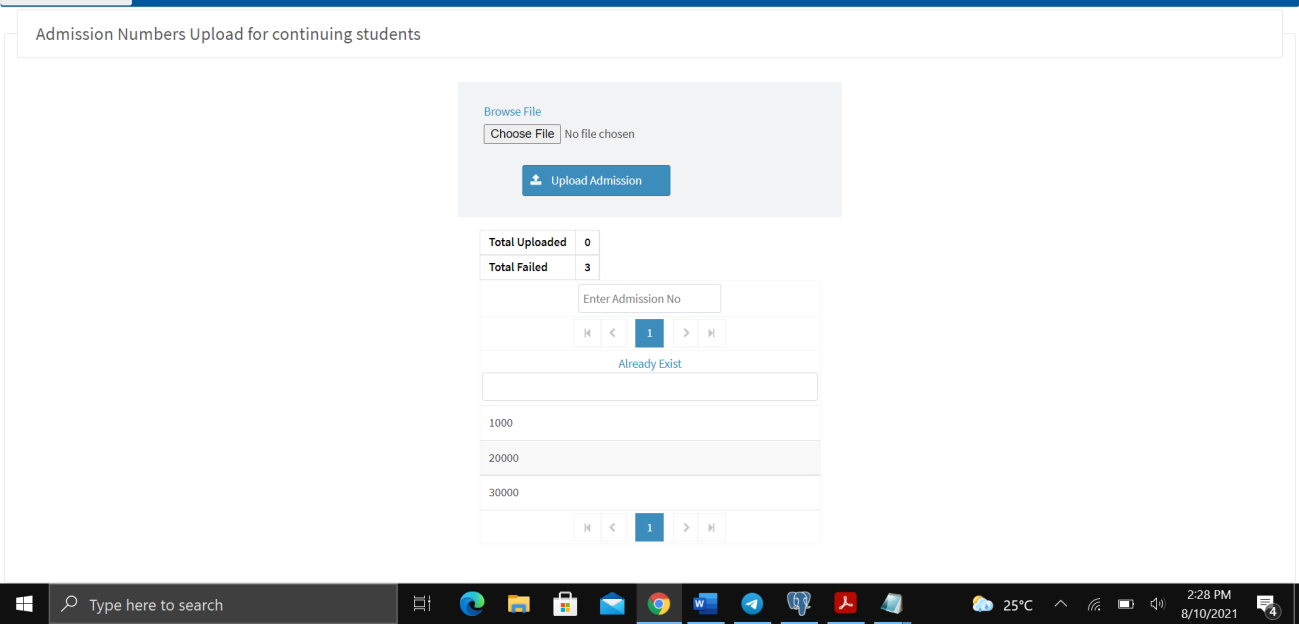
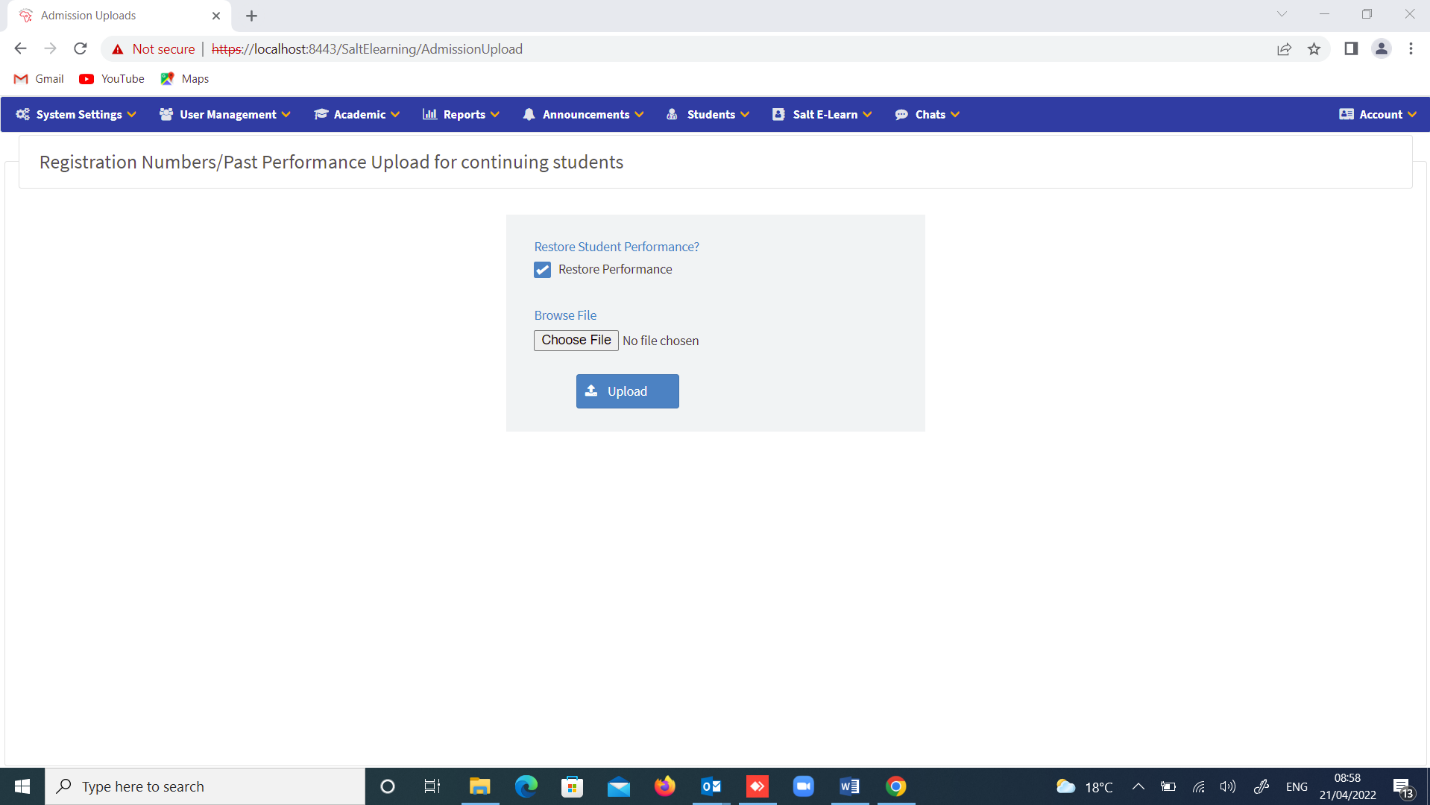
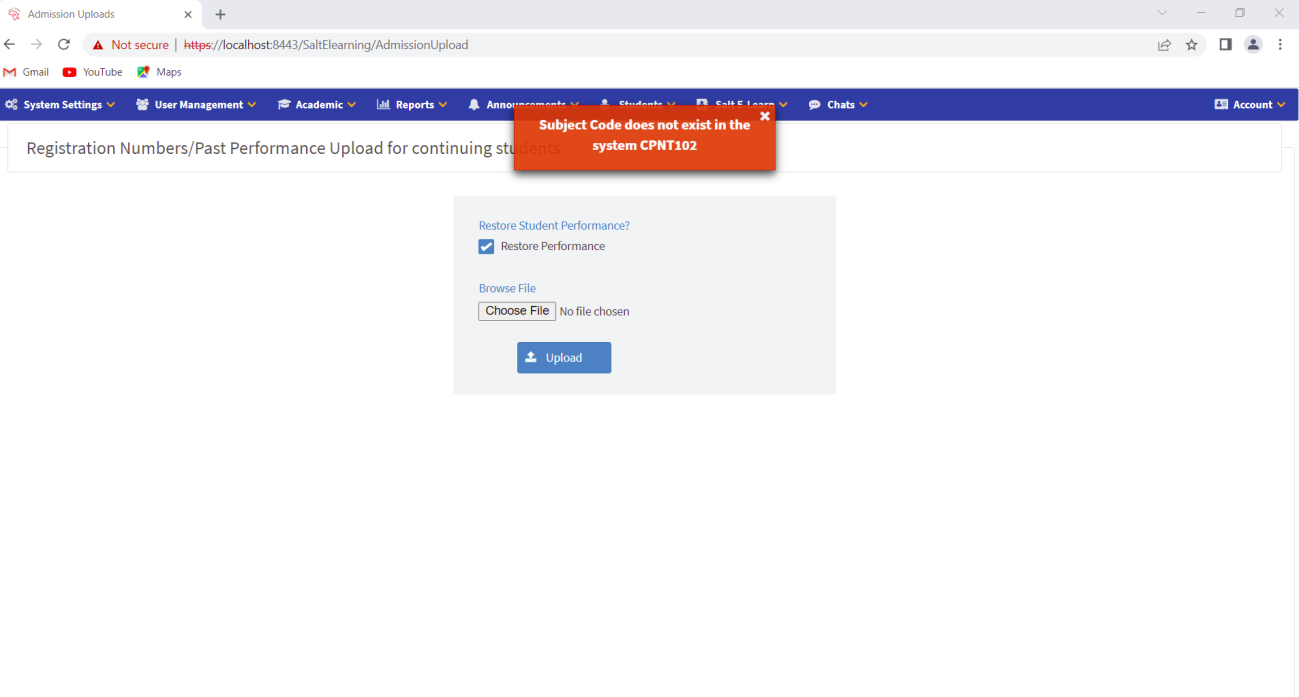
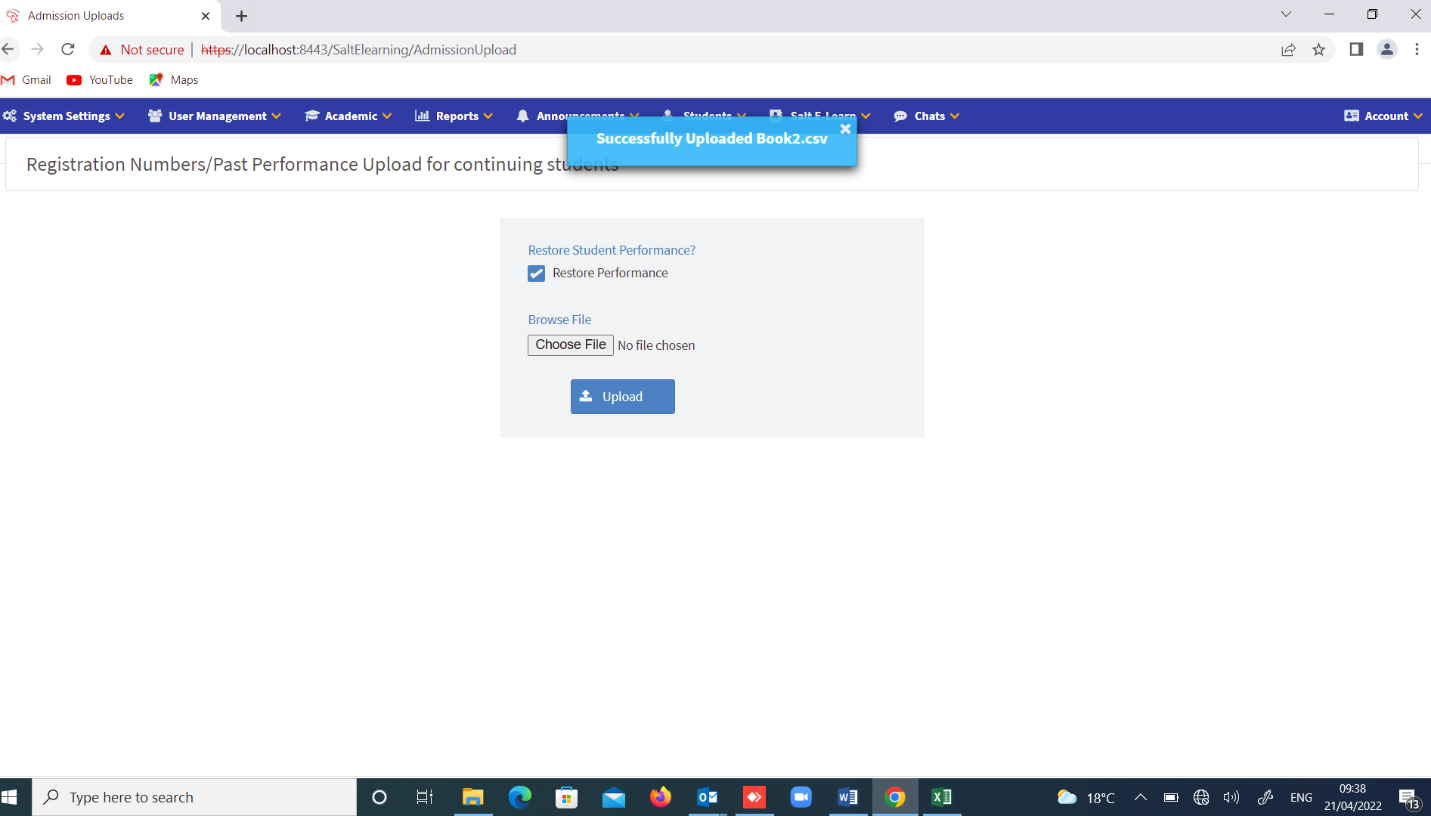
Admission Numbers / Registration Numbers Upload
- Navigate to Admissions Upload.
- Browse and select a CSV file on your PC.
- Click Upload Admission.

The system will display the total uploaded and total failed records, along with any already-existing admission numbers.
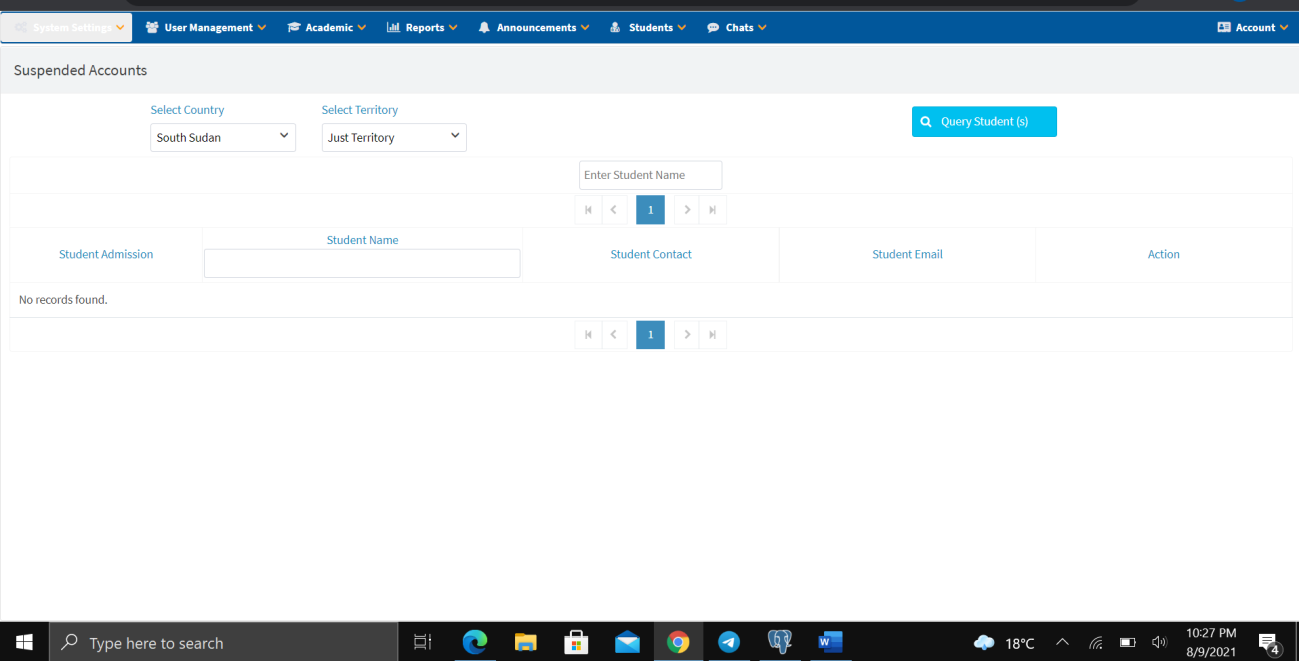
Suspended Accounts
- Select Country and Territory.
- Click Query Student to show all suspended accounts after the expiry period of one year and six months.
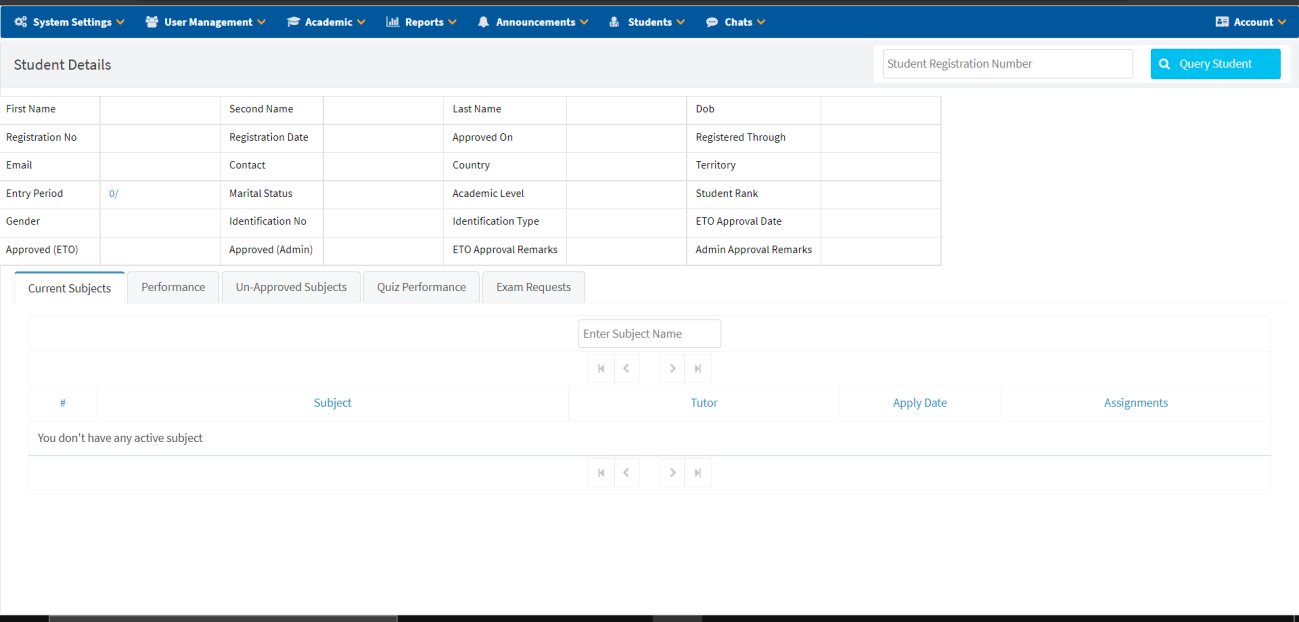
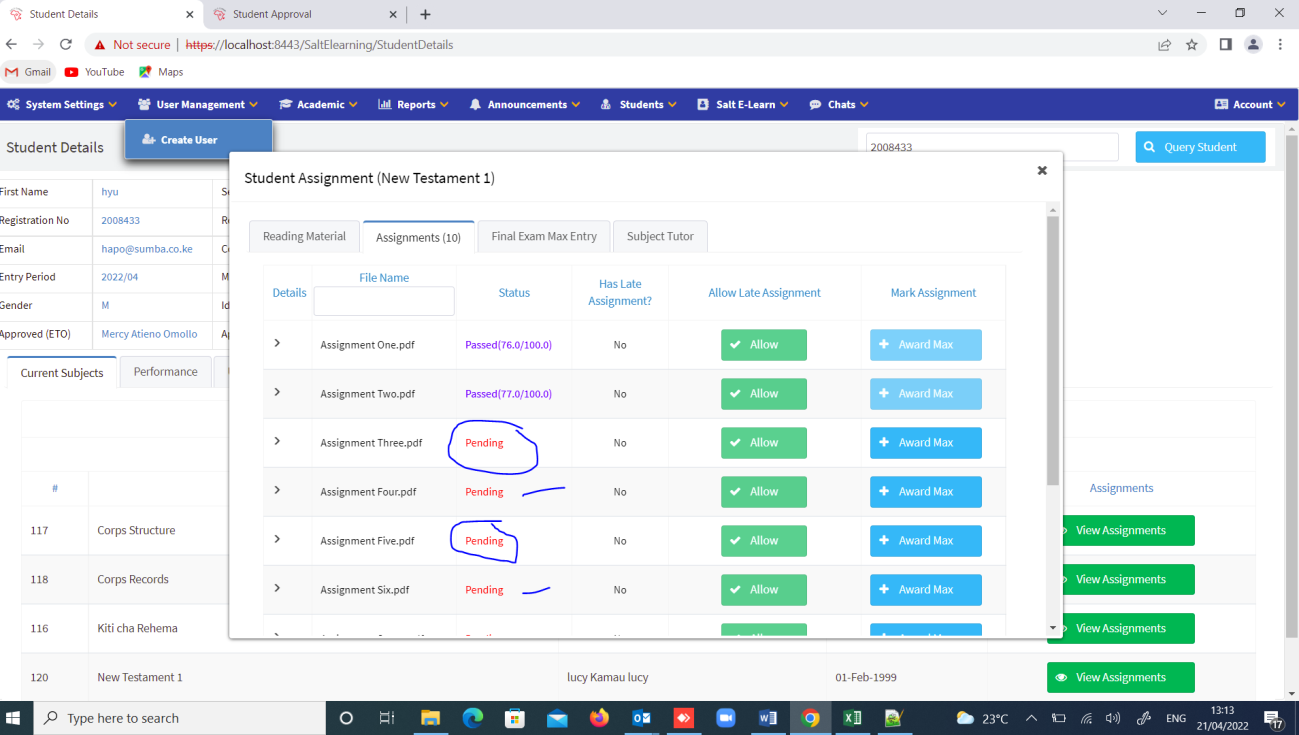
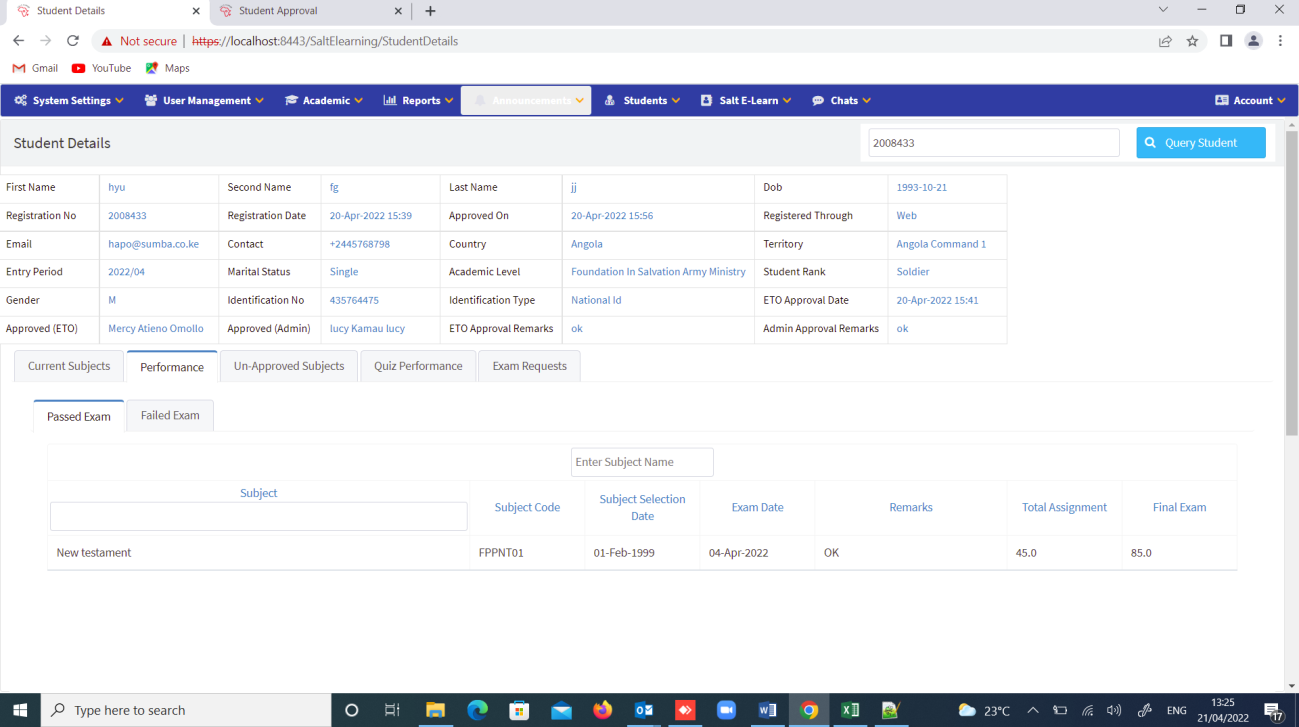
Student Details
View comprehensive student information including: personal details, current subjects, performance, un-approved subjects, quiz performance, and exam requests. Enter the Student Registration Number and click Query Student.
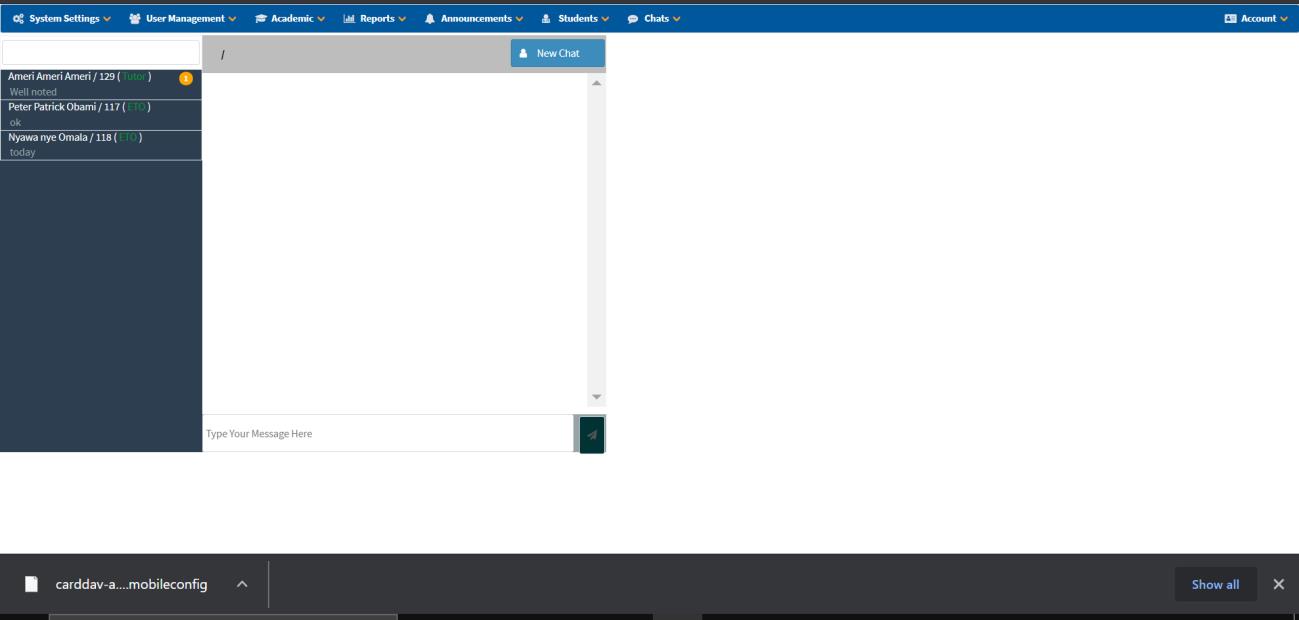
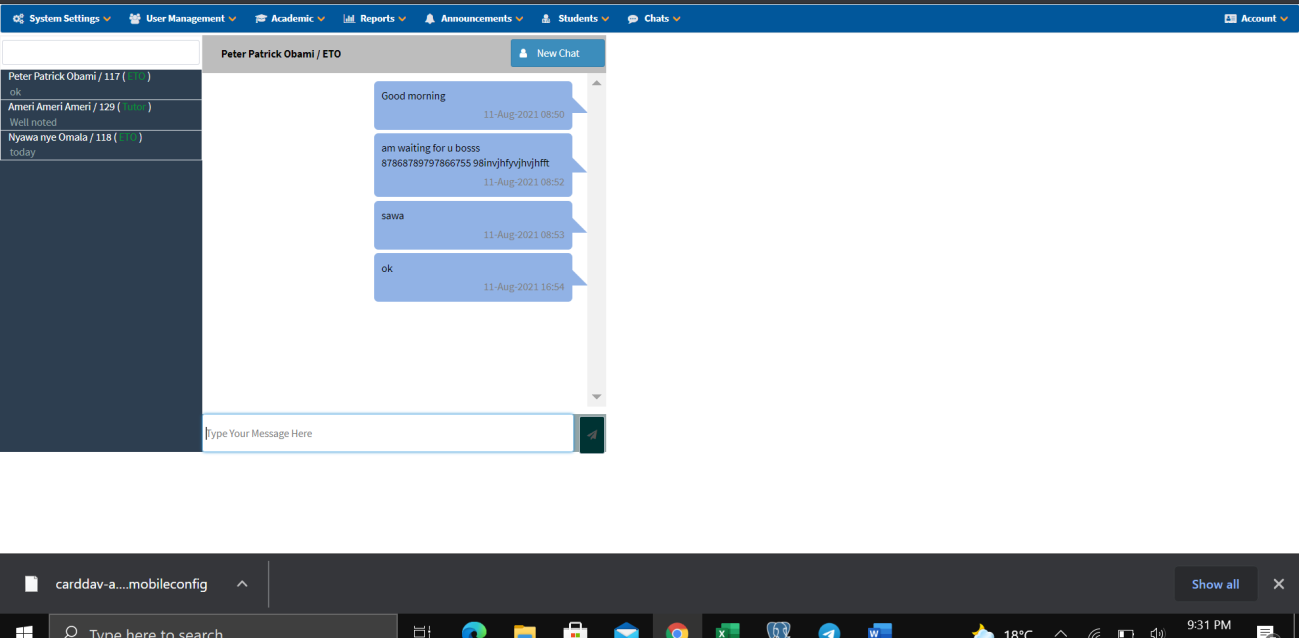
Chat
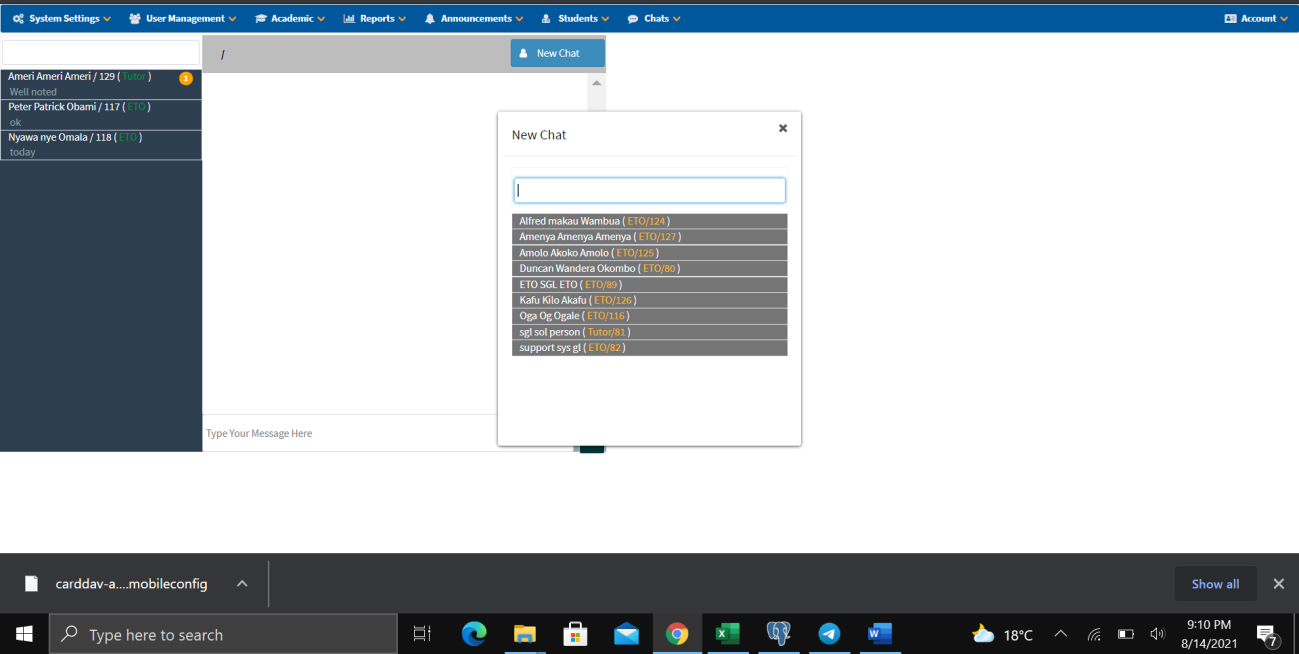
- Navigate to Chat from the top menu.
- Click New Chat.
- Search for or click on the person you want to chat with from the contact list.
- Click to initialize the chat.
- Type your message in the message box and send.
Account
- Click Logout to sign out of the system.
- Click Home to go to the dashboard.
Tutor Functionalities
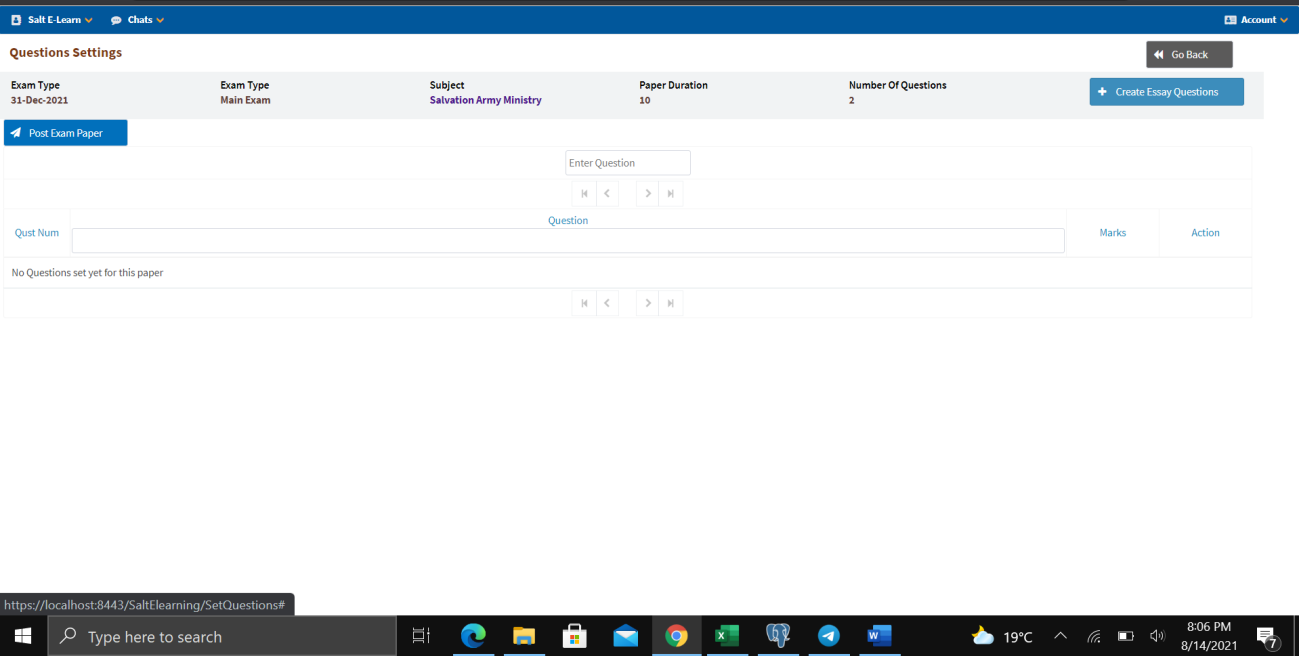
Set Exam (Essay)
- Navigate to Salt E-Learn → Exams → Set Exam.
- Click + Create Exam Paper.
- Choose Examination Type: Essay.
- Select the Subject.
- Enter Total Number of Questions.
- Enter Duration (in minutes).
- Select the Exam Date.
- List all Instructions.
- Click Create Exam Paper.
- Click Yes to save.
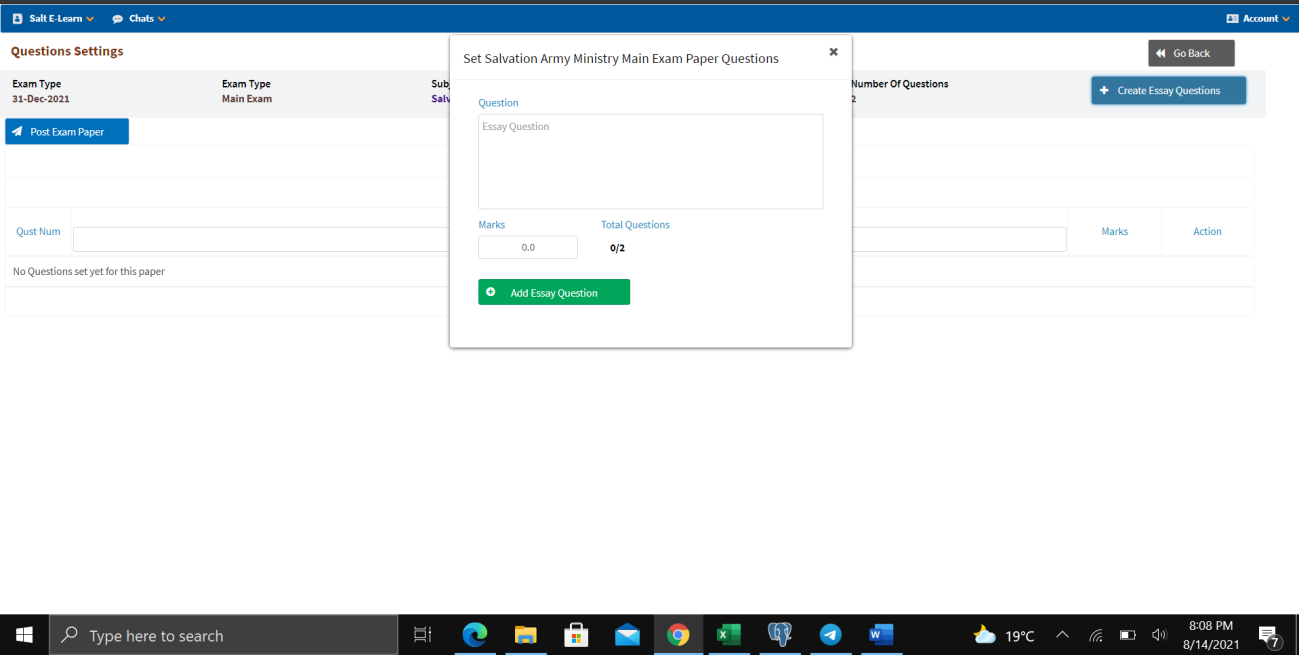
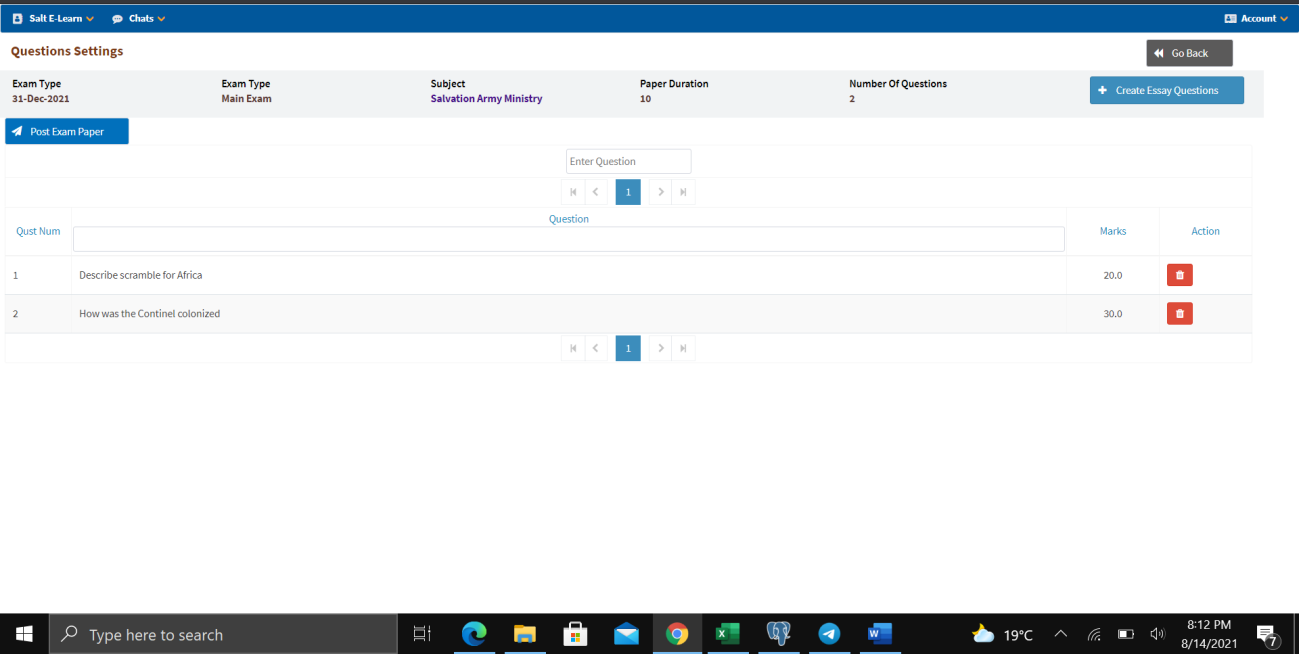
Add Questions
- Click the View icon to show exam paper details.
- Click + Add Questions.
- Click + Create Essay Questions.
- Type in the Question.
- Enter the Marks.
- Click Add Essay Question.
- Close the window after adding all questions.
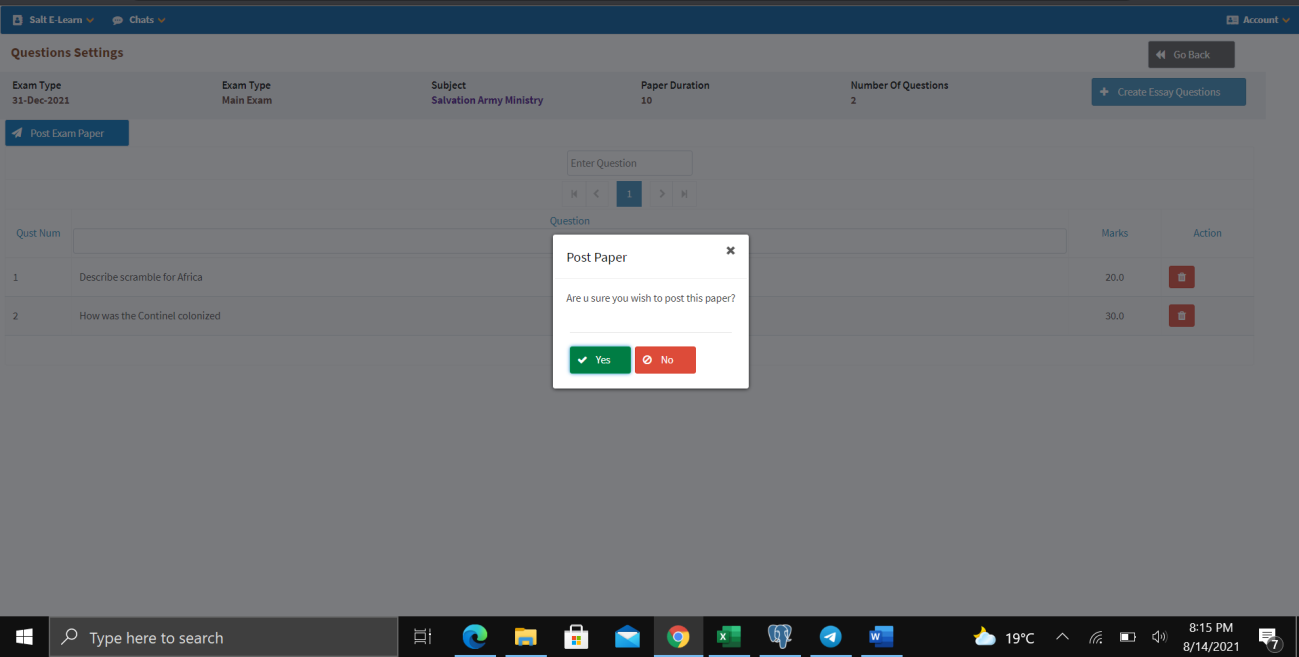
- Click Post Exam Paper to submit to the admin for review.
- Click Yes to confirm posting.
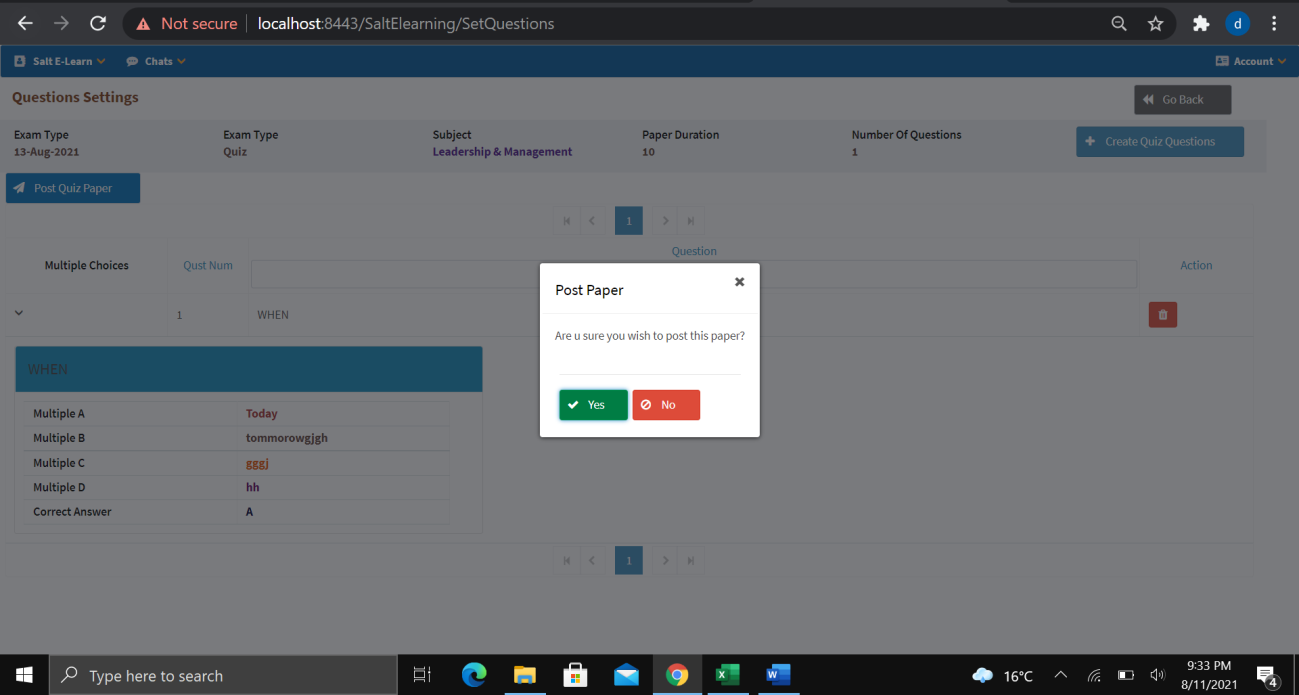
Set Quiz (Multiple Choice)
- Click + Create Exam Paper.
- Select the Subject.
- Choose Examination Type: Multiple Choice Quiz.
- Select Entry Year and Entry Month.
- Set Quiz Due Date.
- Enter Total Questions.
- Enter Exam Duration (in minutes).
- List all Instructions.
- Click Create Exam Paper.
- Add multiple choice questions with options (A, B, C, D) and the correct answer.
- Click Post Quiz Paper to publish the quiz online.
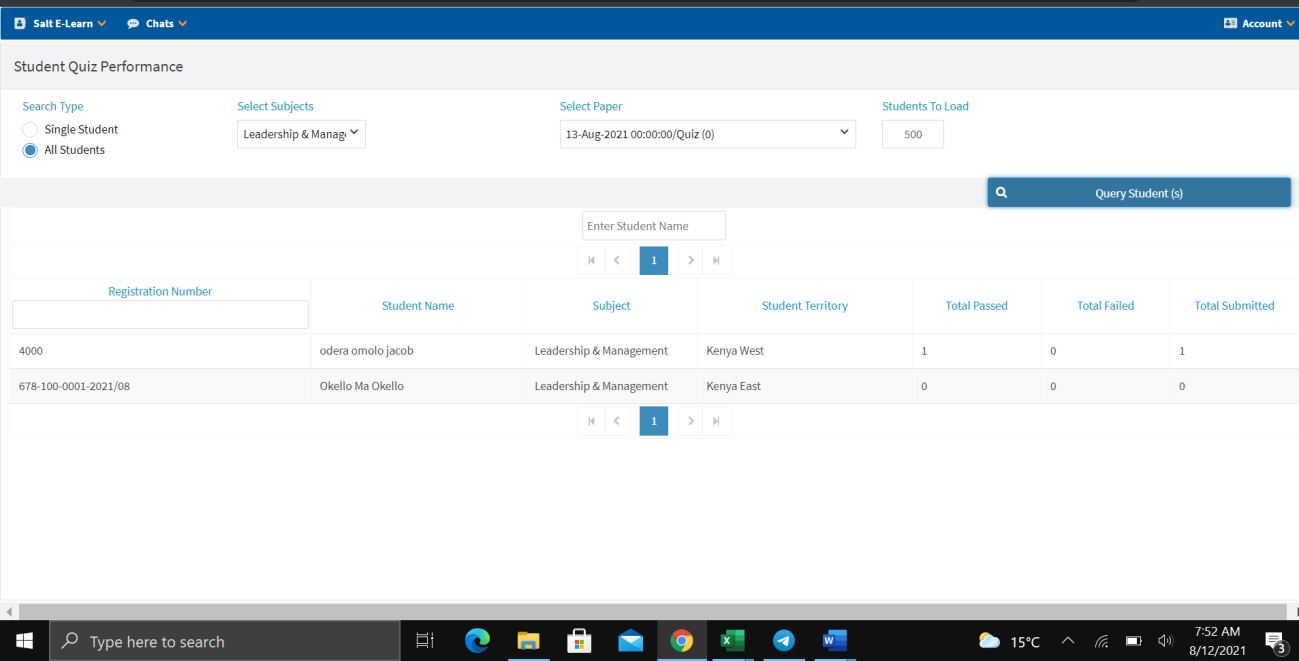
Quiz Performance
- Navigate to Quiz Performance.
- Select Search Type (Single Student or All Students).
- Select the Subject.
- Select the Paper/Date.
- Click Query Student(s).
Results display student registration number, name, subject, territory, total passed, total failed, and total submitted.
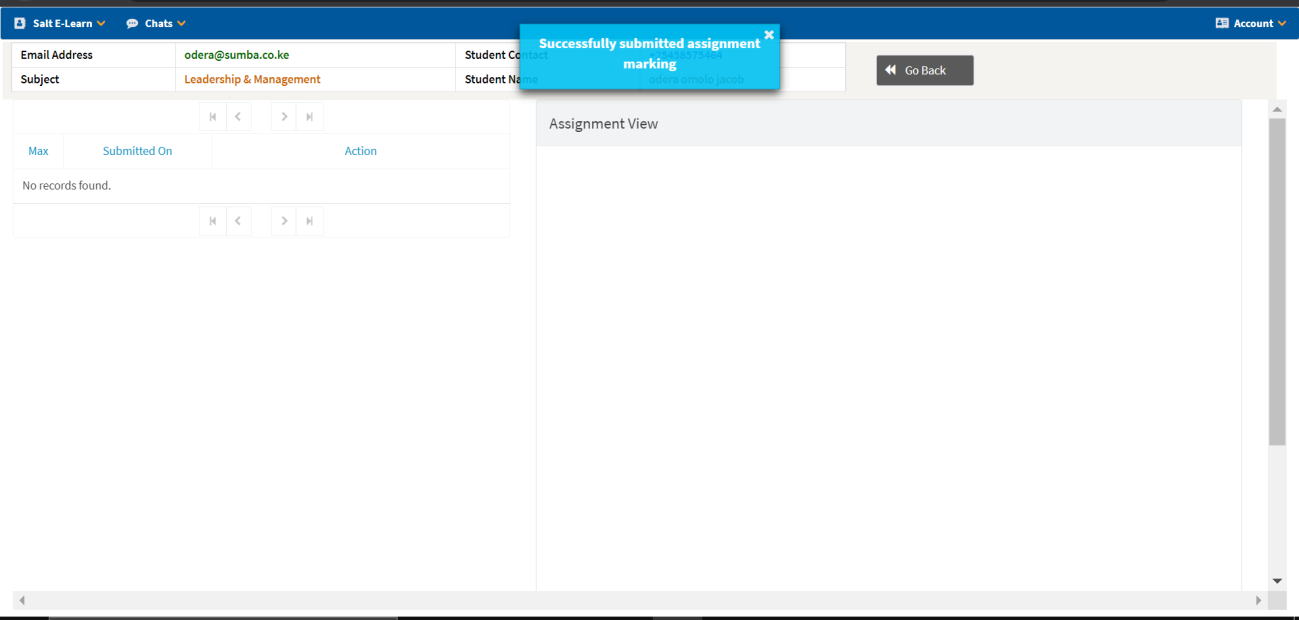
Exam Marking
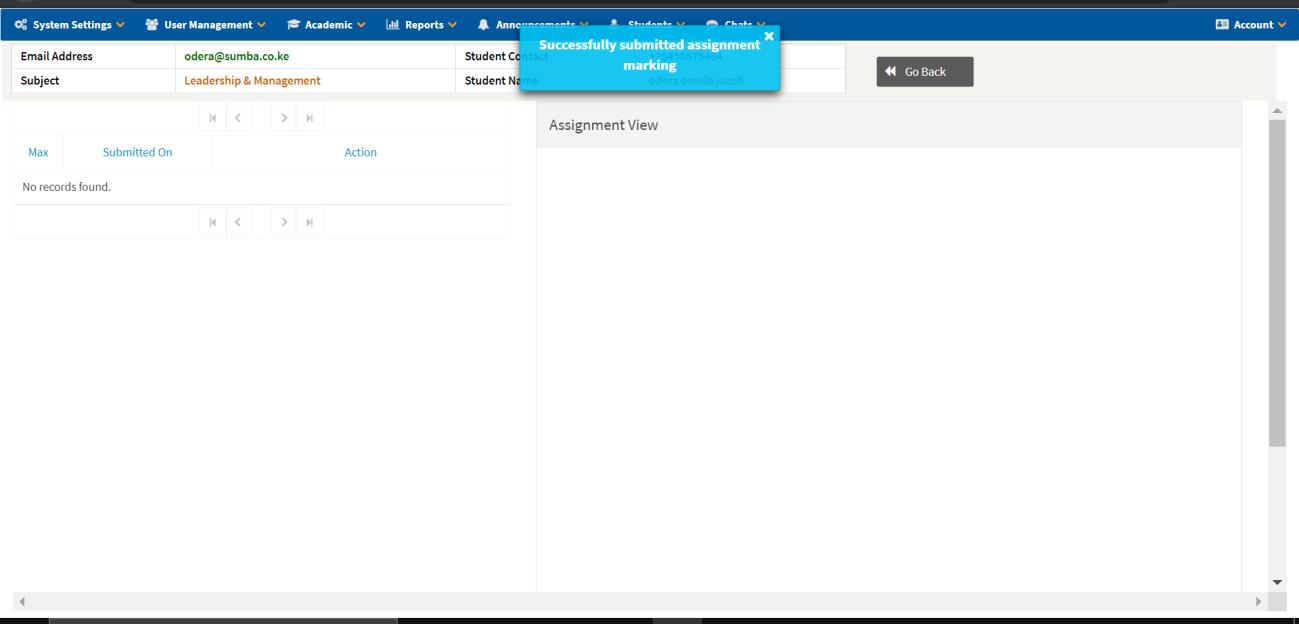
Assignment Marking
- Navigate to Salt E-Learn → Exam Marking → Assignment.
- Select the Subject, Entry Month, Entry Year, and Students to Load.
- Click Query Student(s).
- Award marks appropriately.
- Submit as marked assignment.
ETO Functionalities
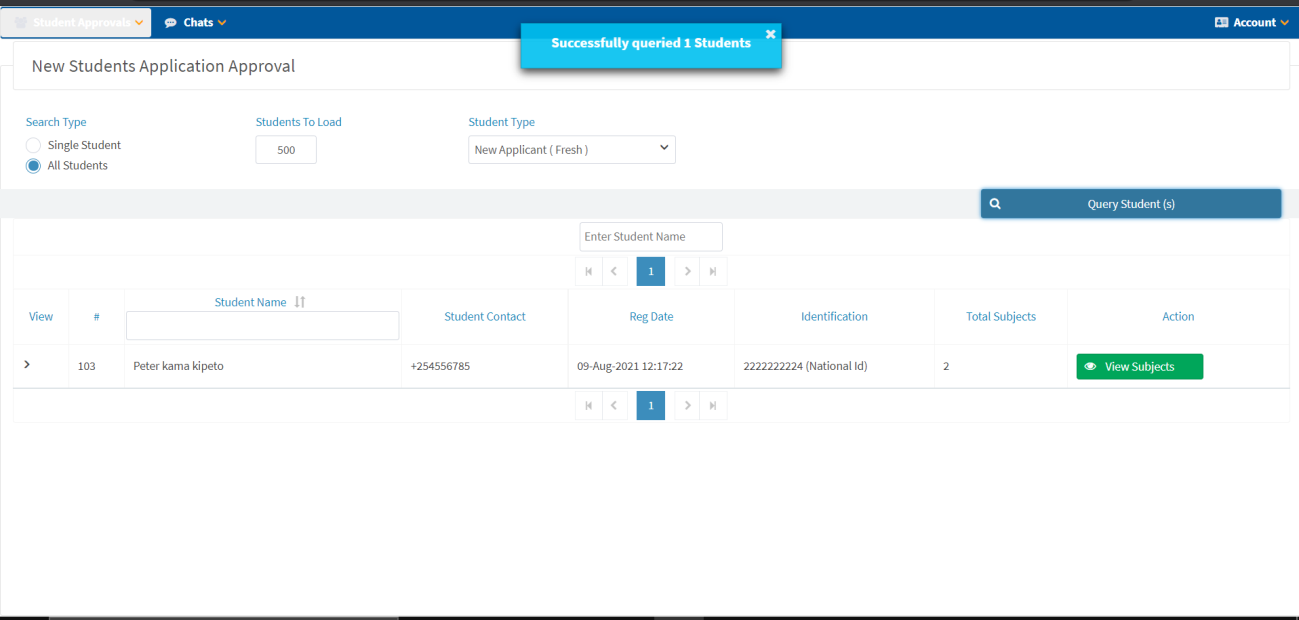
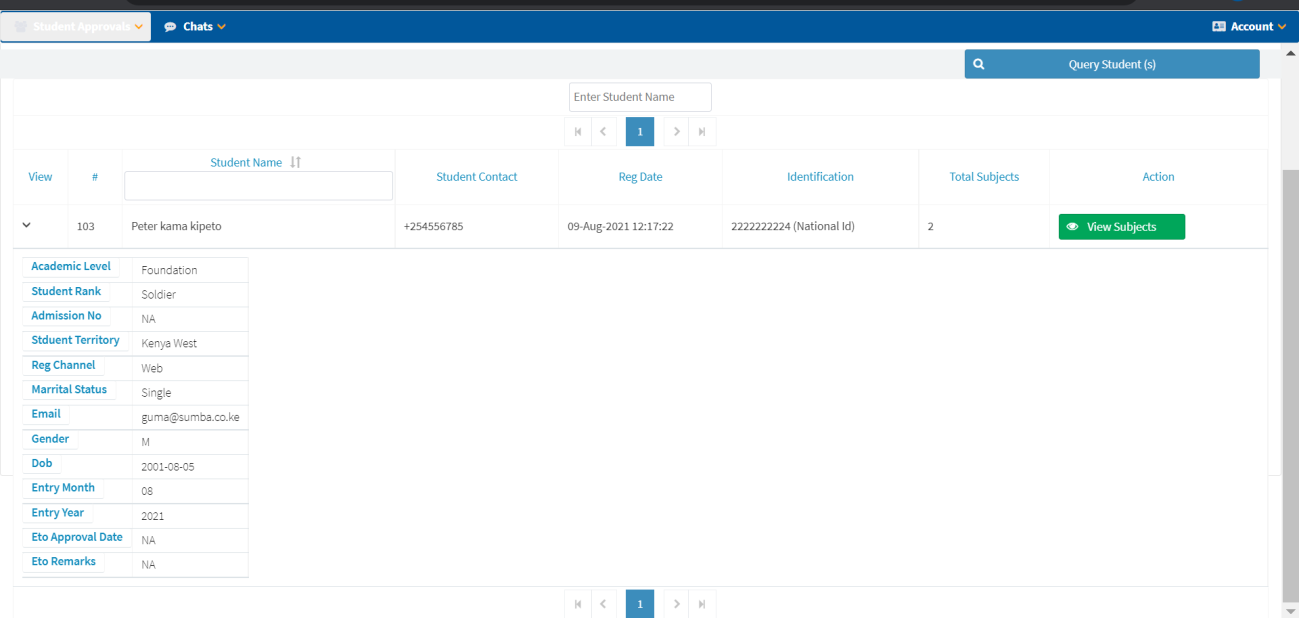
Student Approval
- Navigate to Student Approvals.
- Select Student Type (New Applicant/Fresh).
- Set Students to Load.
- Click Query Student(s).
- Click View Subjects to see the student's selected subjects.
- Review student details (Academic Level, Student Rank, Territory, etc.).
- Provide Remarks.
- Click Approve or Reject.
- Click Yes to confirm approval.
Student Functionalities
After logging in, students can see school announcements on their dashboard/home page.
Subjects
Current Subjects
- Navigate to Academic → Subjects.
- Click on a Subject to view details.
- Click View Assignments to see assigned materials.
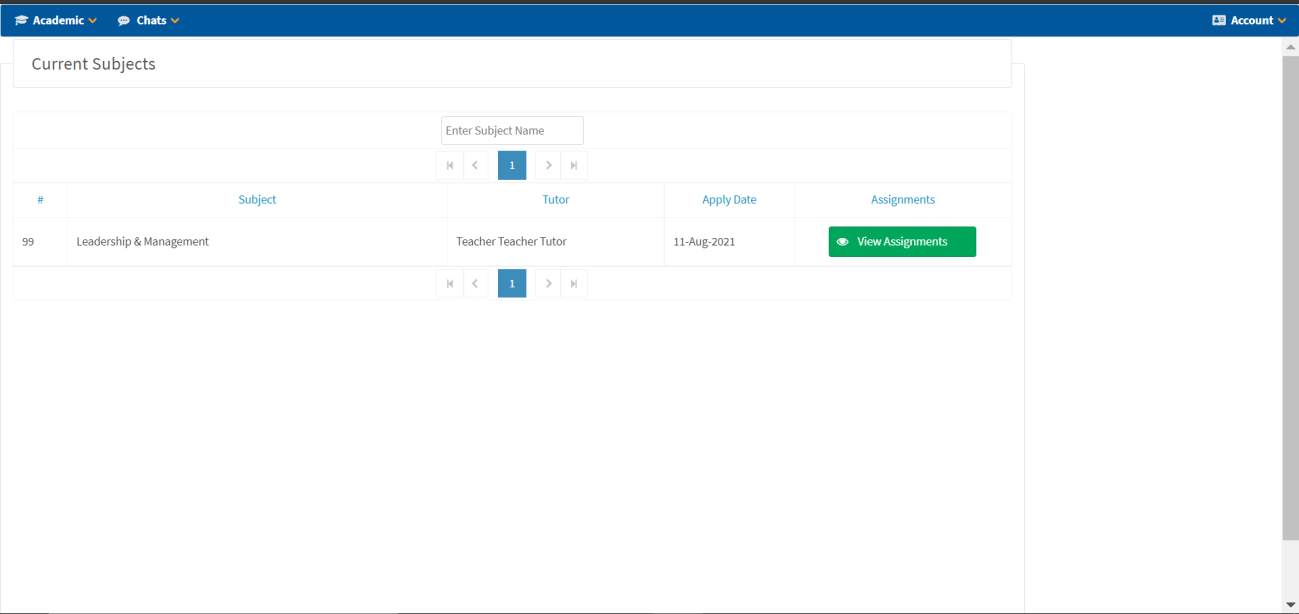
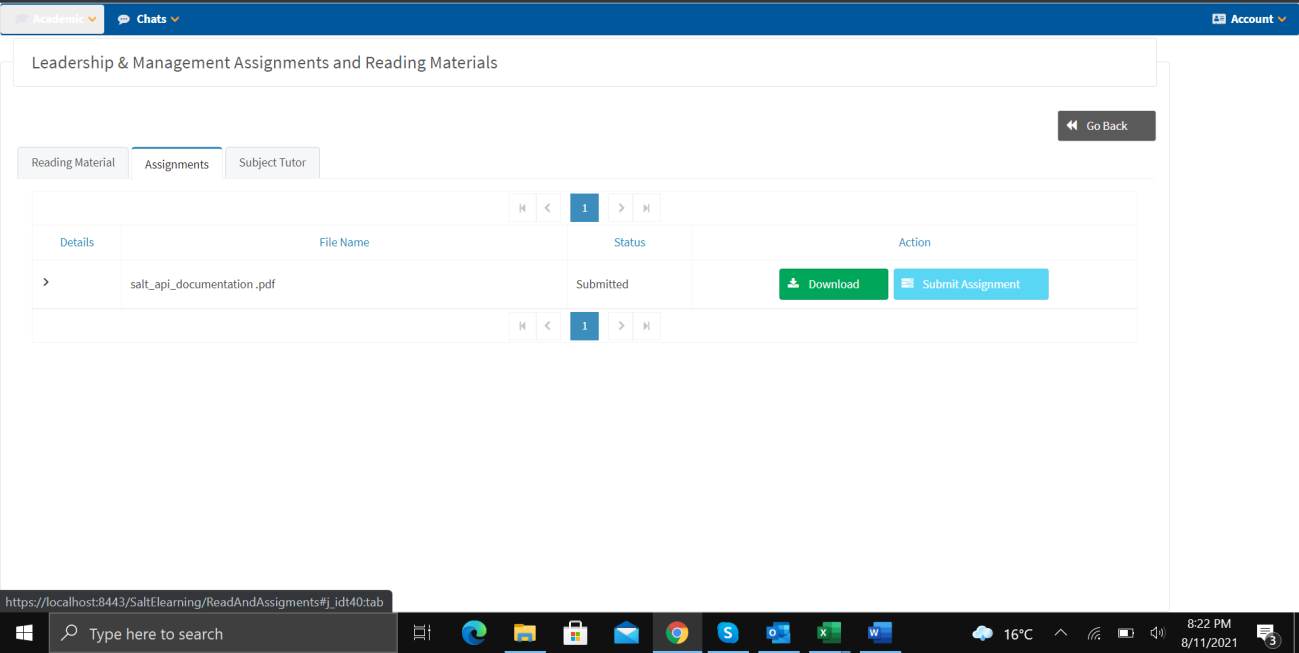
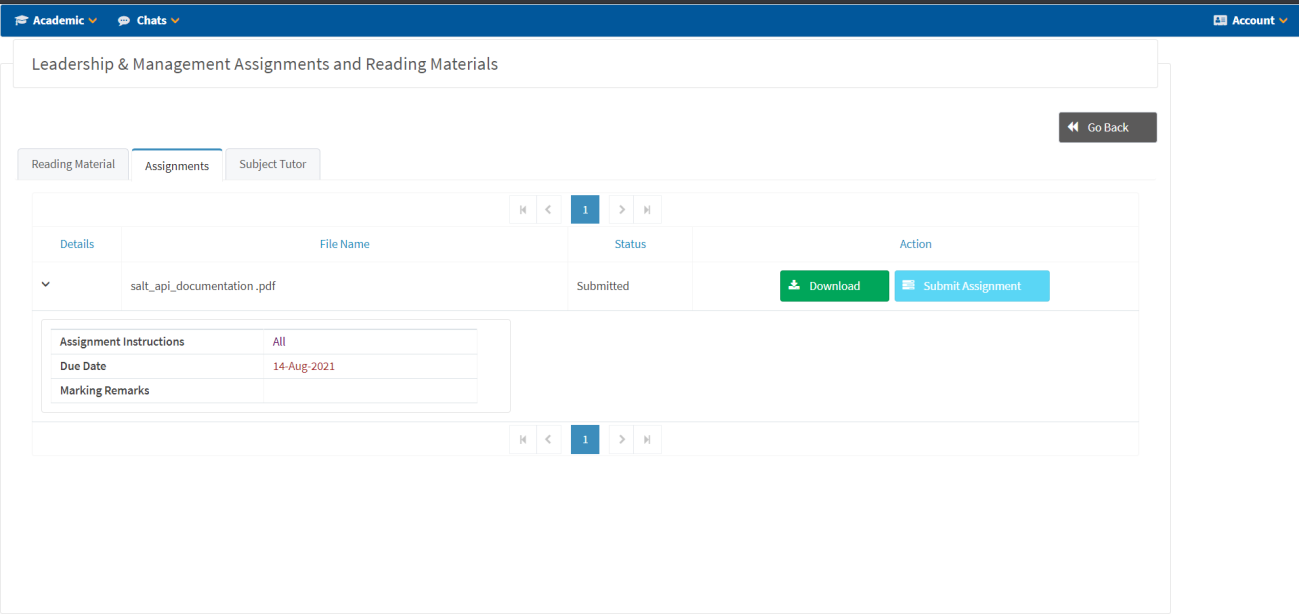
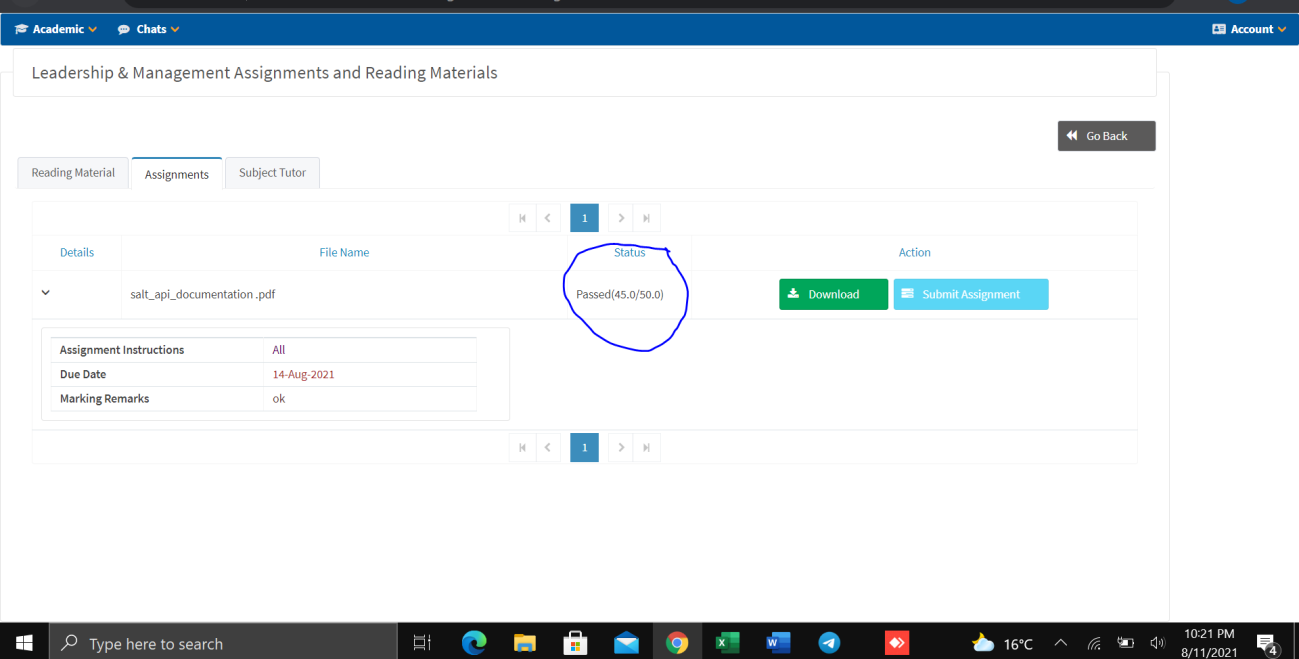
Under each subject, students can access three tabs:
| Tab | Description |
|---|---|
| Reading Material | Download reading materials provided by the tutor |
| Assignments | Download assignments, submit completed work, view status and marks |
| Subject Tutor | View assigned tutor information |
Apply for New Subjects
Navigate to Academic → Apply New to enroll in additional subjects.
Exams
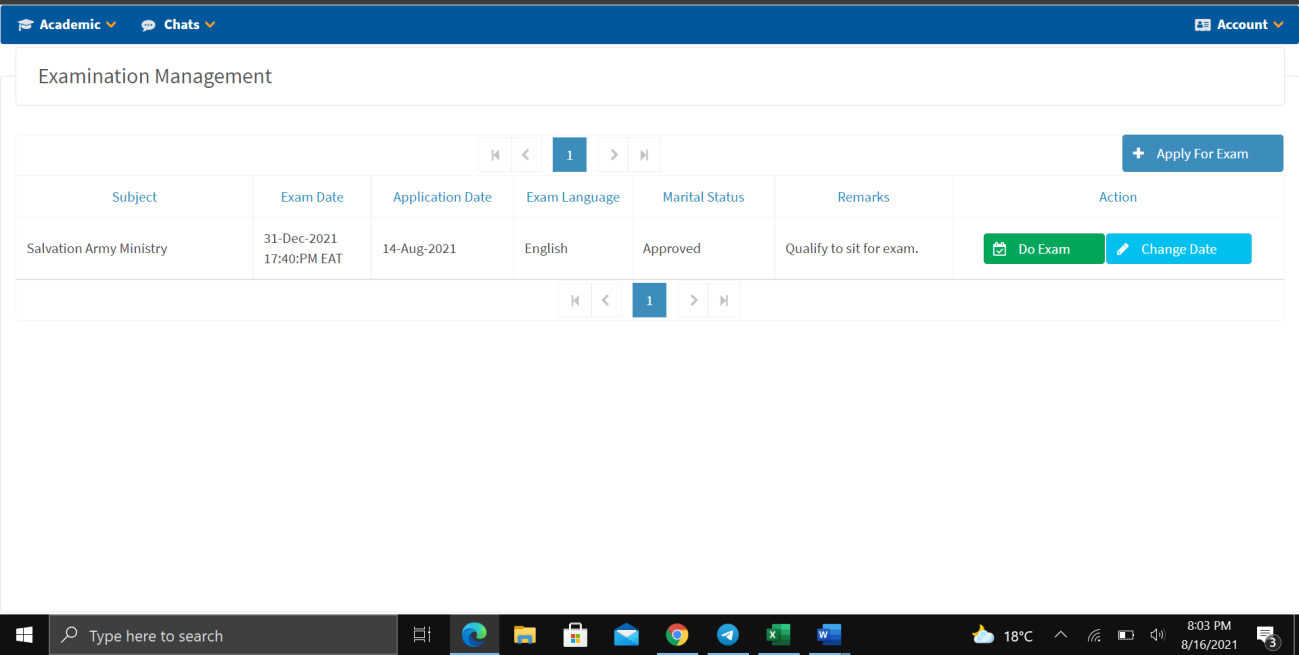
Apply for Exam
- Navigate to Exam → Apply Exam.
- Click + Apply For Exam.
- Wait for approval from administration.
- Once approved, the status will show Approved with remarks.
- Click Do Exam to sit for the examination.
- Click Change Date to request a date change (if applicable).
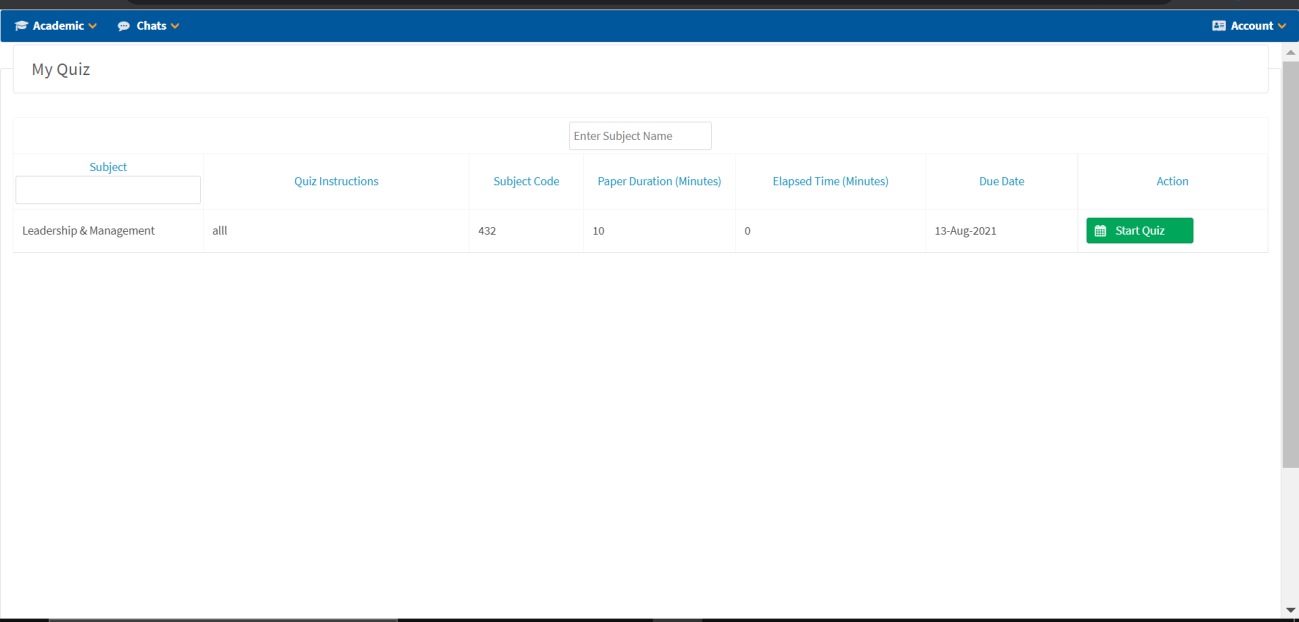
My Quiz
- View available quizzes with subject, instructions, duration, and due date.
- Click Start Quiz to begin.
- Answer all questions within the time limit.
- Click Save Changes to save progress.
- Click Submit Quiz when finished.

After submission, the system displays total submitted, total passed, and total failed.
Past Quiz & My Performance
Students can view their past quiz results and overall performance from the Academic menu.
E-Learning Android Mobile Application
The College E-Learning system is also available as an Android mobile application with the following features:
| Feature | Description |
|---|---|
| Student Registration | Register as a new student or continuing student |
| Login & 2FA | Login with two-factor authentication |
| Chat | Real-time messaging with tutors and staff |
| Academic | Access quizzes, main exams, assignments, and reading materials |
| View Performance | Check academic performance and grades |
Editing Student Marks
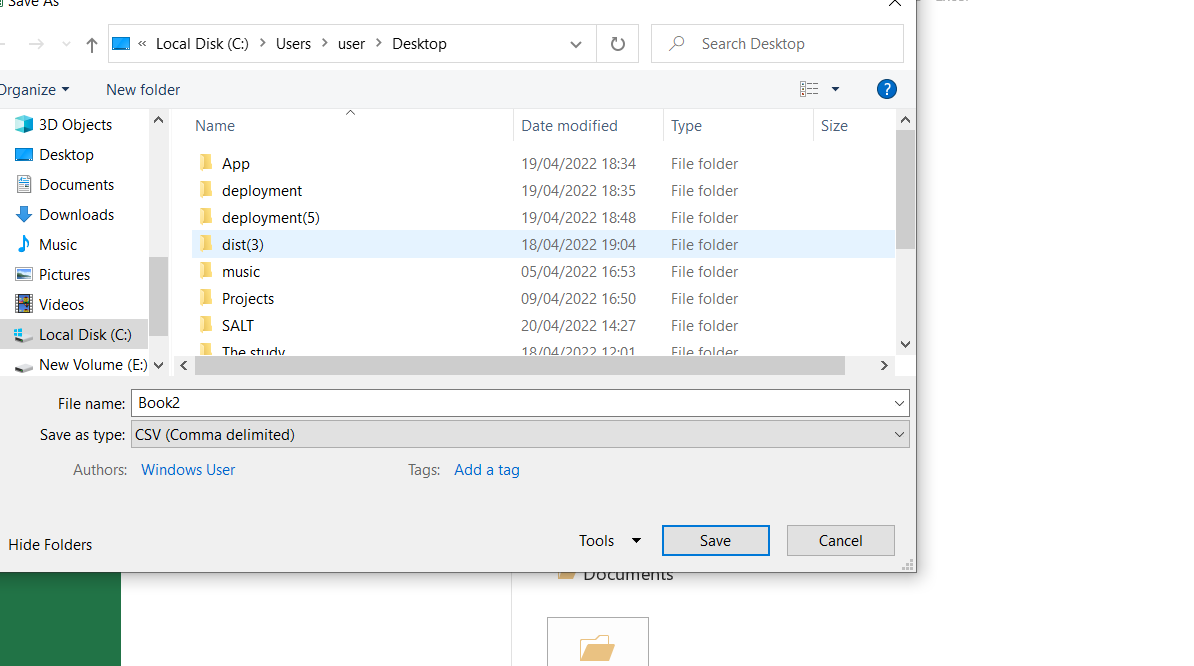
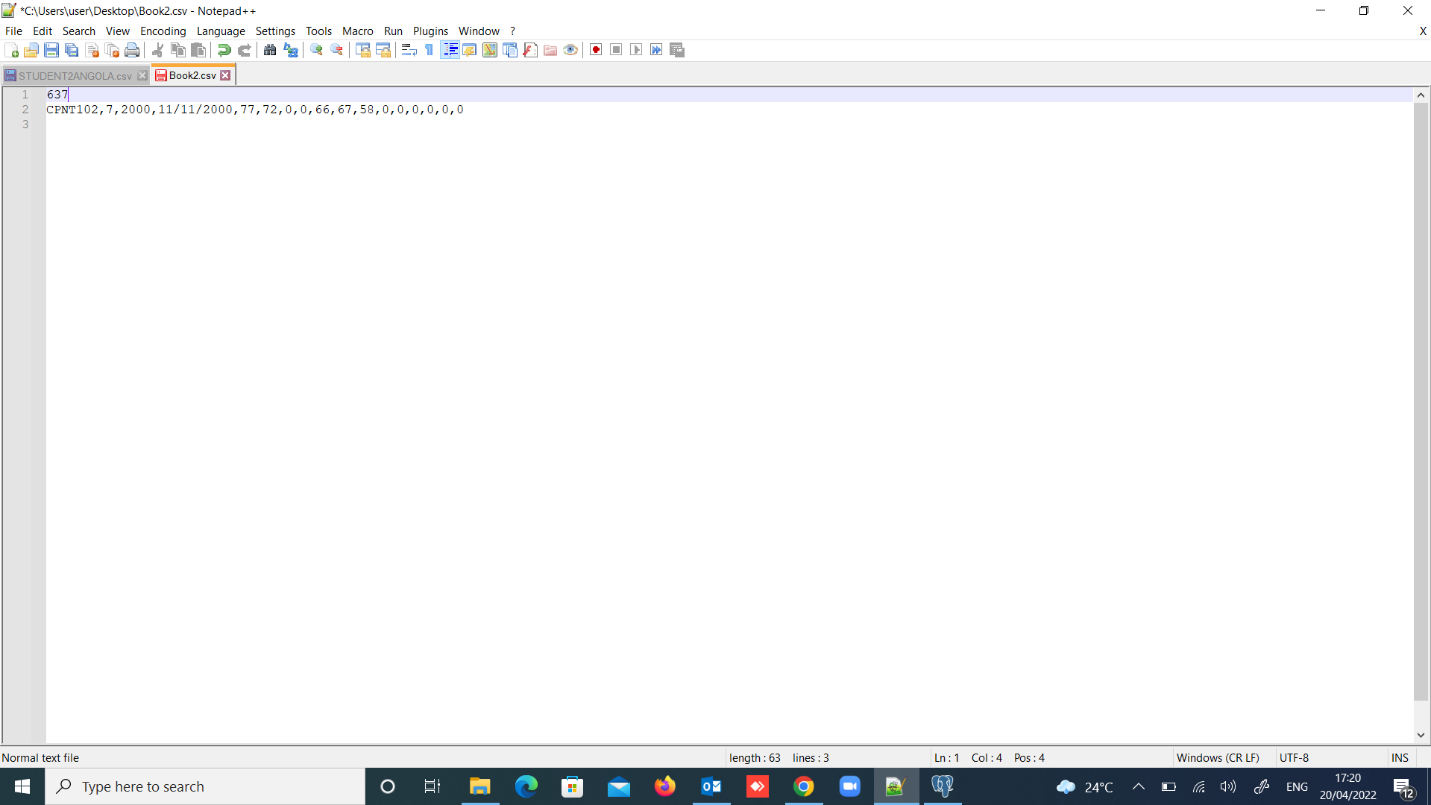
Preparing the Data File
- Save your data file as a CSV (Comma delimited) format.
- Edit the file using Notepad++ — remove all commas that indicate whitespace/empty fields.

Uploading Marks
- Login to the system as an Admin.
- Under the Students drop-down menu, click on Registration Number Upload.
- Check the Restore Performance checkbox.
- Click Choose File and select your CSV file.
- Click Upload.
- Go to System Settings → Subjects.
- Click New Subject and add all the required details.
- Click Create Subject.
- Go back to Students → Registration Number Upload.
- Check Restore Performance, select the file again, and upload.
Verifying and Adding Pending Marks
- Under Students, click on Student Details.
- Query the student by entering their registration number.
- Click View Assignments to add the pending marks.
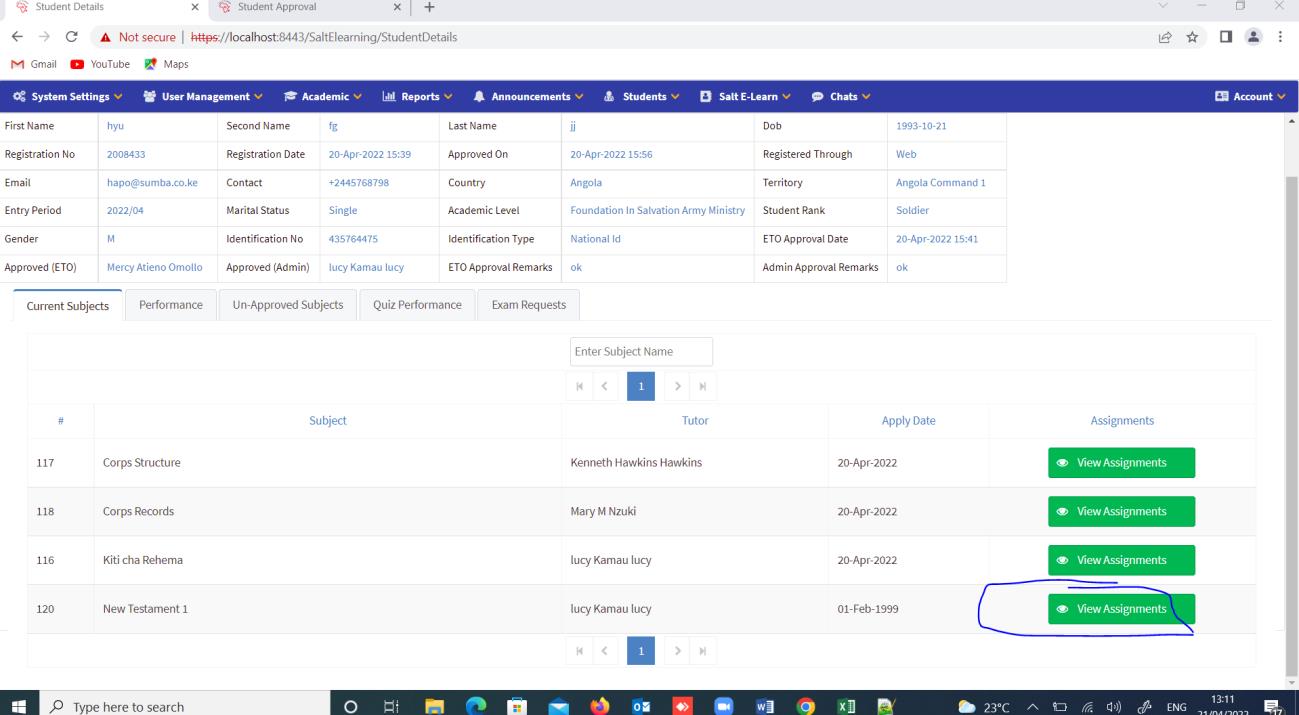
After filling in all the marks, click on the Performance tab to see the total marks for assignments, final exams, and the remarks.
System Reports
Examination Reports
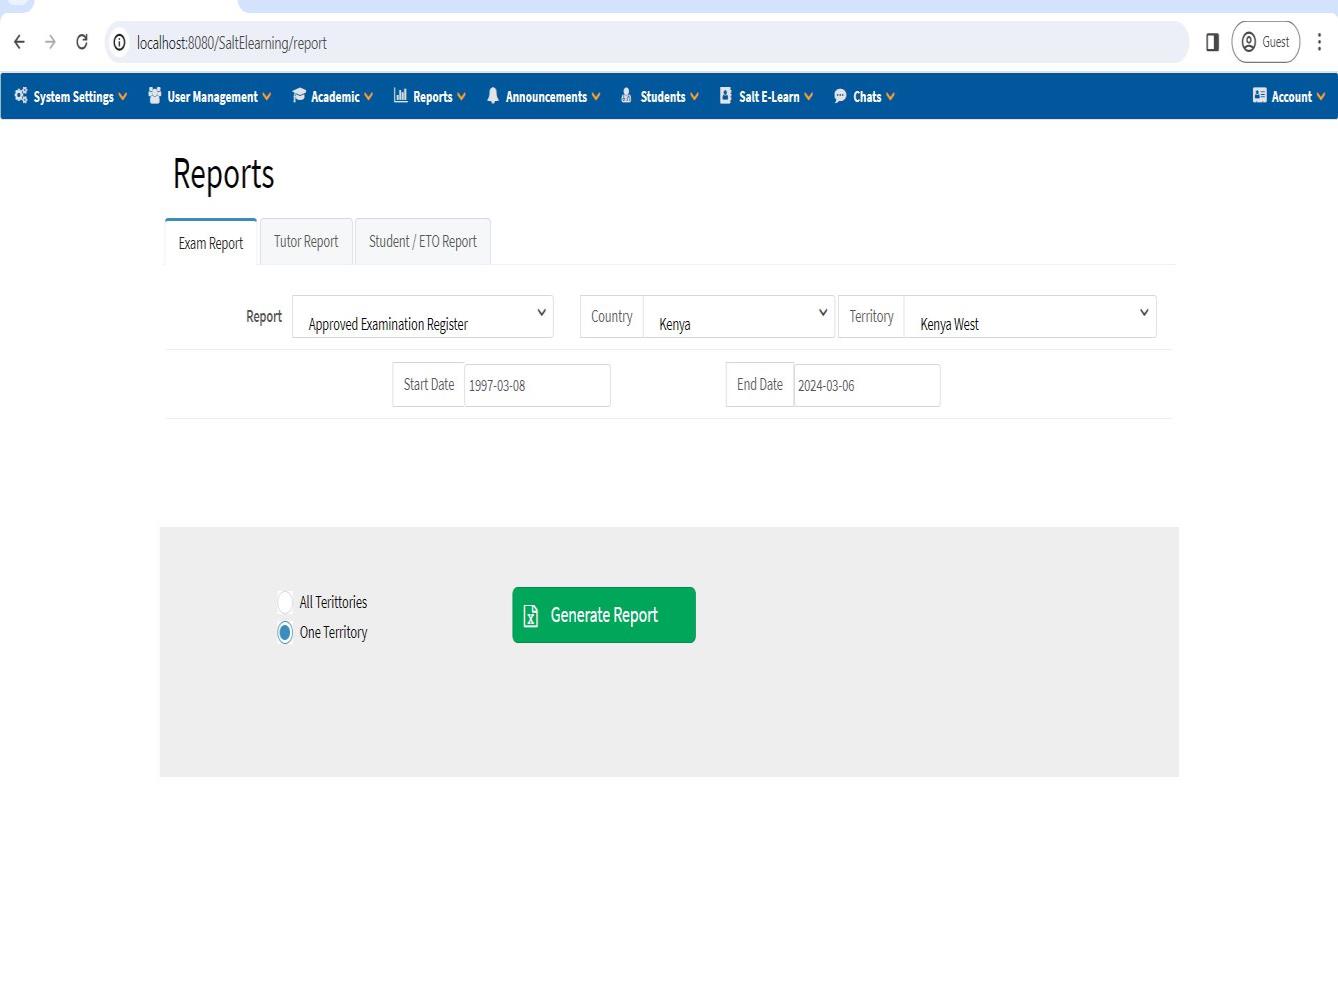
1. Approved Examination Register
- Navigate to Reports.
- Click on Exam Report tab.
- Select Approved Examination Register as your report type.
- Select Country.
- Select Territory.
- Select Start Date and End Date.
- Choose One Territory or All Territories.
- Click Generate Report.
- The system will generate a report which you can save on your PC as an Excel sheet.

2. Exam Register All
Generates a comprehensive exam register for all students across selected territories.
3. Final Course Update
Generates a final course update report with completed grades and results.
4. Progress Report
Generates a student progress report showing assignment and exam performance.
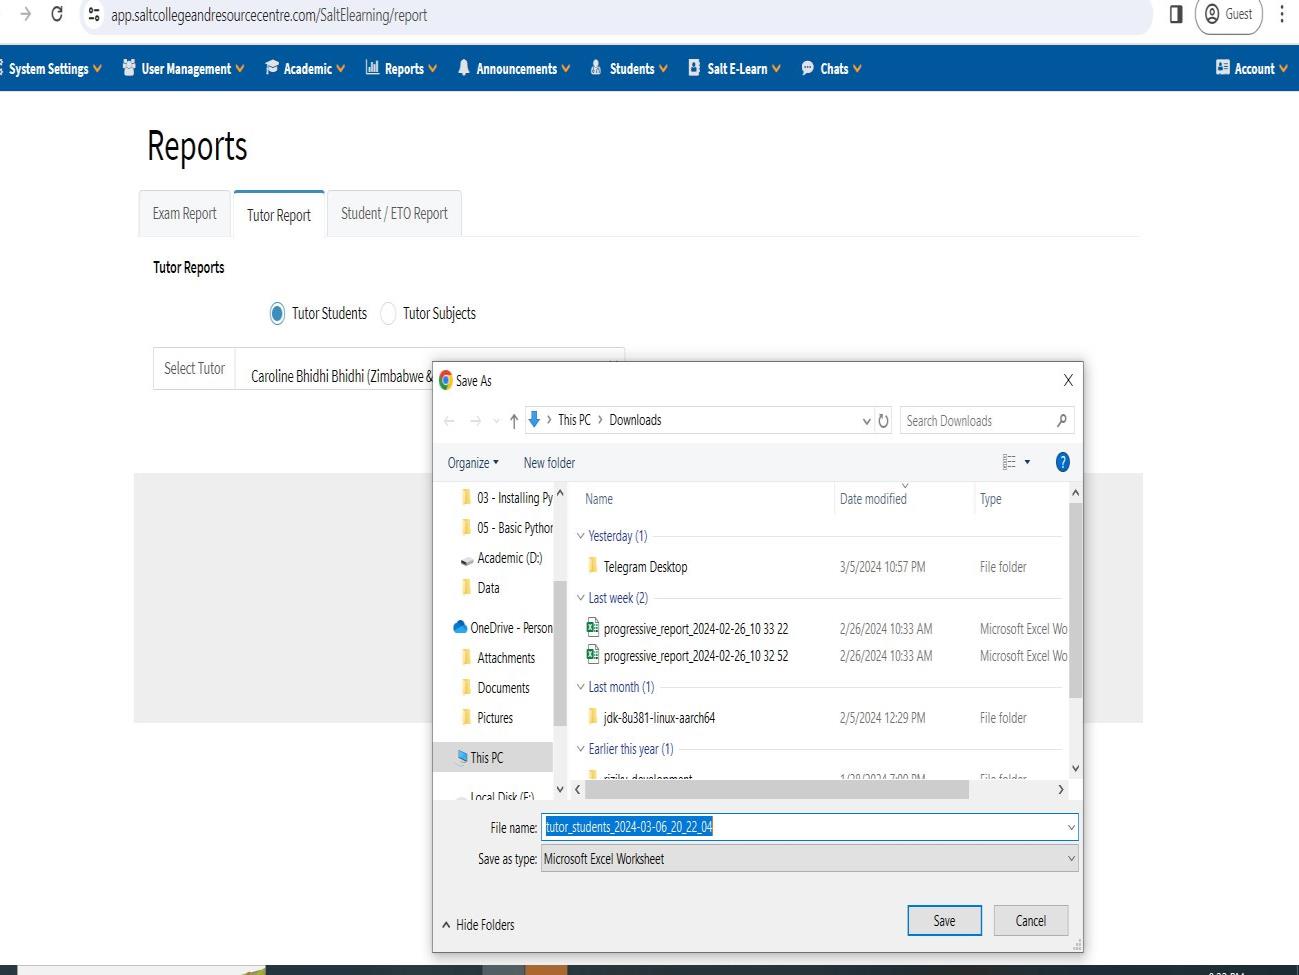
Tutor Reports
Navigate to Reports → Tutor Report tab. Select between:
| Report Type | Description |
|---|---|
| Tutor Students | View students assigned to a specific tutor |
| Tutor Subjects | View subjects assigned to a specific tutor |
Select the tutor and click the generate button. Reports can be saved as Excel worksheets.
Student / ETO Reports
Navigate to Reports → Student/ETO Report tab for student and ETO-specific reporting.
© 2021-2026 College E-Learning System — End-User Documentation v1.0
Prepared by Sumba Group Limited (Kenya) © 2021